
Welcome to my first battle report of the recent Birthday Bash tournament that I attended. Birthday Bash was organised by Dave over at Confessions of a 40k addict and run at Wargames over in Southport. I will do a full review of the tournament and store after my battle reports, but I'll just say that it was an awesome event held at a great store.
I arrived with my Deathwatch at Southport on the Friday night, ready for the carnage to come the next day. I did manage to get a decent sleep at the hotel (though I was awoken during the night by the couple next door who were really enjoying their stay!).

The tournament was a 1500 points, three game event that was going to be three maelstrom missions. All armies were using a Combined Arms Detachment, with Lords of War allowed. Armies were 'encouraged' to be a friendlier affair than a hardcore tournament list. The maelstrom missions would use a modified maelstrom deck- basically the deck cut in half and each card only worth one victory point. In addition, you could score a maximum of two cards per turn. This would prevent any player from running away with the game in most cases. Impossible cards could be discarded when drawn (impossible from that game point onwards).
My first game was against Jonathan from Dragon's Eye Miniatures, who was fielding his Necron Maynarkh Dynasty army. Jonathan has been chronicling his updates to the rules for the Imperial Armour Necrons, so has come up with a fun and thematic force for his Birthday Bash army. The first mission was Cleanse and Control, where you get up to three maelstrom cards per turn. We would also be using Vanguard deployment.
My first game was against Jonathan from Dragon's Eye Miniatures, who was fielding his Necron Maynarkh Dynasty army. Jonathan has been chronicling his updates to the rules for the Imperial Armour Necrons, so has come up with a fun and thematic force for his Birthday Bash army. The first mission was Cleanse and Control, where you get up to three maelstrom cards per turn. We would also be using Vanguard deployment.
My army consisted of:
Watch Captain Artemis (with V3)
5 Veterans- 3 Frag Cannons, Storm Shield (V1)
Drop Pod (DP1)
5 Veterans- Meltagun, 2 Combi-meltas, Auspex (V2)
Drop Pod (DP2)
5 Veterans- 5 Deathwatch Shotguns, Storm Shield (V3)
Drop Pod (DP3)
5 Veterans- 5 Stalker Pattern Bolters (V4)
5 Veterans- 5 Stalker Pattern Bolters (V4)
4 Bikers- Power Weapons, Meltabombs (B1)
4 Bikers- Power Weapons, Meltabombs (B2)
4 Vanguard Veterans- 2 Heavy Thunder Hammers, 2 Pairs of Lightning Claws (VV)
Corvus Blackstar- Inferno Halo Launcher (CB)
Artemis was my warlord and his warlord trait would grant me one extra change to my Mission Tactics (so two in total). I decided to change his unit for this game. Normally he goes with the Vanguard Veterans in the Corvus, but this time, I put him with the Shotgun Marines in the Drop Pod. I figured his poisoned combi-flamer would be of more use with their shotguns and he would add some combat punch to the unit for when they are inevitably assaulted.

Jonathan's army consisted of:
Kutlakh the World Killer (with L)
Canoptek Tomb Stalker (TS)
5 Charnal Lychguard with flensing scarabs (L)
5 Maynarkh Immortals with flensing scarabs (I)
10 Maynarkh Warriors (NW1)
10 Maynarkh Warriors (NW2)
2 Heavy Destroyers (ND)
1 Doom Scythe (DS)
1 Doomsday Ark (DA)
His warlord was Kutlakh, who got Crusader as his warlord trait. Necrons are a tough army to face, but at least this wasn't a Decurion. Fortunately, the Deathwatch have a lot of tools to deal with them, as the special issue ammunition gives me widespread access to AP4 and AP3 shells. I also outnumbered his objective secured units by over 3 to 1, which should hopefully help in the maelstrom mission.
We set up the objectives as shown below:

Jonathan won the roll for deployment zone and chose the side with a good level of cover (though most of the board had a good level of ruins). I won the roll for deployment and chose to go first.
I set up the Stalker Marine Veteran squad on the objective at the back, as their Stalker Bolters gave them increased range, so hopefully they could still get to shoot. One unit of Bikers went on the right flank, shielded by some ruins in case I was seized on, but still in range of the objectives. The other Bikers went on the left flank. With both Biker units deployed on opposite flanks, I was in turbo-boost range of every objective except number 3. This would give me better odds of scoring them quickly if I drew them on turn 1.
In reply, Jonathan deployed his army is a gunline to face off against me. The Destroyers and a unit of Warriors went on his left flank, next to the objective. Kutlakh joined the Lynchguard beside them, with the second Warrior squad and Immortals to the right. The Doomsday Ark went in the crater to the right flank.


Jonathan failed to seize the initiative and I took the first turn.
TURN 1- DEATHWATCH
In turn 1, I drew Objective 1, Objective 5 and Scour the Skies (kill an enemy flyer). I also enacted the Troops Mission Tactics.

The two Drop Pods carrying the Deathwatch crashed to the ground. One landed besides the Necron Warriors on the right flank, the Frag Cannon squad disembarking. The other aimed for the Doomsday Ark, but scattered off target and landed out of Melta range.


The Frag Cannon Veteran Squad targeted the Maynarkh Warriors in front of them, obliterating them with their shots (I scored 42 hits and 36 wounds with the three Frag Cannon shots). The second Veterans squad from the Drop Pod targeted the Immortals with their AP3 shells. Three of the Necron Immortals fell to the Bolter fire, another being dispatched by the Meltagun. The Bikers on the left flank added their firepower, killing the last member of the squad.
Two of the Veterans with the Stalker Bolters fired at the second Necron Warrior squad, but failed to cause any damage.

At the end of my turn, I scored First Blood, Objective 1 and Objective 5. I discarded Scour the Skies. Even though Jonathan did have a flyer, I did not want to have to potentially wait 3 or 4 turns to kill it.
TURN 1- NECRONS
In his first turn, Jonathan drew Objective 4, Big Game Hunter (destroy a vehicle) and Assassinate (kill a character).

Kutlakh led the Lynchguard towards the Frag Cannon squad after seeing the devastation the Deathwatch could cause. The Necron Warriors advanced on the Meltagun Deathwatch Veterans in the centre. Unfortunately, both the reserves failed to arrive.


The Doomsday Ark opened fire on the Drop Pod in the centre, penetrating it and destroying its Storm Bolter (Jonathan was unlucky as he only needed a 4+ to destroy it). The Destroyers fired at the other Drop Pod, but only managed to glance the enemy vehicle.
The Warriors opened fire on the Deathwatch in front of them, wounding them twice, but failing to get past their armour. The Overlord fired his staff of light at the Deathwatch in front of him, killing two of the squad.
The Lynchguard assaulted the Frag Cannon Veterans. The Frag Cannons wounded three times in overwatch, but could not get past the armour of the Necrons. In addition, one of the Deathwatch killed himself with the AP3 Gets Hot shells. The Lynchguard struck at the Deathwatch, easily wiping them out and consolidating towards the Bikers.

At the end of his turn, Jonathan scored no points.
VICTORY POINTS:
Deathwatch- 3
Necrons- 0
TURN 2- DEATHWATCH
This turn, I drew No Prisoners (destroy an enemy unit), Hungry for Glory (issue a challenge) and Ascendancy (control three objectives).

On the right flank, the Bikers advanced on the Destroyers. On the left flank, the other Bikers advanced on the Necron Warriors in the shadow of the Corvus Blackstar that had arrived from reserve. The nearby Deathwatch Veterans moved into the cover of the ruins to protect themselves from the nearby Doomsday Ark.


The Stalker Boltgun Veterans fired at the Necron Warriors, killing three of the squad. The Deathwatch in the ruins accounted for another 4 of the Necrons. The Bikers added their firepower, killing two more, while the nearby Drop Pod killed the last survivor with its Storm Bolter.
The Corvus Blackstar fired at the Doomsday Ark, glancing once with its Assault Cannon. The flyer fired three of its missiles at the enemy skimmer, but the rockets failed to cause any damage.
On the right flank, the Bikers fired their AP3 shells at the Destroyers, killing one of the squad. They attempted to assault the survivor, but failed their charge.
At the end of my turn, I scored Ascendancy and No Prisoners. I discarded Hungry for Glory.
TURN 2- NECRONS
This turn, Jonathan had Objective 4, Big Game Hunter (destroy a vehicle) and Assassinate (kill a character).

Both the Doom Scythe and Tomb Stalker failed to arrive once more. The Lynchguard advanced on the Bikers on the Necron left flank, while the Destroyer moved towards the centre of the battlefield.


The Doomsday Ark fired at the Drop Pod, this time succeeding in wrecking the enemy transport vehicle. The Destroyer fired at the Bikers, killing one of the squad.
The Lynchguard assaulted the Bikers, one of their number falling to the overwatch fire. The Lynchguard once again easily dispatched the Deathwatch Veterans and consolidated towards the rest of the army.
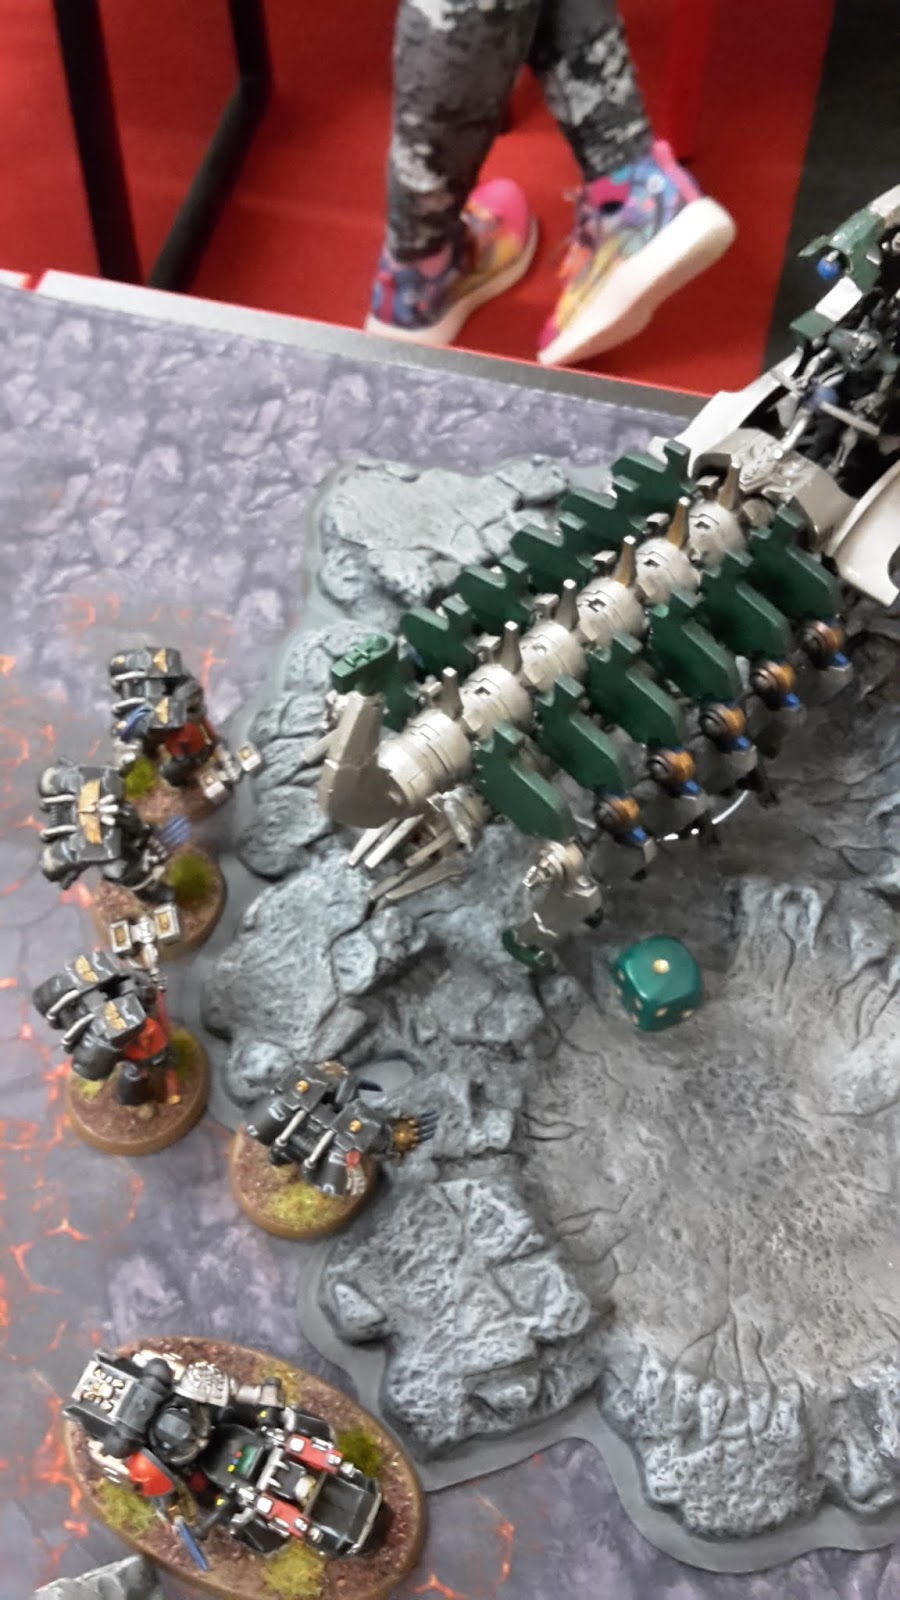
 |
| I'd just told Jonathan about Frag Cannons...... |
We set up the objectives as shown below:

Jonathan won the roll for deployment zone and chose the side with a good level of cover (though most of the board had a good level of ruins). I won the roll for deployment and chose to go first.
I set up the Stalker Marine Veteran squad on the objective at the back, as their Stalker Bolters gave them increased range, so hopefully they could still get to shoot. One unit of Bikers went on the right flank, shielded by some ruins in case I was seized on, but still in range of the objectives. The other Bikers went on the left flank. With both Biker units deployed on opposite flanks, I was in turbo-boost range of every objective except number 3. This would give me better odds of scoring them quickly if I drew them on turn 1.
In reply, Jonathan deployed his army is a gunline to face off against me. The Destroyers and a unit of Warriors went on his left flank, next to the objective. Kutlakh joined the Lynchguard beside them, with the second Warrior squad and Immortals to the right. The Doomsday Ark went in the crater to the right flank.


Jonathan failed to seize the initiative and I took the first turn.
TURN 1- DEATHWATCH
In turn 1, I drew Objective 1, Objective 5 and Scour the Skies (kill an enemy flyer). I also enacted the Troops Mission Tactics.

The two Drop Pods carrying the Deathwatch crashed to the ground. One landed besides the Necron Warriors on the right flank, the Frag Cannon squad disembarking. The other aimed for the Doomsday Ark, but scattered off target and landed out of Melta range.


The Frag Cannon Veteran Squad targeted the Maynarkh Warriors in front of them, obliterating them with their shots (I scored 42 hits and 36 wounds with the three Frag Cannon shots). The second Veterans squad from the Drop Pod targeted the Immortals with their AP3 shells. Three of the Necron Immortals fell to the Bolter fire, another being dispatched by the Meltagun. The Bikers on the left flank added their firepower, killing the last member of the squad.
Two of the Veterans with the Stalker Bolters fired at the second Necron Warrior squad, but failed to cause any damage.

At the end of my turn, I scored First Blood, Objective 1 and Objective 5. I discarded Scour the Skies. Even though Jonathan did have a flyer, I did not want to have to potentially wait 3 or 4 turns to kill it.
TURN 1- NECRONS
In his first turn, Jonathan drew Objective 4, Big Game Hunter (destroy a vehicle) and Assassinate (kill a character).

Kutlakh led the Lynchguard towards the Frag Cannon squad after seeing the devastation the Deathwatch could cause. The Necron Warriors advanced on the Meltagun Deathwatch Veterans in the centre. Unfortunately, both the reserves failed to arrive.


The Doomsday Ark opened fire on the Drop Pod in the centre, penetrating it and destroying its Storm Bolter (Jonathan was unlucky as he only needed a 4+ to destroy it). The Destroyers fired at the other Drop Pod, but only managed to glance the enemy vehicle.
The Warriors opened fire on the Deathwatch in front of them, wounding them twice, but failing to get past their armour. The Overlord fired his staff of light at the Deathwatch in front of him, killing two of the squad.
The Lynchguard assaulted the Frag Cannon Veterans. The Frag Cannons wounded three times in overwatch, but could not get past the armour of the Necrons. In addition, one of the Deathwatch killed himself with the AP3 Gets Hot shells. The Lynchguard struck at the Deathwatch, easily wiping them out and consolidating towards the Bikers.

At the end of his turn, Jonathan scored no points.
VICTORY POINTS:
Deathwatch- 3
Necrons- 0
TURN 2- DEATHWATCH
This turn, I drew No Prisoners (destroy an enemy unit), Hungry for Glory (issue a challenge) and Ascendancy (control three objectives).

On the right flank, the Bikers advanced on the Destroyers. On the left flank, the other Bikers advanced on the Necron Warriors in the shadow of the Corvus Blackstar that had arrived from reserve. The nearby Deathwatch Veterans moved into the cover of the ruins to protect themselves from the nearby Doomsday Ark.


The Stalker Boltgun Veterans fired at the Necron Warriors, killing three of the squad. The Deathwatch in the ruins accounted for another 4 of the Necrons. The Bikers added their firepower, killing two more, while the nearby Drop Pod killed the last survivor with its Storm Bolter.
The Corvus Blackstar fired at the Doomsday Ark, glancing once with its Assault Cannon. The flyer fired three of its missiles at the enemy skimmer, but the rockets failed to cause any damage.
On the right flank, the Bikers fired their AP3 shells at the Destroyers, killing one of the squad. They attempted to assault the survivor, but failed their charge.
At the end of my turn, I scored Ascendancy and No Prisoners. I discarded Hungry for Glory.
TURN 2- NECRONS
This turn, Jonathan had Objective 4, Big Game Hunter (destroy a vehicle) and Assassinate (kill a character).

Both the Doom Scythe and Tomb Stalker failed to arrive once more. The Lynchguard advanced on the Bikers on the Necron left flank, while the Destroyer moved towards the centre of the battlefield.


The Doomsday Ark fired at the Drop Pod, this time succeeding in wrecking the enemy transport vehicle. The Destroyer fired at the Bikers, killing one of the squad.
The Lynchguard assaulted the Bikers, one of their number falling to the overwatch fire. The Lynchguard once again easily dispatched the Deathwatch Veterans and consolidated towards the rest of the army.


At the end of his turn, Jonathan scored Big Game Hunter.
VICTORY POINTS:
Deathwatch- 5
Necrons- 1
TURN 3- DEATHWATCH
This turn, I drew Big Game Hunter (kill an enemy vehicle), Blood and Guts (kill a unit in assault) and Objective 6. I switched my Mission Tactics to Heavy Support.

The Vanguard Veterans disembarked from the Corvus Blackstar and moved to engage the Doomsday Ark. The Bikers moved up on the Destroyer, while the nearby Veterans in the ruins moved to grab the central objective.


The Bikers fired at the Destroyer, killing him with their AP3 shells.
The Vanguard Assaulted the Doomsday Ark, easily blowing it up with their Heavy Thunder Hammers and surviving the resulting explosion.


At the end of my turn, I scored Big Game Hunter and Blood and Guts.
TURN 3- NECRONS
This turn, Jonathan drew No Prisoners (kill an enemy unit) to go with Objective 4 and Assassinate.

The Necron reserves finally arrived, the Tomb Stalker outflanking besides objective 4 and the Stalker Veterans, the Doom Scythe moving on in front of the Corvus Blackstar. The Lynchguard advanced on the enemy Drop Pod currently holding the objective.


The Doom Scythe opened fire on the Bikers, wounding them 5 times with its main weapons, but the Jinking Deathwatch suffered no harm. The Tomb Stalker fired at the Deathwatch in front of it, killing one of the squad.
In the assault phase, the Lynchguard assaulted the Drop Pod, blowing it up.

At the end of his turn, Jonathan scored No Prisoners.
VICTORY POINTS:
Deathwatch- 7
Necrons- 2
At the end of the third turn, things were not looking good for the Necrons. I was far ahead on points and there was not much of the army left.
TURN 4- DEATHWATCH
This turn, I drew Objective 2, Objective 3 and Objective 6. I changed to the Elites Mission Tactics.

The last Drop Pod arrived, scattering off course of Objective 3, but Artemis was able to lead his squad to capture it. The Corvus Blackstar moved up on the Doom Scythes, while the Vanguard Veterans moved towards the Lynchguard. The last Bikers squad moved away to help secure the objectives, while the Meltagun Veterans moved to secure the central objective.


The Corvus Blackstar opened fire on the Doom Scythe, glancing the enemy flyer twice despite its jinking.
Artemis directed his squad to fire on the Lynchguard. Their shotgun shells managed to bring down one of the elite Necrons. The Bikers added their firepower, killing another. The Meltagun Veterans fired at the unit, but were unable to get past their armour.
In the Deathwatch deployment zone, the Veterans turned their Stalker Boltguns on the Tomb Stalker, wounding it once (unfortunately, it was immune to the poisoned shells that would still need a 6 to wound).
At the end of my turn, I scored Objective 3 and Objective 6.
TURN 4- NECRONS
This turn, Jonathan drew Ascendency (hold 3 objectives) and had Assassinate and Objective 4.

Kutlakh led the remaining Lynchguard up towards Artemis and his squad. The Tomb Stalker advanced on the Deathwatch holding objective 4, while the Doom Scythe advanced out of the firing arc of the Corvus.


In the shooting phase, Kutlakh fired his Staff of Light at the Veterans, killing one.
The Tomb Stalker assaulted the Deathwatch. The Veterans were able to wound the Stalker three times with their overwatch fire, but the armour of the construct held. The Stalker struck at the Veterans, killing two of the squad for no damage in return. The Deathwatch Veterans fled from the combat, stopping at the edge of the battlefield.


The Lynchguard assaulted Artemis and the Veterans. Kutlakh issued a challenge that Artemis accepted. Kutlakh activated his Splinter of Madness and Artemis had his WS reduced to 1. Artemis struck at the Necron Overlord, but failed to do any damage. Kutlakh then struck at Artemis, wounding him once with his Instant Death attacks. Fortunately, Artemis' Iron Halo blocked the attack (Jonathan was really unlucky, hitting with only one of his 5 attacks).


The Deathwatch Veterans struck at the Lynchguard, killing one of them, before 2 of the Veterans were cut down.
At the end of his turn, Jonathan scored Objective 4 and discarded Ascendency.
VICTORY POINTS:
Deathwatch- 9
Necrons- 3
TURN 5- DEATHWATCH
This turn, I drew Overwhelming Firepower (kill an enemy unit in shooting phase), Supremacy (hold at least 2 objectives and twice as many as your opponent) and had Objective 2.

The Corvus Blackstar turned in its arc to take another pass at the Doom Scythe, whilst the Vanguard Veterans moved to help out their Captain.


The Bikers moved to secure the objective in the ruins.
In the shooting phase, the Bikers and Stalker Marines fired at the Tomb Stalker, but failed to do any damage. The central Veterans targeted the Doom Scythe with their Meltaguns, but failed to hit the enemy flyer.
The Vanguard Veterans assaulted the Lynchguard. The Lightning Claws of the Veterans took down the last of the Lynchguard. Artemis decided to risk his Stasis Grenade on the Necron Warlord. His attack missed and he took the damage, but fortunately his Iron Halo saved him from harm.

Kutlakh struck at Artemis, wounding him twice with his weapon. Fortuntely, I passed my Invulnerable saves once more and Artemis was fine. The Vanguard struck at Kutlakh with their Heavy Thunder Hammers and killed him.


At the end of my turn, I scored Supremacy and Objective 2, as well as Slay the Warlord.
TURN 5- NECRONS
This turn, Jonathan drew Scour the Skies (kill an enemy flyer), Blood and Guts (kill a unit in assault) and Assassinate.

The Doom Scythe turned towards the Corvus Blackstar, as the Tomb Stalker advanced to finish off the Deathwatch Veterans.


The Doom Scythe fired at the Deathwatch Flyer, glancing once and penetrating once, but the jinking flyer blocked the damage.
The Tomb Stalker assaulted the Deathwatch Veterans, taking a wound from their overwatch fire. The Necron creature cut down the last two Veterans.
At the end of his turn, Jonathan scored Blood and Guts.
We rolled to see if the game would end and it did on turn 5.
VICTORY POINTS:
Deathwatch- 13 (inc. First Blood, Slay the Warlord and Linebreaker)
Necrons- 5 (inc. Linebreaker)
A win for the Deathwatch
AFTER-BATTLE THOUGHTS
Thanks to Jonathan for a great game, I'm just sorry it was not a bit closer in the end. It was great to finally meet him in the flesh and he was a great sport throughout the game, especially when the luck and cards were not on his side.
Overall, my plan went really well. I was able to focus on scoring maximum objectives each turn as well as using my firepower to take out the Necron threats. With massed AP3 and AP4 firepower available in my army, Jonathan only had his reanimation rolls to save him from harm. These were successful some of the time, but they would fall to Bolter fire eventually.
The Lynchguard were brutal, eliminating just about anything they came into contact with in combat. As I said above, luck was just not on his side in this game. By all accounts, Kutlakh should have killed Artemis with his instant death attacks, but I made all 4 invulnerable saves I needed. It wouldn't have made a difference in the outcome of the game, but would have netted him another two victory points at least.
I think there were a few of things during the game that Jonathan could have done to improve his chances.
Maelstrom Cards- I think that Jonathan held onto his cards for too long to try and score them. Generally, if I don't think I will definitely score a card in the next turn, I will discard it and hope for a better one when I next draw. This allows you to cycle through the cards quickly and try and score maximum points. That is why I discarded Scour the Skies in turn 1, rather than have to wait several turns for payoff.
I know that Jonathan was planning on outflanking the Tomb Stalker to grab objective 4, but some really unfortunate reserves rolls meant that he had to wait till turn 4 to score it after drawing it on turn 1. Had he got rid of it, he may have drawn another objective that was easier to score. In addition, it might have been advisable to assault both the Drop Pod and Frag Cannon Veterans on turn 1. Odds are he would have taken out both units and scored Big Game Hunter too.
Reserves- I would have deployed the Tomb Stalker from the beginning. With my Drop Pod heavy army, odds are I would be deploying agressively. The Stalker could have been another potent combat unit in his deployment zone, taking out 2 threats a turn instead of one. As it was, coming in on turn 3 and not charging till turn 4 meant all it achieved during the game was killing a single 135 point unit.
Deployment- Deploying much of the army in the open was a problem for the army too. There was not much he could have done about the Frag Cannons, but having the Immortals and Warriors some cover could potentially have saved some of them in the first turn. As it was, my special issue ammunition could negate their armour easily, forcing him to rely on the 5+ reanimation roll. In addition, having the Doomsday Ark in cover or out of line of sight might have helped it too.
I also might have been inclined to use the Destroyers as objective grabbers rather than shooting. Their mobility would be great for grabbing maelstrom objectives, with their jetpack moves allowing them to get into good positions.
Overall, it was a fun game against a great opponent, and a great start to the day for my Deathwatch army.
VICTORY POINTS:
Deathwatch- 5
Necrons- 1
TURN 3- DEATHWATCH
This turn, I drew Big Game Hunter (kill an enemy vehicle), Blood and Guts (kill a unit in assault) and Objective 6. I switched my Mission Tactics to Heavy Support.

The Vanguard Veterans disembarked from the Corvus Blackstar and moved to engage the Doomsday Ark. The Bikers moved up on the Destroyer, while the nearby Veterans in the ruins moved to grab the central objective.


The Bikers fired at the Destroyer, killing him with their AP3 shells.
The Vanguard Assaulted the Doomsday Ark, easily blowing it up with their Heavy Thunder Hammers and surviving the resulting explosion.

At the end of my turn, I scored Big Game Hunter and Blood and Guts.
TURN 3- NECRONS
This turn, Jonathan drew No Prisoners (kill an enemy unit) to go with Objective 4 and Assassinate.

The Necron reserves finally arrived, the Tomb Stalker outflanking besides objective 4 and the Stalker Veterans, the Doom Scythe moving on in front of the Corvus Blackstar. The Lynchguard advanced on the enemy Drop Pod currently holding the objective.


The Doom Scythe opened fire on the Bikers, wounding them 5 times with its main weapons, but the Jinking Deathwatch suffered no harm. The Tomb Stalker fired at the Deathwatch in front of it, killing one of the squad.
In the assault phase, the Lynchguard assaulted the Drop Pod, blowing it up.

At the end of his turn, Jonathan scored No Prisoners.
VICTORY POINTS:
Deathwatch- 7
Necrons- 2
At the end of the third turn, things were not looking good for the Necrons. I was far ahead on points and there was not much of the army left.
TURN 4- DEATHWATCH
This turn, I drew Objective 2, Objective 3 and Objective 6. I changed to the Elites Mission Tactics.

The last Drop Pod arrived, scattering off course of Objective 3, but Artemis was able to lead his squad to capture it. The Corvus Blackstar moved up on the Doom Scythes, while the Vanguard Veterans moved towards the Lynchguard. The last Bikers squad moved away to help secure the objectives, while the Meltagun Veterans moved to secure the central objective.


The Corvus Blackstar opened fire on the Doom Scythe, glancing the enemy flyer twice despite its jinking.
Artemis directed his squad to fire on the Lynchguard. Their shotgun shells managed to bring down one of the elite Necrons. The Bikers added their firepower, killing another. The Meltagun Veterans fired at the unit, but were unable to get past their armour.
In the Deathwatch deployment zone, the Veterans turned their Stalker Boltguns on the Tomb Stalker, wounding it once (unfortunately, it was immune to the poisoned shells that would still need a 6 to wound).
At the end of my turn, I scored Objective 3 and Objective 6.
TURN 4- NECRONS
This turn, Jonathan drew Ascendency (hold 3 objectives) and had Assassinate and Objective 4.

Kutlakh led the remaining Lynchguard up towards Artemis and his squad. The Tomb Stalker advanced on the Deathwatch holding objective 4, while the Doom Scythe advanced out of the firing arc of the Corvus.


In the shooting phase, Kutlakh fired his Staff of Light at the Veterans, killing one.
The Tomb Stalker assaulted the Deathwatch. The Veterans were able to wound the Stalker three times with their overwatch fire, but the armour of the construct held. The Stalker struck at the Veterans, killing two of the squad for no damage in return. The Deathwatch Veterans fled from the combat, stopping at the edge of the battlefield.


The Lynchguard assaulted Artemis and the Veterans. Kutlakh issued a challenge that Artemis accepted. Kutlakh activated his Splinter of Madness and Artemis had his WS reduced to 1. Artemis struck at the Necron Overlord, but failed to do any damage. Kutlakh then struck at Artemis, wounding him once with his Instant Death attacks. Fortunately, Artemis' Iron Halo blocked the attack (Jonathan was really unlucky, hitting with only one of his 5 attacks).


The Deathwatch Veterans struck at the Lynchguard, killing one of them, before 2 of the Veterans were cut down.
At the end of his turn, Jonathan scored Objective 4 and discarded Ascendency.
VICTORY POINTS:
Deathwatch- 9
Necrons- 3
TURN 5- DEATHWATCH
This turn, I drew Overwhelming Firepower (kill an enemy unit in shooting phase), Supremacy (hold at least 2 objectives and twice as many as your opponent) and had Objective 2.

The Corvus Blackstar turned in its arc to take another pass at the Doom Scythe, whilst the Vanguard Veterans moved to help out their Captain.


The Bikers moved to secure the objective in the ruins.
In the shooting phase, the Bikers and Stalker Marines fired at the Tomb Stalker, but failed to do any damage. The central Veterans targeted the Doom Scythe with their Meltaguns, but failed to hit the enemy flyer.
The Vanguard Veterans assaulted the Lynchguard. The Lightning Claws of the Veterans took down the last of the Lynchguard. Artemis decided to risk his Stasis Grenade on the Necron Warlord. His attack missed and he took the damage, but fortunately his Iron Halo saved him from harm.

Kutlakh struck at Artemis, wounding him twice with his weapon. Fortuntely, I passed my Invulnerable saves once more and Artemis was fine. The Vanguard struck at Kutlakh with their Heavy Thunder Hammers and killed him.


At the end of my turn, I scored Supremacy and Objective 2, as well as Slay the Warlord.
TURN 5- NECRONS
This turn, Jonathan drew Scour the Skies (kill an enemy flyer), Blood and Guts (kill a unit in assault) and Assassinate.

The Doom Scythe turned towards the Corvus Blackstar, as the Tomb Stalker advanced to finish off the Deathwatch Veterans.


The Doom Scythe fired at the Deathwatch Flyer, glancing once and penetrating once, but the jinking flyer blocked the damage.
The Tomb Stalker assaulted the Deathwatch Veterans, taking a wound from their overwatch fire. The Necron creature cut down the last two Veterans.
At the end of his turn, Jonathan scored Blood and Guts.
We rolled to see if the game would end and it did on turn 5.
VICTORY POINTS:
Deathwatch- 13 (inc. First Blood, Slay the Warlord and Linebreaker)
Necrons- 5 (inc. Linebreaker)
A win for the Deathwatch
 |
| End of the game. |
AFTER-BATTLE THOUGHTS
Thanks to Jonathan for a great game, I'm just sorry it was not a bit closer in the end. It was great to finally meet him in the flesh and he was a great sport throughout the game, especially when the luck and cards were not on his side.
Overall, my plan went really well. I was able to focus on scoring maximum objectives each turn as well as using my firepower to take out the Necron threats. With massed AP3 and AP4 firepower available in my army, Jonathan only had his reanimation rolls to save him from harm. These were successful some of the time, but they would fall to Bolter fire eventually.
The Lynchguard were brutal, eliminating just about anything they came into contact with in combat. As I said above, luck was just not on his side in this game. By all accounts, Kutlakh should have killed Artemis with his instant death attacks, but I made all 4 invulnerable saves I needed. It wouldn't have made a difference in the outcome of the game, but would have netted him another two victory points at least.
I think there were a few of things during the game that Jonathan could have done to improve his chances.
Maelstrom Cards- I think that Jonathan held onto his cards for too long to try and score them. Generally, if I don't think I will definitely score a card in the next turn, I will discard it and hope for a better one when I next draw. This allows you to cycle through the cards quickly and try and score maximum points. That is why I discarded Scour the Skies in turn 1, rather than have to wait several turns for payoff.
I know that Jonathan was planning on outflanking the Tomb Stalker to grab objective 4, but some really unfortunate reserves rolls meant that he had to wait till turn 4 to score it after drawing it on turn 1. Had he got rid of it, he may have drawn another objective that was easier to score. In addition, it might have been advisable to assault both the Drop Pod and Frag Cannon Veterans on turn 1. Odds are he would have taken out both units and scored Big Game Hunter too.
Reserves- I would have deployed the Tomb Stalker from the beginning. With my Drop Pod heavy army, odds are I would be deploying agressively. The Stalker could have been another potent combat unit in his deployment zone, taking out 2 threats a turn instead of one. As it was, coming in on turn 3 and not charging till turn 4 meant all it achieved during the game was killing a single 135 point unit.
Deployment- Deploying much of the army in the open was a problem for the army too. There was not much he could have done about the Frag Cannons, but having the Immortals and Warriors some cover could potentially have saved some of them in the first turn. As it was, my special issue ammunition could negate their armour easily, forcing him to rely on the 5+ reanimation roll. In addition, having the Doomsday Ark in cover or out of line of sight might have helped it too.
I also might have been inclined to use the Destroyers as objective grabbers rather than shooting. Their mobility would be great for grabbing maelstrom objectives, with their jetpack moves allowing them to get into good positions.
Overall, it was a fun game against a great opponent, and a great start to the day for my Deathwatch army.
Another good report - one question though, do deathwatch squads not have sergeants? Jonathan seems to have not scored assassinate despite killing off some squads, which would normally have included sergeants in them (assuming they're the same as marine squads).
ReplyDeleteLots of interesting points to learn here too - keeping stuff in reserve can be powerful but it also comes at a cost as you have shown. My guess would be that the frag cannon squad was offputting, but sometimes you're going to get hit and you just have to suck it up and prepare your counterpunch as best you can.
Interestingly, the Deathwatch Veteran squad does not need to take a Sergeant if they do not want to. You can choose to upgrade one Veteran to a Sergeant, giving them access to certain wargear such as an Auspex or Xenophase Blade. This actually makes them quite useful in not giving up victory points for things such as Assassinate or forced challenges.
DeleteYeah, Marines definitely have it better with Drop Pods. Having a known number of units guaranteed to arrive on turn 1 is a great boost to the army. Having the Tomb Stalker on the board may have forced me to go after it instead, leaving the Necron Warriors alive to fire and contest objectives.
I can't decide if it's better to take a Sergeant or not. On the one hand you are right to deny your opponent easy victory points. On the other hand you can't take an Auspex without one. And in addition, in my opinion the point of matter, the option to have "look out Sir". I will give an example. My standard Frag Cannon unit is this:
DeleteSergeant with Auspex and Shield
Veteran
3 Veterans with Frag Cannons
I put the Sergeant up in front to catch shots with AP1/2/3. But I don't wont to do a lot of armour tests for example Boltgun fire. So I do my look out Sir for these, to put them on the Veteran. I could not figure out which is better for me. Use the Auspex and to have the option for look out Sir, or just show up with a Veteran with shield.
Regards
I used to arm the Sergeant with an Auspex and Storm Shield as you said, and use the Look Out, Sir. However, from the new FAQ, the Sergeant and Black Shield cannot take options available to Veterans, meaning you cannot equip them with a Storm Shield. As a result, I just switched to a standard Veteran with a Storm Shield.
DeleteThe only reason I take the Sergeant in my Melta squad is to access the Auspex. Handy for taking on Vehicles in cover or reducing Jink saves.
I don't see that with the FAQ. FAQ says: Can a Watch Sergeant or Blck Shield take items listed as being available to Veterans? A: No.
DeleteOkay, let us take a look at items for Verterans. "Up to 4 Vets a Heavy Weapon", "Any Veteran may replace for a heavythunder hammer".
Bullet point 3 says "Any model may replace either his boltg or ccw with a storm shield"
The difference for me is "being available to Veterans" and "any model".
A Watch Sergeant is not a Veteran, but a Model. In conclusion he is able to take a storm shield, but not allowed to take a heavy weapon or a heavy thunder hammer. What do you think about that? Cheers, Tim
Ah, you're right about that. I assumed that all of the options were for Veterans, but only some specified one. So, you could arm the Sergeant with an Auspex and Storm Shield!
DeleteGreat report, nice photos and narrative. Sounds like Jonathan had some rubbish dice rolls and RP let him down, shows the Decurion is needed sometimes.
ReplyDeleteYeah, the Decurion would have helped a lot with the durability of his army in this game.
DeleteNice battle report. I enjoyed reading it and the visualization is great, too!
ReplyDeleteThanks Tim!
DeleteNicely done!
ReplyDeleteI wasn't that impressed by the Tomb Stalker photos on FW's website, but it looks great here. Sounds like it's a pretty serious combat monster, too.
It's pretty tough to take down with its immunity to poisoned and sniper weapons. It's not too shabby in combat. He only killed a couple of Marines, but I think that was down to poor rolling at the time.
Delete