
This week's written battle report is 1850 pts of Ravenwing vs Allan's White Scars. Allan and I had clashed before in our White Scars vs White Scars battle report, a tough contest featuring lots of bikes and landspeeders. This time round, the two pre-eminent bike armies of the Space Marines would face one another to see who was the best. This game was Allan's first in the Medusa IV map-based campaign that I am running at Dundee Wargames Club, so Allan would be fighting hard to try and capture new territory.
My Ravenwing army was one that I am considering taking to Blog Wars X in November, so was keen to see how it would perform in action. The army consisted of:
RAVENWING STRIKE FORCE
Sammael- Corvex (S)
Librarian- Mastery Level 2, Space Marine Bike, Meltabombs, Conversion Field, Auspex (L)
5 Ravenwing Command Squad- Grenade Launcher, Champion, Apothecary, Ravenwing Standard (CS)
6 Black Knights- Grenade Launcher (BK)
5 Ravenwing Bikers- 2 Grav guns, sergeant with meltabombs (RB1)
5 Ravenwing Bikers- 2 Plasma guns, sergeant with meltabombs (RB2)
Dark Talon (DT)
RAVENWING ATTACK SQUADRON
5 Ravenwing Bikers- 2 Meltaguns, sergeant with meltabombs (RB3)
Ravenwing Landspeeder- Multimelta, Typhoon Missile launcher (RL)
RAVENWING SUPPORT SQUADRON
Darkshroud- Assault Cannon
3 Ravenwing Landspeeders- Heavy Bolters, Assault Cannons (RSS)
Sammael was my warlord and the Librarian got Mind War, Seeds of Fear and Maelstrom of Misery; a decent batch of powers, but not the best.
Allan's White Scars army was a special modified Battle Company that I had allowed for the campaign. Essentially, it allows the tactical squads in the Gladius strike force to be replaced with bike squads to better suit the White Scars theme. The army consisted of:
BATTLE COMPANY
Kor'sarro Khan- Moondrakkan (K)
Chaplain- Space Marine Bike (C)
4 Bikers and attack bike- 2 Grav guns, attack bike has heavy bolter (B1)
4 Bikers and attack bike- 2 Grav guns, attack bike has heavy bolter (B2)
4 Bikers and attack bike- 2 Grav guns, attack bike has heavy bolter (B3)
4 Bikers and attack bike- 2 Grav guns, attack bike has heavy bolter (B4)
4 Bikers and attack bike- 2 Grav guns, attack bike has heavy bolter (B5)
4 Bikers and attack bike- 2 Grav guns, attack bike has heavy bolter (B6)
Landspeeder- Two heavy bolters (L1)
Landspeeder- Two heavy bolters (L2)
Landspeeder- Two heavy bolters (L3)
5 Devastators- 4 Heavy bolters (D1)
Razorback- TL Heavy Bolter (R1)
5 Devastators- 4 Heavy bolters (D2)
Razorback- TL Heavy Bolter (R2)
SUPPRESSION FORCE
3 Whirlwinds (W)
2 Landspeeders- Two heavy bolters (L3 and L4)
That's a lot of bikers. I was outnumbered 34 to 52 and I knew from experience how good White Scars bikers can be. This would be a tough battle.
We rolled for mission and got Crusade with 4 objectives to be placed. The battlefield consisted of a large bunker network on one half of the board (plenty of line of sight blocking terrain) and a few ruins scattered around the board. I won the roll off for objective placing and we placed the four objectives as shown below.
 |
| Terrain and placement of objectives (Shields). |


I also won the roll for deployment zone and chose the diagonal with the bunker network. This would hopefully provide some good line of sight blocking in case I got seized on in the game.
I won the roll off for deployment and chose to go first, reasoning that I would need every turn of firepower to even the odds a little.
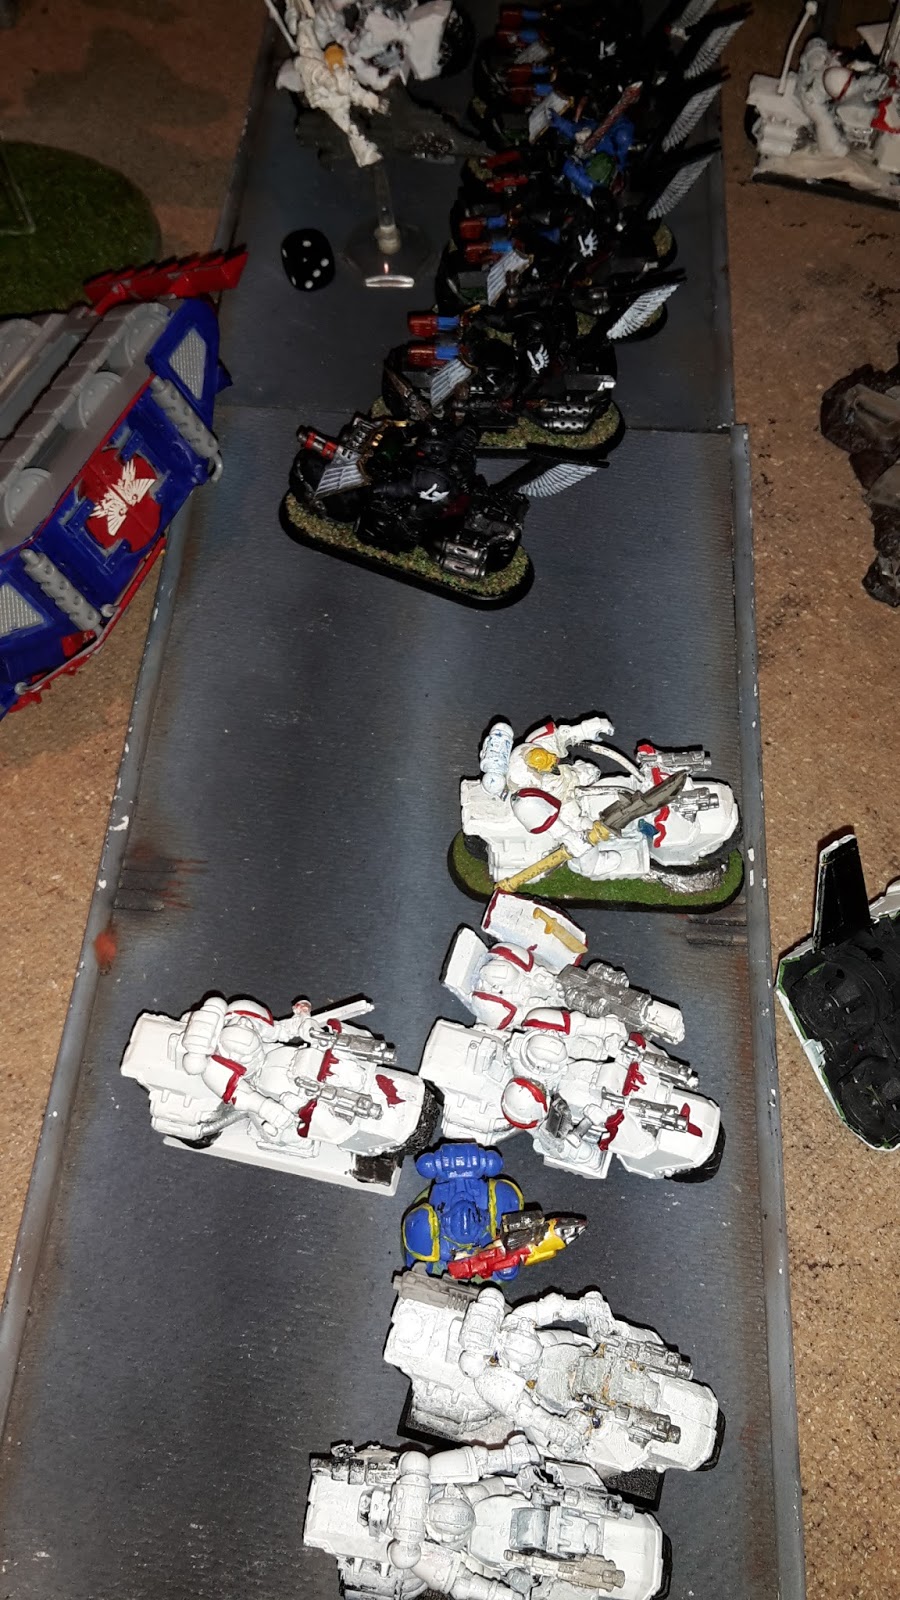
I spread the bikes across my deployment zone, ready to move off and engage the enemy threats. The command squad and black knights took up a central location, hopefully they could get off a charge in the first turn. The Support squadron went behind the trenches, ready to pop out and fire in the first turn.
Allan deployed his army opposite mine in an even fashion. The Whirlwinds went at the back of the board as expected, the rest of the army set up as close as possible to me, I think he was eager to attack as soon as possible.
I won the roll off for Scout moves. The Grav gun Ravenwing moved into cover to the left, Allan countered by moving a speeder up towards them. I then moved the plasma bikers forward, followed by another speeder from Allan. The Meltagun Ravenwing then advanced on the enemy Razorback and the White Scars bikers on Allan's right moved up towards my lines. Finally for me, the anti-tank Landspeeder moved up to support the Meltagun bikers. Allan manoeuvred some other bike units into position, getting as close as possible.
 |
| Deployment and scout moves. |


Allan failed to seize and I got the first turn.
TURN 1- RAVENWING
 |
| Turn 1- Ravenwing. |
In the first turn, the Ravenwing gunned their engines and most of the army advanced. Sammael led the command squad up to the scouting bikers, the meltagun Ravenwing advanced on the Razorback and the grav gun Ravenwing broke cover to deal with the Devastators.
 |
| The Ravenwing advance. |
 |
| The Command Squad target the White Scars bikers. |
In the psychic phase, the Librarian cast Maelstrom of Misery on the bikers in front of him. I managed to Peril on the roll, but rolled a 6 on the table, giving my Librarian a big boost. The Maelstrom hit, but did not cause any wounds.
The shooting phase began in earnest, the Attack Squadron Landspeeder fired at the Razorback in front of it, its multimelta and missiles causing a penetrating hit and glancing hit. The meltagun bikers followed up, using their increased accuracy to wreck the enemy vehicle.
The Plasma gun bikers fired at the other Razorback, hitting four times but failing to damage the vehicle (I didn't get a single glance, despite only needing a 4+ on 4 dice!).
The command squad aimed at the White Scars bikers in front of them. The Rad grenade struck on target, slowing the enemy bikers. The command squad then let loose with their plasma talons, causing 6 wounds, all of which were saved by the jinking bikers. To make matters worse, one of the command squad died when their talons overheated. Sammael fired his plasma cannon at the unit, but a large scatter saw it his the second bike unit, causing two wounds which were both saved by jinking. I now get the annoyance of my opponents when facing my White Scars, would they just die already!
 |
| The Command Squad assault..... |
 |
| .....then hit and run away. |
The Support Squadron fired at the landspeeder opposite them. The assault cannons struck firm, causing 5 penetrating hits and two glancing hits. Unbelievable, only one glancing hit made it through, the rest being saved by the Jinking skimmer. The heavy bolters were fortunately able to finish it off, wrecking the landspeeder.
The grav gun bikers fired at the Devastators in front of them, killing two marines with their grav weaponry. The Black Knights targeted the Landspeeder in front of them, easily destroying the vehicle with their plasma talons.
In the assault phase, Sammael led his squad in an assault against the bikers. The charge crashed home, the Ravenwing Champion slaying the enemy sergeant in a challenge, while the other black knights killed one more biker in return (I managed one rending wound and three other wounds that were all saved). Unfortunately, Sammael was not in range to engage in the combat. The White Scars passed their morale check on a double 1 and I hit and ran out of combat towards the Whirlwinds in the rear of the enemy deployment zone.
TURN 1- WHITE SCARS
 |
| Turn 1- White Scars. |
Seeing the Ravenwing surged into their deployment zone, Khan ordered the back units to converge on their position and Sammael's squad was quickly surrounded. The other bikers and speeders continued their advance on the enemy lines.
 |
| Sammael is surrounded. |

 |
| The White Scars target the Ravenwing. |
In the shooting phase, the Whirlwinds fired at the Ravenwing Support squadron, their anti-cover shells taking one hull point off of the Darkshroud.
Near the Scars' deployment zone, the bikers took aim at the Command Squad. Four units of bikers and two landspeeders poured fire into the squad, causing 14 wounds and killing 3 of the Jinking bikers, leaving just Sammael and the Standard bearer alive.
The Razorback fired at the plasma gun Ravenwing, killing one. The two bike squads facing them both fired at the unit, killing another of the jinking bikers, while a landspeeder managed to cause a penetrating hit on the multimelta armed Ravenwing landspeeder.
 |
| The Command Squad are practically wiped out. |
On the right flank, the remaining Devastators and a Landspeeder fired at the grav gun Ravenwing, killing two of the bikers. They passed their morale check and kept on fighting.
In the assault phase, Khan led one unit in an assault on the Command Squad, while the Chaplain led another unit into the assault. The last Black Knight fired overwatch at the approaching enemy, hitting twice with his snap shots. The fates were not with him, however, as both to wound rolls came up a 1, resulting in no casualties. The hammer of wrath attacks on the standard bearer were enough to slay him, while the Chaplain issued a challenge on Sammael. He accepted and managed to wound the Chaplain for no wounds in return. The other bikers struck at the Ravenwing warlord, causing two wounds on him and leaving him on one. Sammael decided to retreat and hit and ran out of combat towards his own lines.
 |
| The bikers are assaulted. |
 |
| Sammael survives, barely. |
The two units of White Scars bikers on the right launched an assault against the remains of the Ravenwing plasma gun squad. They fired at the approaching bikers, but could not cause any damage. Just as they thought they were finished, the Ravenshield opened fire, the Support Squadron gunning down 4 bikers (including the attack bike). The flurry of shots distracted the attacking bikers and they were unable to finish off the squad in combat. The Ravenwing took advantage of the confusion and hit and ran out of combat.
 |
| The White Scars suffer the wrath of the Support Squadron. |
Not a great first turn for the Ravenwing. I had managed to down a few of the Landspeeders and a Razorback, but the bikers proved resistant to the firepower thanks to their jink saves. The command squad had also been butchered in a (foolhardy) attempt to silence the whirlwinds.
TURN 2- RAVENWING
 |
| Turn 2- Ravenwing. |
The weakened Sammael made his way to join the plasma gun Ravenwing squad, while the Black Knights advanced on the White Scars bikers in front of them. The Dark Talon arrived, racing ahead to cover the Black Knights. The grav gun bikers advanced towards the Devastators.
 |
| The Ravenwing counter attack. |
 |
| The Black Knights move to target the bikers. |
The Librarian attempted to manifest Seeds of Fear on the bikers in front of them, but the effort was blocked. He then attempted to cast Maelstrom of Misery on the Devastators, but failed to manifest the power on 5 dice.
The Librarian used his Auspex to help the Black Knights target the White Scars bikers in front of them. The Knights fired their plasma talons, killing three of the enemy riders. The Dark Talon fired at the second unit of Devastators, the Rift Cannon killed three of the marines, the hurricane bolters killed the other two. The plasma gun squad fired at the lone biker sergeant, killing him and wiping out the squad. The Ravenwing support squadron fired at another landspeeder, wrecking the vehicle. The Ravenwing attack squadron targeted the Razorback, the Landspeeder and meltagun bikers each causing a single penetrating hit on the vehicle. The bikers then assaulted the Razorback, wrecking it with their grenades.
The Black Knights charged at the White Scars bikers in front of them. The Librarian struck one down with his force sword and the Black Knights managed to slay another warrior with a rending strike (I caused 7 other wounds with the corvus hammers, all of which were saved by the Scars' armour). The carnage was enough to break the White Scars bikers, who fled 10" towards their own lines.
 |
| The Black Knights assault the White Scars. |
 |
| The Ravenwing finish off the Razorback. |
 |
| The White Scars flee. |
TURN 2- WHITE SCARS
 |
| Turn 2- White Scars. |
The White Scars continued their advance on the Ravenwing lines, Khan and the Chaplain leading their squads to the right of the central ruins to face the Meltagun bikers.


The Whirlwinds fired at the Support squadron once again. Their shells rang true, obliterating one of the Ravenwing landspeeders. Two of the White Scars landspeeders followed up with their firepower, but were unable to harm the jinking squadron.
Two of the biker units fired at the Ravenwing meltagun squad, their grav weapons wiping out the enemy unit, despite the jinking of the riders. With no unit now in front of them, the Chaplain's bike squad turned their attention to the Black Knights, their firepower causing 5 wounds, all of which were saved by the Jinking riders. Many of the White Scars units fired at the newly arrived Dark Talon, but were unable to harm the zooming flyer.


In the assault phase, the Chaplain attempted to lead his unit in an assault on the Black Knights. Unsurprisingly, they did not make the assault (Allan needed a 12 to reach them) and lost one of their number to overwatch fire in reply.
Another interesting turn. Sammael had escaped to rejoin the ranks of the Ravenwing, but I had lost another squad of bikers. Allan had suffered a few casualties, but the damage had been severely reduced by some great cover and armour saves.
TURN 3- RAVENWING
 |
| Turn 3- Ravenwing. |
The Grav gun bikers retreated behind the ruins in their deployment zone, while Sammael led his squad to the objective in their deployment zone. The Black Knights advanced towards the Chaplain's squad while the Dark Talon raced overhead towards the White Scar's back lines. The Dark Talon loosed its stasis bomb at the Chaplain's squad, hitting them and trapping them in a stasis anomaly.
In the psychic phase, the Librarian attempted to manifest Mind Worm on the Chaplain, but was unable to manifest the power on three dice.
 |
| That's not a Stormtalon, its a sophisticated camouflage device for my as yet unbuilt Dark Talon. |


The Dark Talon fired at the bikers in front of it. The Rift Cannon scattered off target, but the bolters managed to slay two of the enemy warriors. The Attack Squadron fired at a landspeeder, wrecking one of them. The Black Knights fired at the Chaplain's squad, killing one of them.
They followed up with an assault on the squad, their Hammer of wrath attacks killing one. The Librarian issued a challenge that was accepted by the Sergeant. Both combatants struck at one another, but were unable to kill their opposite. The Black Knights struck, killing three of the bikers and causing a wound on the Chaplain. The White Scars could cause no damage in return. The Black Knights failed their attempt to hit and run out of combat, leaving them locked in combat with the rest of the White Scars close to attacking.


TURN 3- WHITE SCARS
 |
| Turn 3- White Scars. |
The White Scars advanced on the Black Knights, ready to pounce on the enemy warriors.


In the shooting phase, the Whirlwinds once again fired at the Support squadron (they really had it in for them), but were unable to damage any of the vehicles. With many other units out of range, there was little shooting at the Dark Angels.
In the assault phase, the two biker units assaulted the Black Knights. The Support Squadron fired overwatch at one of the biker units, killing one. The Hammer of Wrath attacks hit home, killing two of the Black Knights. In the challenge, the Librarian managed to kill the sergeant in the challenge. The White Scars struck at the Black Knights, killing all but the Chaplain, while the Knights were able to bring down one Scar before succumbing. The Librarian passed his morale check, but failed his Hit and Run roll, leaving him in a precarious position.
TURN 4- RAVENWING
 |
| Turn 4- Ravenwing. |
With a scream of afterburners, the Dark Talon left the airspace of the battlefield, sweeping around for another pass. The remaining units moved into cover of the trenches, moving out of line of sight of much of the enemy army.
 |
| The Ravenwing move out of line of sight. |
In the psychic phase, the Librarian attempted to power up his force sword, the arcane power surging through him caused him to peril and he took a wound. To compound his miseries, the attempt was blocked.
In the shooting phase, Sammael and his squad fired at the speeders in front of them. The enemy landspeeders jinked, but it was not enough to stop a glancing hit on one of them. He then led a disordered charge on the two skimmers and succeeded in destroying one of them.
The Librarian challenged the Chaplain to glorious combat, but was unable to hit his darting foe (I managed to miss with all three attacks). Khan raced forward and cut down the enemy psyker before the Chaplain could have his retribution.
TURN 4- WHITE SCARS
 |
| Turn 4- White Scars. |
A unit of bikers retreated to the White Scars deployment zone, while the Whirlwinds backed up towards the ruins. The other bike units moved up towards the objectives.


In the shooting phase, the Chaplain fired at the attack squadron's landspeeder, but caused no damage. The Whirlwinds decided to cease their attempt to destroy the Darkshroud and instead aimed at Sammael and his squad. The massive barrage shells caused two wounds, both of which were saved by the jinking riders.
The bike squads advanceding on the Ravenwing grav gun squad opened fire, their own grav guns and boltguns easily slaying the bikers in a hail of gunfire.
The superior numbers of the White Scars were finally coming to bear and the few Ravenwing units looked to be able to hold on till the end.
TURN 5- RAVENWING
 |
| Turn 5- Ravenwing. |
Sammael led his unit towards the landspeeder holding the objective in their deployment zone, while the support squadron and typhoon landspeeder advanced on the Whirlwinds, eager for some payback. They opened fire at the enemy vehicles, causing 5 hull points worth of damage, enough to finish off one of the tanks.
 |
| Sammael was unable to finish off the Landspeeder. |
 |
| The Whirlwinds are targeted. |
In a final attack, Sammael led his squad against the enemy landspeeder, but was unable to finish it off either in the shooting phase or in an assault, leaving the enemy skimmer to claim the objective.
TURN 5- WHITE SCARS
 |
| Turn 5- White Scars. |
We were quickly running out of time to finish the battle, so Allan was only able to take his movement phase. This was more than enough though as his bikes manoeuvred to claim all the objectives on the board.
VICTORY POINTS:
RAVENWING- 2 (First Blood and Linebreaker)
WHITE SCARS- 13 (Four objectives and Linebreaker)
A victory for the White Scars. Allan rolled for capturing his tile and was successful.
AFTER BATTLE THOUGHTS
Mike:
Wow, that was a crushing defeat for the Ravenwing. Allan played a brilliant game and had a tough army, but there were quite a few mistakes that I made in the game and a few comments on the army to talk about.
1. A major error of mine was the Command Squad's sweeping advance after the combat in the first turn. My plan was to go after the Whirlwinds in the Allan's deployment zone, I wanted to take these tanks out and thought that Allan would not go after the squad with as much force as he did. This was obviously a huge miscalculation on my part and I was lucky that Sammael managed to survive the combat on a single wound. The Black Knights are durable, but not enough to survive most of the enemy army firing at them, especially with so many grav guns around.
I'm not sure why I thought that the Whirlwinds were such a threat to my army that it was worth the sacrifice of so many points. In hindsight, they did not achieve all that much, only putting a hull point on the darkshroud and destroying one of the landspeeders.
A better move would have been to pull the command squad back to my lines. That way, only the units they were in combat with would have been able to target them effectively and these units had already jinked, so their firepower would have been minimal. They would also not have been charged, as the only units in range to do this had Scouted at the start of the game so could not have assaulted them. This way I would have kept the firepower and combat ability of another unit of black knights to deal with the White Scars bikers.
2. I also made a mistake with target priorities in the first couple of turns. A lot of my shooting was focused on the Landspeeders and Razorbacks. Though these units were fast and had some decent firepower, they were not as much of a threat as the various units of grav gun bikers on the table. I should have focused my firepower on these units to try and wipe them out first. The speeders could then have been dealt with later in the game.
3. I don't seem to have much success running a Librarian. The Interromancy powers look fantastic on paper, but I somehow can't get them to work in practice. In most of the games when I run a Librarian, he doesn't really achieve anything and dies when he does.
I am thinking of dropping him from the list and replacing him with an Interrogator-Chaplain. This would give me another powerful close combat character and his Zealot re-rolls would be hugely beneficial for the Black Knights, hopefully allowing them to cause more damage in combat.
4. I am a little worried about the low model count for the army. It is quite a small, elite force and may struggle against some horde armies. The Ravenwing support squadron is nice, but it does eat up a lot of points. I could drop two of the landspeeders and take another unit of Ravenwing bikers. Alternatively, I could drop one unit of Black Knights and take more bikers (at least two units for the points), but this may deny me one of the hardest hitting units in the army.
5. Lack of Objective Secured. This is a big one for me and it no doubt cost me a few victory points in the game. None of my units have objective secured and just about every unit in Allan's army has it (not that it mattered much in this game as I had very few models left at the end of the game). I will need to play more practice games, but this could be a key weakness for the army.
Overall, a good practice game. I didn't mind losing, in fact, I really wanted to lose as I want the players to enjoy the campaign and purposefully play an army that they will easily beat..................... you're not buying it, are you?
It was a very tough battle against an even tougher army and will give me a lot to think about in the run up to blog wars. I will get a few more practice games in over the coming months and see how I get on with them.
Allan:
"This week I was going for a campaign tile against Mike's Dark Angels Ravenwing. I was wanting to try to build a White Scars Gladius battle company in 1850 pts. In the campaign, Mike had agreed that White Scars bikers could replace tactical squads as long as they were 5 strong. I fielded two Gladius formations with an attached suppression force (1854 pts when the free Razorbacks were subtracted, Mike was kind enough to allow me to be 4 pts over!).
I had guessed that Mike would be using at least one Darkshroud, along with Sammael and that would mean great Jink saves. I brought the Whirlwinds to try and reduce this advantage using the ignores cover rule they get for one of their shells. I had planned to target the Darkshroud and Support squadron to try and deny the unit buffs. Bad idea, the Whirlwinds' paltry strength 4 and a single hit were pretty near useless. Why I perservered throughout the game with shooting them, I cannot explain.
I placed my forces and scout moves in the forlorn hope that I would seize the initiative. When this failed, I resigned myself to selling my clans' lives as expensively as possible.
When Mike got the first turn and I saw the Black Knights and Sammael with the Command squad advance, I pretty much felt that this would be a really short game with either the Scars or Ravenwing being blasted off the table in the first few moves.
Some things that I recalled from the battle:
- The Librarian not being very good at casting, but getting good rolls on the Perils table.
- The first round of Ravenwing shooting not being particularly deadly.
- The Black Knight plasma guns not being very successful. Every time they fired, they scared the crap out of me, but I managed a lot of saves against them and Mike seemed to roll "Get's Hot" a lot of times.
- My Razorbacks being useless and dying softly (not too big a deal, they were free after all!- Mike).
- Mike's big mistake was advancing Sammael and his Command Squad towards the Whirlwinds, leaving them in "No mans land", surrounded by bike squads, characters and speeders. With no support from the other bikers, Sammael's squad had to face a crazy number of shots, Hammer of Wrath attacks and close combat attacks. Sammael was left with one wound, meaning that when he managed to hit and run, he was not strong enough for Mike to risk him against any of my surviving bike squads, effectively taking him out of the game.
- I only won because the Gladius gives objective secured, a big bonus (This I dispute. Allan had managed to kill off most of my army, so I would have had trouble contesting all the objectives, even if I was objective secured- Mike).
I feel that I don't want to change my basic army; Keeping Khan, a Chaplain and 6 bike squads, supported by two devastator squads in Razorbacks. I think my first drop will be the suppression force, at they were the least successful unit. Depending on the points left, I would increase the size of the devastator squads and combat squad them with the sergeant and 4 heavy weapons on foot and the other 5 in the Razorback.
I won by a large margin, which was a huge surprise to me because I thought the game had been really close, shows how powerful objective secured can be.
Afterwards I rolled for my tile and succeeded. Yeah! I now have an extra territory for my Scars to protect."
Thanks again to Allan for a fantastic game and for taking the time to send me his thoughts on the battle.
Really interesting read, thanks mike. Here's a curveball: what are the good bits from your white scars army that you are trying to emulate here? And also, what are you hoping will be different because of dark Angels?
ReplyDeleteI ask partly because at the moment I find myself stuck I a rut. Short of
Buying two imperial Knights I don't know how to improve my space marines! I'm interested to hear your thought process!
I always like a good curveball, something to sink my teeth into.
DeleteAlthough there are obvious similarities between the White Scars and the Ravenwing, I actually find that I play the armies in different ways.
The White Scars have considerably more options when it comes to army building compared to a pure Ravenwing force. My Scars can take Grav centurions, devastators, drop pods, tactical squad, scouts, landspeeder storm, etc. I can build a White Scars themed fast force with a lot of options and tactical complexity to it.
The Ravenwing are a lot more limited, consisting of bikes, speeders and maybe a flyer, but I think they make a much more thematic force and look good on the table.
The good bits from the army are the high mobility; very useful for controlling the board and for seizing objectives. With the turbo-boost moves, I can get to pretty much anywhere on the board in a turn and the formation rule allows me to turboboost on the first turn and get a Jink save without having to fire snap shots- very useful for getting right in the enemy army's face on the first turn then being effective enough to make it count in the second turn.
The Ravenwing have a much lower model count but make up for it in durability- all these re-rollable cover saves make a big difference during the game.
One of the big differences I have noticed in the Ravenwing is an increased combat ability over the White Scars. The Scars get the increased strength hammer of wrath hits, but once they are in combat, they are no more impressive than normal marines and really struggle against 3+ armour saves. In most of my games, I actively avoid combat with my white scars unless I am playing significantly weaker opponents such as guard or dark eldar.
In contrast, the Black Knights and Sammael can actually cause a lot of damage in combat thanks to increased strength, number of attacks and rending (in the case of the black knights). I actually try and get these units in to combat, knowing I can use hit and run to get out if things start to get unfavourable. Stubborn is also a big boost for the Dark Angels in combat, helping them to stick around if you don't want them to flee. There were quite a few times when Khan and my Chapter Master would get charged, their squad would be butchered and they would flee off the table without taking any damage.
The Ravenwing also have a decent level of firepower thanks to the plasma talons and landspeeders.
The one big loss is objective secured and having the manpower to win an attrition war with the enemy. With the loss of objective secured, I will need to butcher the enemy troops units and army to try and grab the objectives. You saw in our game how one landspeeder storm or scout squad can shut down your scoring ability in maelstrom missions if you don't deal with them quickly.
I've always liked the Ravenwing and I frequently ran an all Ravenwing force before the new codex made them the new "it" army. I like the look of them on the table, but they are a very challenging army to use so far. They are extremely durable, but up against certain opponents (Eldar, Knights and Tau), I think they will really struggle.
As for your army, I have a few suggestions based on the force you last took to blog wars:
Delete- A common choice I am now seeing with the new codex is to put your centurions in a fast attack drop pod with Librarian. This helps mitigate the short range of the centurions and helps prevent an alpha strike on the centurions in the first turn if you go second.
- With all the drop pods, your army has a great ability for board control, striking where you need them the most in the turn. However, once on the ground, your mobility is more limited. You had a small bike squad that was taken out quite early in the game, restricting your movement around the board. Maybe a second bike unit would allow you to be more mobile in the game depending on what the mission required. If you could make them troops (maybe put the librarian on a bike) that would work in your favour for the objective missions.
- I like the scouts and landspeeder storm. A very cheap scoring unit that can cause a lot of hassle for the enemy with a 30" move each turn (12" move and 18" turboboost). I give the sergeant meltabombs and use them as a mobile drop pod hunting unit as the meltabombs hit automatically.
- I think you could built a battle demi-company with your army; 3 units of tacticals, grav centurions and bike squad. This would give you some strong objective secured units and a nice bonus with the tactical doctrine.
- I always want to steer clear of Knights (using or playing). They are very powerful and seem to make games less fun. Either your opponent has no way to deal with them, leading to a boring game where they run away from it or get crushed by it, or they take it out too easily and you've lost the points investment. They seem to be too easy to use, just point them at the enemy you want to destroy and stomp them. Of all the superheavies, they seem to be the best and most undercosted. I have a Baneblade and Stompa, both much more expensive than the Knight, but they never seem to achieve a fraction of what it can do in a game.
Obviously take these suggestions with a pinch of salt, you did beat me twice in our blog wars game, so the army is obviously doing something right. Hope that helps with some of my thought process. I am still evolving the Ravenwing in my practice games. I think I will drop the librarian and maybe drop the Support squadron and take individual speeders or another bike unit.