
Today's battle report sees my White Scars army take on Luke's Aeldari force comprised of Eldar and Harlequins.

I played this game at Battle Bunker in Sunderland. The mission was the Cloak and Shadows (3 cards per turn, hidden from your opponent) maelstrom mission using table quarters deployment.
My army consisted of:
Battalion Detachment
Captain- Bike, Teeth of Terra (C)
Lieutenant- Master-crafted Bolter (L)
10 Tactical Marines- Bolters, Meltagun (TS1)
Rhino- Storm Bolter (R)
6 Tactical Marines- Bolters, Flamer (TS2)
5 Scouts- Sniper Rifles, Camo Cloaks (S1)
Razorback- Twin Assault Cannon (Rb)
10 Sternguard Veterans- Special Issue Bolters (S2)
Drop Pod- Storm Bolter (DP)
5 Vanguard Veterans- 3 pairs Lightning Claws, 2 Thunder Hammers and Storm Shields (VV)
Outrider Detachment
Chaplain- Jump Pack (Ch)
Outrider Detachment
Chaplain- Jump Pack (Ch)
5 Bikers- 2 Grav Guns, Power Fist (B1)
5 Bikers- 2 Meltaguns, Power Axe (B2)
6 Scout Bikers (SB)
2 Attack Bikes- Multi-meltas (AB)
7 Command Points
7 Command Points
My warlord was the Captain and he took the White Scars Deadly Hunter Warlord trait.


I decided to mix up my army from their last outing. I added a second detachment, led by a Chaplain with a Jump Pack. To support him, I took a unit of Vanguard Veterans with various combat weapons. Other than that, my list was quite similar to last time.


I decided to mix up my army from their last outing. I added a second detachment, led by a Chaplain with a Jump Pack. To support him, I took a unit of Vanguard Veterans with various combat weapons. Other than that, my list was quite similar to last time.
Luke's army consisted of:
Battalion Detachment
Troupe Master- Harlequins Kiss, Shuriken Pistol (TM)
Shadowseer- Shuriken Pistol (Sh1)
Shadowseer- Shuriken Pistol (Sh2)
5 Troupe Players- Harlequins caress, 2 Fusion Pistols (TP1)
5 Troupe Players- Harlequins embrace, 2 Fusion Pistols (TP2)
5 Troupe Players- Harlequins kiss, Shuriken pistols (TP3)
Soltaire (Sol)
3 Skyweavers- 3 Haywire Cannons, 3 Zephyr Glaives (Sk1)
3 Skyweavers- 3 Haywire Cannons, 3 Zephyr Glaives (Sk2)
Skyweaver- 2 Shuriken Cannons (S1)
Skyweaver- 2 Shuriken Cannons (S2)
Skyweaver- 2 Shuriken Cannons (S3)
Spearhead Detachment
Maugan Ra (MR)
4 Dark Reapers (DR1)
3 Dark Reapers (DR2)
3 Dark Reapers (DR2)
7 Command Points
7 Command Points
The warlord was the Troupe Master who took the Legendary Fighter warlord trait. One Shadowseer took Fog of Dreams, while the other took Twilight Pathway.


A fast and deadly mixed Eldar army. I had played both Harlequins and Dark Reapers before, so knew this would be a tough fight. The Dark Reapers and Maugan Ra would make a mess of my Bikers. The Harlequin vehicles were also tough, with their 4+ invulnerable save. I was hoping my volume of Bolter fire would take care of the Troupe Players once they disembarked.


A fast and deadly mixed Eldar army. I had played both Harlequins and Dark Reapers before, so knew this would be a tough fight. The Dark Reapers and Maugan Ra would make a mess of my Bikers. The Harlequin vehicles were also tough, with their 4+ invulnerable save. I was hoping my volume of Bolter fire would take care of the Troupe Players once they disembarked.
We set up the objectives as shown below:

Luke won the roll for deployment zone and chose his side. The deployment order was as follows:
- Drop Pod (Sternguard)
- Soltaire
- Vanguard Veterans (reserve)
- Starweaver (Troupe and Troupe Master)
- Devastators
- Starweaver (Troupe and Shadowseer)
- Chaplain (reserve)
- Starweaver (Troupe and Shadowseer)
- Rhino (Tactical Squad)
- Skyweavers
- Razorback (Tactical Squad)
- Skyweavers
- Bikers
- Dark Reapers
- Bikers
- Maugan Ra
- Scouts
- Dark Reapers
- Lieutenant
- Dark Reapers
- Rest of my army
I set up my Devastators in the ruins in my deployment zone, next to the objective. The Lieutenant went besides them to give them his re-roll buff. The Scouts went on the other side of the ruins. I then set up the rest of my army across my deployment zone, covering the objectives and spreading out a bit. I deployed a bit further back, as I would be going second and could always use my Stratagem to advance quickly.
Luke deployed the Dark Reapers in the ruins to the right of his deployment zone, with Maugan Ra nearby, but out of line of sight. One unit of Skyweavers went on the left flank, the other in the centre. The Starweavers spread out across his deployment zone.


I failed to seize the initiative and Luke took the first turn.
TURN 1- ELDAR
As this was Cloak and Shadows, I would not know Luke's objectives until he achieved them.

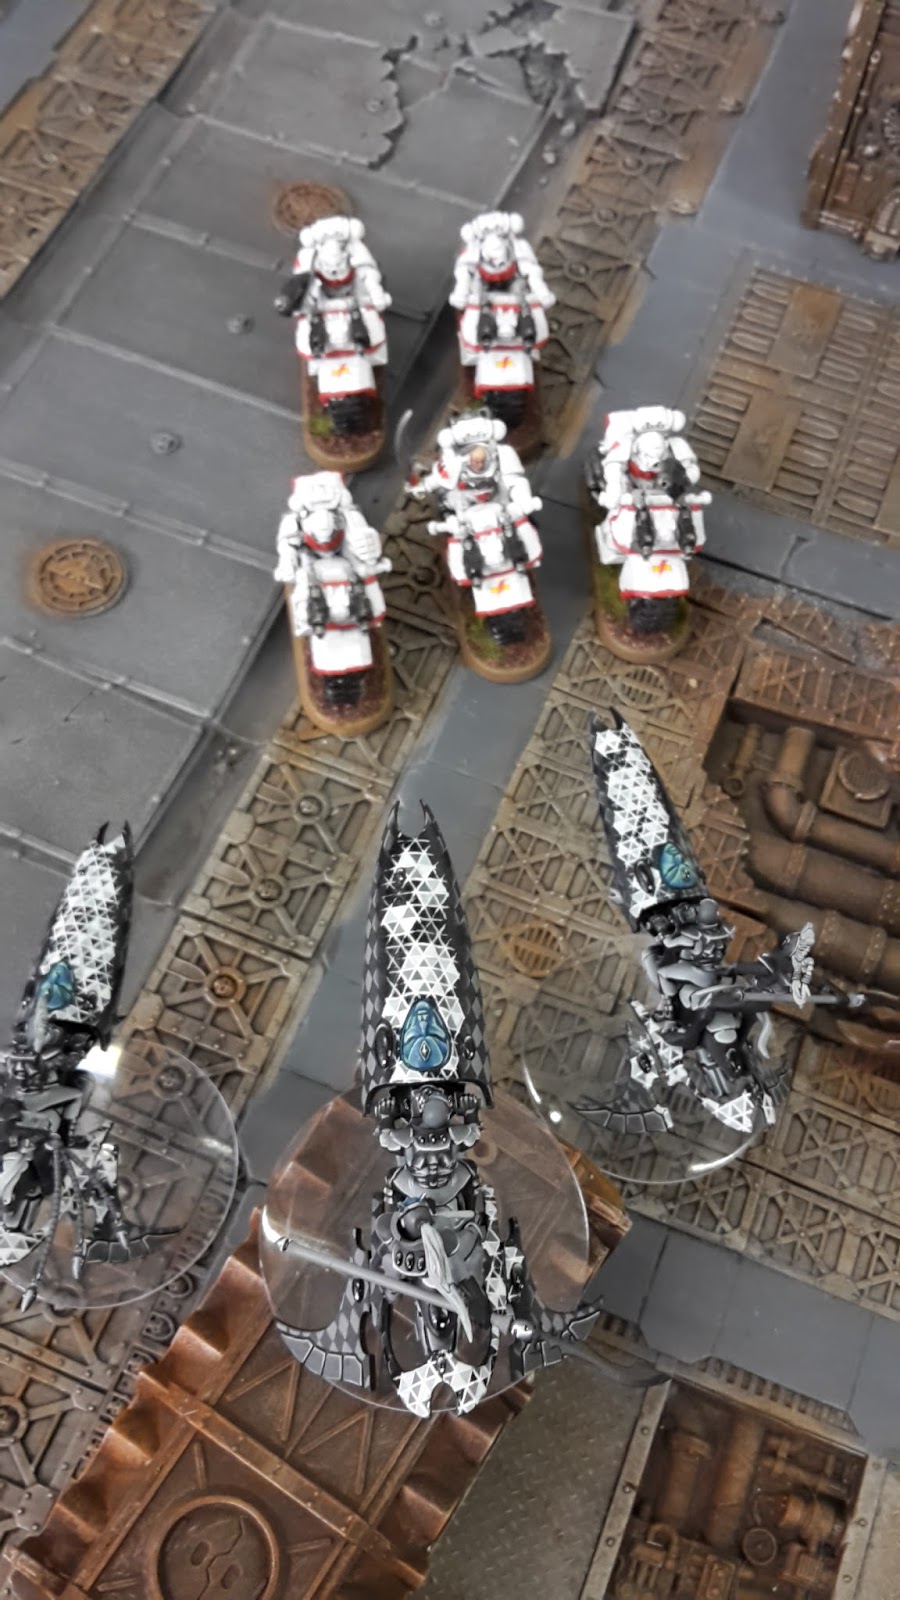
One unit of Skyweavers advanced across the battlefield, surging towards the White Scars Bikers. The Soltaire and one of the Starweavers moved up the middle, still behind the ruins. The Dark Reapers spread out on the ruins they were occupying, while Maugan Ra advanced to get into range of them. The other Harlequin vehicles moved up to support.


In the shooting phase, Maugan Ra targeted the Scouts. Even with his two rounds of shooting, only one Scout fell to his barrage. A unit of Dark Reapers added their firepower, killing one more of the squad. A second unit of Dark Reapers also fired, killing one more. The third unit of Dark Reapers also targeted the Scouts (he really wanted them dead), wounding them four times and wiping out the unit.


The Skyweavers on the left flank fired at the Rhino, hitting it once, but failing to wound. The Starweaver also fired at it, but also failed to do any damage.
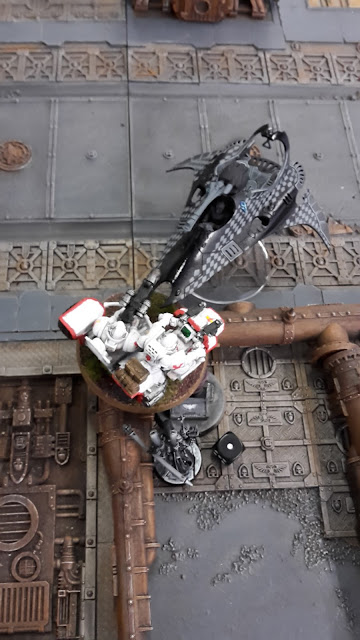
In the charge phase, the Skyweavers assaulted the Bikers. The Bolters fired their overwatch shots, wounding one of the Skyweavers twice. One of the Meltaguns also hit and wounded, but Luke made his invulnerable save.
Some poor rolling saw the Skyweavers only hit twice, that even requiring the use of a single command point. They wounded once, but I passed my save. The Bikers attacked back, killing the wounded Skyweaver. The Sergeant attacked with his Power Axe, wounding another one twice. That was not the result Luke was expecting.


At the end of his turn, Luke scored First Blood and one point for Area Denial (he rolled a 1 on the D3 roll).
TURN 1- WHITE SCARS
This turn, I drew Secure Objective 4, Defend Objective 1 and Behind Enemy Lines.

Using the Born in the Saddle Stratagem, the White Scars Bikers on the right flank advanced towards the Skyweavers. The other unit of Bikers fell back from combat, as the Razorback moved up on the Eldar. The Scout Bikers and Attack Bikes also moved up the centre to target the enemy units.


Finally, the Vanguard Veterans and Chaplain arrived from reserve, landing deep in the enemy deployment zone.
The Bikers on the right flank fired at the Skyweavers. Their Bolter shots caused 7 wounds and the Harlequins took four of them. The Grav guns failed to do any damage.

On the other flank, the Razorback fired at the other unit of Skyweavers, doing two wounds and killing one of them. The Captain added his firepower, wounding another twice. Despite using a Command Point, Luke failed his invulnerable saves and the final Skyweaver perished.
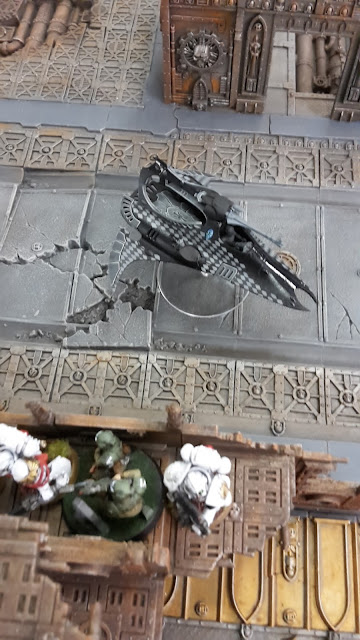
The Attack Bikes fired at the Starweaver, but failed to hit. They were needing 6's thanks to moving, the cloak and shadows penalty and the Mirage launchers. The Scout Bikers fired at the Dark Reapers, killing one of the squad. The Devastators fired at the same unit wounding twice. Luke failed both saves and one Dark Reaper died and the Exarch was wounded. I rolled a one for the damage, using a command point re-roll to try and kill him, but I rolled another 1 for damage!
In the charge phase, the Bikers assaulted the Skyweavers. The Vanguard Veterans and Chaplain attempted to charge the Starweaver, but both failed their charges, despite the use of another command point.


In the fight phase, the Bikers struck at the Skyweavers, wounding four times, but only getting past their save once. The Sergeant stuck with his Power Fist, wounding once, but the tricky Eldar made their invulnerable save. The Skyweavers attacked back, killing one of the Bikers.
At the end of my turn, I scored Behind Enemy Lines and Secure Objective 4 for 2 points.
VICTORY POINTS:
Eldar- 2
White Scars- 2
TURN 2- ELDAR

The Spiritseer led the Troupe out of the Starweaver to engage the Chaplain and Vanguard Veterans. The Soltaire moved over to support the Skyweavers against the enemy Bikers, while Maugan Ra moved into the cover of the ruins. One Starweaver moved up towards the central ruins, while the other two moved onto the objective.


In the psychic phase, the Shadowseer attempted to cast Fog of Dreams on the Vanguard Veterans, but failed to manifest the power. He then cast Smite, rolling an 11, but only managing to wound the Chaplain twice despite this.
The Starweaver opened fire on the Vanguard Veterans, wounding three times, but failing to get past their armour. The lone Dark Reaper added his firepower, but the armour protected them once more.
The two other Starweavers fired at the Attack Bikers, wounding one of them once. The Dark Reapers in the ruins fired at the Scout Bikers, killing three of the squad. The third unit of Dark Reapers fired at them as well, killing two more. Maugan Ra then fired on the Scout Bikers, slaying the last member. He turned his second volley on the Devastators, killing the squad's Sergeant.

In the Eldar deployment zone, the Shadowseer fired on the Chaplain, but failed to wound him. The Troupe fired at the Vanguard Veterans, wounding them once, but failing to get past their armour once more (both Fusion pistols failed to wound).
In the charge phase, the Soltaire assaulted the Bikers, while the Shadowseer charged the Chaplain and the Troupe Players charged the Vanguard Veterans.
The Troupe Players attacked the Vanguard Veterans first. This was annoying, as I was hoping to interrupt and take on the Troupe. The Harlequins put four wounds on the Veterans, but the squad's Storm Shield blocked all the damage. The Shadowseer then struck the Chaplain, wounding him twice. I failed both invulnerable saves and the Chaplain perished.

The Soltaire attacked the Bikers, killing one. The Skyweavers failed to do any harm.


The White Scars then struck back. The Vanguard Veterans attacked the Troupe Players, killing two of the squad. The Bikers struck at the Skyweavers, killing one with their normal attacks. The Sergeant managed to wound once with his Power Fist. Luke failed his save, but used a command point re-roll to pass it.
At the end of his turn, Luke scored Secure Objective 2 and discarded Secure Objective 3. I also scored Defend Objective 1 for 2 points.
TURN 2- WHITE SCARS
This turn, I drew Secure Objective 2, Secure Objective 3 and Supremacy (hold 3 objectives).

The Captain led the Bikes and Razorback as they moved up on the Dark Reapers. The Attack Bikes moved up to engage the Starweaver in front of them. The other unit of Bikers fell back from combat, moving beside the Skyweavers. The Tactical Squad disembarked from the Rhino, moving up to target the Eldar units.


The Drop Pod carrying the Sternguard landed on the White Scars' left flank, the squad deploying to support the advancing Bikers.
I activated the Masterful Marksmanship Stratagem and opened fire on the Dark Reapers. The Sternguard fired at the squad, wounding them 12 times and wiping the unit out. The Razorback fired at a second unit of Dark Reapers, killing two of the squad. The Bikers fired at the lone Dark Reaper Exarch, slaying him. The Captain fired his Bolters at Maugan Ra, wounding him twice, but was unable to get past his armour.

The Tactical Squad fired at the Soltaire, wounding him twice. The Attack Bikes fired their Multi-meltas at the Starweaver, wounding it four times. The Squad's Bolters took another wound from the Skimmer. The Devastators added their firepower, wounding the damaged Starweaver twice, but Luke made both his invulnerable saves.
In the charge phase, the Bikers asaulted the Skyweaver, while the Attack Bikes assaulted the Starweaver.
The Bikers struck at the Skyweaver, wounding him once. The Sergeant wounded once with his Power Fist, but I only rolled a 1 for damage and left him on one wound. The Attack Bikes then managed a single hit on the Starweaver and failed to do any damage.


Luke then used two command points to interrupt and attacked the Vanguard Veterans with the Harlequin Troupe. They managed to kill one of the Storm Shield Veterans. The Veterans then attacked back, hitting 6 times, but only managing to wound twice (despite their re-rolls), but managed to kill two of the Players. The Veteran with the Thunder Hammer hit once and wounded the last Player once, but the Troupe Player made his invulnerable save.
The Skyweaver attacked the Bikers, killing one of the squad. The Starweaver also managed to put two wounds on the Attack Bikes and I managed to fail both saves!
At the end of my turn, I scored Secure Objective 3 and two points for Supremacy. I discarded Secure Objective 2.
VICTORY POINTS:
Eldar- 3
White Scars- 7
The end of turn 2 had seen me pull ahead on maelstrom points, as well as causing a fair bit of damage to the enemy army. The Harlequins were not out of it yet though and had punished much of the faster elements of my army.
TURN 3- ELDAR

The Harlequins decided to engage the White Scars. Those in combat with the White Scars fell back to fire on them once more. One Troupe disembarked from their transport and moved towards the Attack Bikes, the Shadowseer moving towards the Bikers.


The Troupe Master led his Troupe as they advanced on the Sternguard and Bikers, joined by the last of the Dark Reapers and the Phoenix Lord, their transport falling back towards the ruins. The Soltaire moved up to support the Harlequins in battle with the Vanguard Veterans.
In the psychic phase, the first Shadowseer cast Smite, killing one of the Vanguard Veterans. The other Shadowseer also cast Smite, causing three wounds, killing one Biker and wounding the Sergeant.


The Shadowseer and Troupe Player opened fire on the Vanguard Veterans with their Fusion Pistols, but once more the Storm Shield Veteran blocked all the damage (he was certainly proving his worth in this game).
Maugan Ra opened fire on the Sternguard with both his volleys, wounding 7 times and killing three of the squad. The Dark Reaper fired on the Razorback, taking four wounds from it. The Starweaver fired at the Sternguard, wounding them three times, but failing to get past their armour.
The nearby Troupe then opened fire on the Attack Bikes, wounding them once and killing one of the Bikers. The Shadowseer fired his Fusion Pistol at the last Attack Bike, but failed to wound. Two of the Starweavers fired at the same target, wounding him three times and leaving the Attack Bike on a single wound.
In the charge phase, the Dark Reaper Exarch charged the Bikers, but they managed to slay him with their overwatch fire. Maugan Ra charged the Bikers, but failed to make the distance, even with a Command Point re-roll helping him out. Luke was hoping to save the Troupe from harm by soaking up the overwatch fire, but it had not worked out that way.
The Troupe then charged the Bikers. Fortunately for Luke, I only managed a single hit with my 20 shots that was saved by the invulnerable save of the Players. One of the Meltaguns also hit and wounded, but once more their save came to the rescue. The Troupe Master joined them on the charge. The Shadowseer and a Starweaver assaulted the Attack Bike, while the Troupe and Skyweaver charged the lone Biker Sergeant. On the other side of the field, the Soltaire, Troupe Player and Shadowseer charged the Vanguard Veterans.

The Troupe Players attacked the Bikers, wounding 6 times and killing three. By removing the closest models, I was able to take the Troupe Master out of combat, so he would not be able to finish off the squad.
I then used two command points to interrupt and attack with the Vanguard Veterans, hoping to take out the Soltaire before he could attack. However, some terrible rolling saw only a single wound from the Lightning Claws that was saved and a single wound from the Thunder Hammer that was also saved. What a waste of two command points!

In reply, the Soltaire wiped out the Vanguard Veterans with ease. The Shadowseer also killed the Attack Bike and the Troupe killed the Biker Sergeant.

At the end of his turn, Luke scored Secure Objective 6 twice and Hold the Line.
TURN 3- WHITE SCARS
In turn 3, I drew Defend Objective 4, Secure Objective 6 and Big Game Hunter.

On the right flank, the Tactical Squad and Rhino moved up on the Troupe, hoping to get into rapid fire range with their Bolters. The two remaining Bikers moved up to secure Objective 6, while the Sternguard and Captain moved up on the Troupe and Troupe Master. The Tactical Squad disembarked from the Razorback and moved up on the Troupe.


The Tactical Squad fired at the Troupe on my right flank, killing four of them. The Rhino added its firepower, killing the last member of the squad.
The Bikers fired their Meltagun at the Starweaver, hitting and wounding (after the use of my last command point), but Luke made his invulnerable save. The Bolters of the squad did managed to take its last wound though and the vehicle was destroyed.
The Sternguard fired at the Troupe Master in front of them, wounding 7 times. Luke failed three saves. The Captain added his firepower, wounding him once more and leaving him on a single wound.
The Tactical Squad fired at the troupe, killing four. The Drop Pod then fired at the last of the Troupe, hitting and wounding once. Luke failed his save, using his last Command Point to re-roll, but also failed and the Player perished. The Razorback then fired on the Troupe Master, easily taking his last wound. Finally, the Devastators fired at Maugan Ra, only hitting once with their four shots, wounding him once, but he made his armour save.
In the charge phase, the Sternguard assaulted Maugan Ra. Even though he was handy in combat, it was better than allowing him to shoot once more. The Sternguard managed to put two wounds on Ra, one of which got past his armour. The Phoenix Lord manged to kill two of the elite Veterans against him.


At the end of my turn, I scored Big Game Hunter and Secure Objective 6, as well as Slay the Warlord.
The end of turn 2 had seen me pull ahead on maelstrom points, as well as causing a fair bit of damage to the enemy army. The Harlequins were not out of it yet though and had punished much of the faster elements of my army.
TURN 3- ELDAR

The Harlequins decided to engage the White Scars. Those in combat with the White Scars fell back to fire on them once more. One Troupe disembarked from their transport and moved towards the Attack Bikes, the Shadowseer moving towards the Bikers.


The Troupe Master led his Troupe as they advanced on the Sternguard and Bikers, joined by the last of the Dark Reapers and the Phoenix Lord, their transport falling back towards the ruins. The Soltaire moved up to support the Harlequins in battle with the Vanguard Veterans.
In the psychic phase, the first Shadowseer cast Smite, killing one of the Vanguard Veterans. The other Shadowseer also cast Smite, causing three wounds, killing one Biker and wounding the Sergeant.


The Shadowseer and Troupe Player opened fire on the Vanguard Veterans with their Fusion Pistols, but once more the Storm Shield Veteran blocked all the damage (he was certainly proving his worth in this game).
Maugan Ra opened fire on the Sternguard with both his volleys, wounding 7 times and killing three of the squad. The Dark Reaper fired on the Razorback, taking four wounds from it. The Starweaver fired at the Sternguard, wounding them three times, but failing to get past their armour.
The nearby Troupe then opened fire on the Attack Bikes, wounding them once and killing one of the Bikers. The Shadowseer fired his Fusion Pistol at the last Attack Bike, but failed to wound. Two of the Starweavers fired at the same target, wounding him three times and leaving the Attack Bike on a single wound.
In the charge phase, the Dark Reaper Exarch charged the Bikers, but they managed to slay him with their overwatch fire. Maugan Ra charged the Bikers, but failed to make the distance, even with a Command Point re-roll helping him out. Luke was hoping to save the Troupe from harm by soaking up the overwatch fire, but it had not worked out that way.
The Troupe then charged the Bikers. Fortunately for Luke, I only managed a single hit with my 20 shots that was saved by the invulnerable save of the Players. One of the Meltaguns also hit and wounded, but once more their save came to the rescue. The Troupe Master joined them on the charge. The Shadowseer and a Starweaver assaulted the Attack Bike, while the Troupe and Skyweaver charged the lone Biker Sergeant. On the other side of the field, the Soltaire, Troupe Player and Shadowseer charged the Vanguard Veterans.

The Troupe Players attacked the Bikers, wounding 6 times and killing three. By removing the closest models, I was able to take the Troupe Master out of combat, so he would not be able to finish off the squad.
I then used two command points to interrupt and attack with the Vanguard Veterans, hoping to take out the Soltaire before he could attack. However, some terrible rolling saw only a single wound from the Lightning Claws that was saved and a single wound from the Thunder Hammer that was also saved. What a waste of two command points!

In reply, the Soltaire wiped out the Vanguard Veterans with ease. The Shadowseer also killed the Attack Bike and the Troupe killed the Biker Sergeant.


At the end of his turn, Luke scored Secure Objective 6 twice and Hold the Line.
TURN 3- WHITE SCARS
In turn 3, I drew Defend Objective 4, Secure Objective 6 and Big Game Hunter.

On the right flank, the Tactical Squad and Rhino moved up on the Troupe, hoping to get into rapid fire range with their Bolters. The two remaining Bikers moved up to secure Objective 6, while the Sternguard and Captain moved up on the Troupe and Troupe Master. The Tactical Squad disembarked from the Razorback and moved up on the Troupe.


The Tactical Squad fired at the Troupe on my right flank, killing four of them. The Rhino added its firepower, killing the last member of the squad.
The Bikers fired their Meltagun at the Starweaver, hitting and wounding (after the use of my last command point), but Luke made his invulnerable save. The Bolters of the squad did managed to take its last wound though and the vehicle was destroyed.
The Sternguard fired at the Troupe Master in front of them, wounding 7 times. Luke failed three saves. The Captain added his firepower, wounding him once more and leaving him on a single wound.
The Tactical Squad fired at the troupe, killing four. The Drop Pod then fired at the last of the Troupe, hitting and wounding once. Luke failed his save, using his last Command Point to re-roll, but also failed and the Player perished. The Razorback then fired on the Troupe Master, easily taking his last wound. Finally, the Devastators fired at Maugan Ra, only hitting once with their four shots, wounding him once, but he made his armour save.
In the charge phase, the Sternguard assaulted Maugan Ra. Even though he was handy in combat, it was better than allowing him to shoot once more. The Sternguard managed to put two wounds on Ra, one of which got past his armour. The Phoenix Lord manged to kill two of the elite Veterans against him.


At the end of my turn, I scored Big Game Hunter and Secure Objective 6, as well as Slay the Warlord.
VICTORY POINTS:
Eldar- 6
White Scars- 10
A good turn of scoring for both players. That had been a bloody set of turns for both players, with much of each army being decimated by some massed firepower or precision assaults. Things were still in the balance. Luke was down to a few models, but some good cards could turn the game in his favour.
TURN 4- ELDAR

The Soltaire and Spiritseer headed across the battlefield for the far away objective, while the Starweavers moved up on the Devastators. The other Spiritseer and Troupe Player headed for a second objective. The Skyweaver moved up on the Tactical Squad in front of it.


The Spiritseer attempted to cast Fog of Dreams on the Rhino, but failed.
In the shooting phase, the Skyweaver fired at the Tactical Squad, killing one. The Starweavers fired on the Devastators, killing three of the squad with their combined firepower.


One of them then charged the Devastators, allowing the Lieutenant to heroically intervene.
The two Skimmers managed to kill off the Devastators. The Lieutenant struck at the enemy vehicles, but could cause no harm.
In the other combat, Ra killed two of the Sternguard, while the White Scars were able to wound him once more.

At the end of his turn, Luke scored no points and discarded Priority Orders Received. I was also able to score Defend Objective 4.
TURN 4- WHITE SCARS
This turn, I drew No Prisoners (kill an enemy unit), Blood and Guts (kill a unit in assault) and Advance (have no units in my deployment zone).

The Lieutenant fell back from combat, moving to support the Advance, while the Captain and Tactical Squad moved up on Maugan Ra, the Sternguard falling back from combat.


The Tactical Squad fired at the Skyweaver, killing him with their Bolter fire. The Rhino opened fire on a Starweaver, wounding it once, but failing to get past its armour. The Razorback added its firepower, wounding the Starweaver three times.
The Tactical Squad fired at Maugan Ra, wounding him once with their Bolters. The Bikers and Captain added their firepower, but failed to do any more harm. The Drop Pod managed to take one more wound from the Phoenix Lord
In the charge phase, the Tactical Squad, Captain and Bikers charged Maugan Ra. The Captain did one Mortal Wound with his warlord trait. He then struck at Ra, wounding him five times and killing him.

At the end of my turn, I scored all three of my objectives. Luke also scored Defend Objective 5.
VICTORY POINTS:
Eldar- 8
White Scars- 15
A good turn of cards for me had seen me surge ahead in maelstrom points.
TURN 5- ELDAR

The Harlequins moved towards the objectives, the Starweaver moving towards the central ruins, while the Soltaire moved towards the Tactical Squad.


In the psychic phase, the Shadowseer cast Fog of War on the Tactical Squad. The other cast Smite, wounding the Rhino twice.
In the shooting phase, one Starweaver targeted the two Bikers, wounding twice, but failing to pierce their armour. The other Starweaver fired at the Lieutenant, wounding three times. I failed all three saves and the Lieutenant was perilously close to death.
The Shadowseer fired at the Rhino, but failed to hit with his Fusion Pistol.
The Soltaire charged the Tactical Squad. The overwatch fire of the White Scars struck the charging warrior, wounding him twice with their Bolters. The Meltagun also managed to hit in overwatch, but I rolled a 1 to wound!
The Soltaire attacked the White Scars, killing three of the squad. In reply, the Tactical Marines were able to take down the Harlequin warrior.

At the end of his turn, Luke scored Secure Objective 3 and two points for Supremacy.
TURN 5- WHITE SCARS
In turn 5, I drew Secure Objective 1, Secure Objective 2 and Defend Objective 6.

The Rhino moved back to the objective, as the Captain and Bikers moved up on a second objective. The Tactical Squad and Sternguard moved up on the central objective as well, while the Lieutenant moved up beside the Razorback.


The Bikers fired on the last of the Troupe Players, killing him. The Captain fired on the Spiritseer, wounding him twice. The Tactical Squad fired at the Seer, wounding him twice, but he made one of his saves.
The Sternguard opened fire on the Starweaver in the ruins, wounding it once. The Tactical Squad beside them opened fire, but failed to do any damage. Finally, the Razorback fired at it, doing two more wounds.
With no charges, that was the end of my turn. I scored Objective 1 and 2.
VICTORY POINTS:
Eldar- 11
White Scars- 17
TURN 6- ELDAR

The two Starweavers moved up towards the injured Lieutenant, while the two Shadowseers moved up on the objective, behind the cover of the storage crates.


The Shadowseer cast Smite, killing three of the Tactical Squad near them. He then cast Fog of War on the Rhino. The other Shadowseer then cast Smite, killing the last two of the squad.
One Starweaver fired at the Razorback, but failed to do any damage. The other Starweaver killed the Lieutenant.
The Starweavers then assaulted the Razorback, suffering no damage in overwatch. The Eldar Skimmers managed to do a single wound in combat.

At the end of his turn, Luke scored Assassinate, two points for Master the Warp and Secure Objective 5. I also scored Defend Objective 6.
TURN 6- WHITE SCARS
At the start of turn 6, I drew Secure Objective 3, Secure Objective 4 and Defend Objective 2.

The Rhino, Bikers and Captain moved up on the Shadowseers, while the Tactical Squad moved up to secure the objective. The Sternguard moved into the ruins to hold another objective.


The White Scars opened fire on the closest Shadowseer, taking three wounds from him.
The White Scars then assaulted the Shadowseers. The Captain managed to slay one of them. The Rhino wounded the other, but failed to get past his save.


At the end of my turn, I scored no objectives and discarded Secure Objective 3.
VICTORY POINTS:
Eldar- 15
White Scars- 19
TURN 7- ELDAR

The Spiritseer and the two Starweavers fell back from combat, moving towards the centre of the battlefield.
The Shadowseer cast Smite, wounding one of the Bikers. He then cast Fog of War on the Tactical Squad.
The Starweaver fired on the Razorback, wounding it once. The other fired at the Tactical Squad, wounding them twice, but I made both my armour saves. The Shadowseer fired at the Tactical Squad, but failed to wound them.
The Shadowseer charged the Tactical Squad. The Flamer managed to do a single wound in overwatch fire. The Shadowseer struck at the White Scars but failed to do any damage. The Tactical Squad were able to slay the Harlequin psyker in reply.
At the end of his turn, Luke scored no points and I scored Defend Objective 2.
TURN 7- WHITE SCARS
In my final turn, I drew Overwhelming Firepower (kill an enemy unit in the shooting phase), Priority Orders Received (Defend Objective 3) and had Secure Objective 4.

The Captain, Bikers and Tactical Squad moved up on the Starweaver.

The White Scars then opened fire on the Starweaver, destroying it with their combined firepower.

At the end of my turn, I scored Overwhelming Firepower, Secure Objective 4 and Linebreaker. Luke also scored Linebreaker.
TURN 7- ELDAR

The Spiritseer and the two Starweavers fell back from combat, moving towards the centre of the battlefield.
The Shadowseer cast Smite, wounding one of the Bikers. He then cast Fog of War on the Tactical Squad.
The Starweaver fired on the Razorback, wounding it once. The other fired at the Tactical Squad, wounding them twice, but I made both my armour saves. The Shadowseer fired at the Tactical Squad, but failed to wound them.
The Shadowseer charged the Tactical Squad. The Flamer managed to do a single wound in overwatch fire. The Shadowseer struck at the White Scars but failed to do any damage. The Tactical Squad were able to slay the Harlequin psyker in reply.
At the end of his turn, Luke scored no points and I scored Defend Objective 2.
TURN 7- WHITE SCARS
In my final turn, I drew Overwhelming Firepower (kill an enemy unit in the shooting phase), Priority Orders Received (Defend Objective 3) and had Secure Objective 4.

The Captain, Bikers and Tactical Squad moved up on the Starweaver.


The White Scars then opened fire on the Starweaver, destroying it with their combined firepower.

At the end of my turn, I scored Overwhelming Firepower, Secure Objective 4 and Linebreaker. Luke also scored Linebreaker.
VICTORY POINTS:
Eldar- 16
White Scars- 24
A decisive win for the White Scars.
AFTER-BATTLE THOUGHTS
That was a fun game against a tough force.
The mobility and massed Bolter fire of the White Scars once again shone through in this game, able to get past the invulnerable saves of the Harlequin troupes and cause some real damage.
I thought I was in real trouble with the -1 to hit at range from Cloak and Shadows at the start of the game, as it really reduced the effectiveness of my Devastators and Razorback in the initial turns. Once I got closer though, my firepower was much more effective.
The Dark Reapers were as ruthlessly efficient as they have been in previous games. Always hitting on a 3+ is really effective, allowing them to put out consistent firepower each turn. They shredded both Scout squads with ease (Sniper Scouts and Scout Bikers), eliminating them before they could do much of anything.
I liked the army, it was quite effective in this game.
Pairing the Lieutenant with the Devastators is a good strategy. This allows them to re-roll roughly half their failed wounds (as they are wounding most things on a 3+), really improving their firepower output. They were a little less effective in this game against the Starweavers, as they suffered -2 to hit in most cases, making it difficult for them to get many hits on them.
The Vanguard Veterans and Chaplain didn't achieve too much in this game. Deep Striking with assault units is always risky, as there is always the chance they will fail their first charge and be wiped out without doing anything. It was only the amazing saves from the Storm Shield Veterans that kept them alive for so long, as they realistically should have been killed in Luke's second turn. I think starting both units on the table might have been a better tactic in this game, though it would have stopped me from scoring behind enemy lines. I thought about sending the Sternguard into the Eldar deployment zone to score it, but I really needed them to take out the Dark Reapers, as they would have made a mess of much of my army.
The Bikers were also solid. They can put out a lot of firepower and are highly mobile, making them great for maelstrom games.
Another win for the White Scars. I'm not used to winning games in 8th edition yet! Going to have to see if I can keep my streak going.
 |
| End of the game. |
A decisive win for the White Scars.
AFTER-BATTLE THOUGHTS
That was a fun game against a tough force.
The mobility and massed Bolter fire of the White Scars once again shone through in this game, able to get past the invulnerable saves of the Harlequin troupes and cause some real damage.
I thought I was in real trouble with the -1 to hit at range from Cloak and Shadows at the start of the game, as it really reduced the effectiveness of my Devastators and Razorback in the initial turns. Once I got closer though, my firepower was much more effective.
The Dark Reapers were as ruthlessly efficient as they have been in previous games. Always hitting on a 3+ is really effective, allowing them to put out consistent firepower each turn. They shredded both Scout squads with ease (Sniper Scouts and Scout Bikers), eliminating them before they could do much of anything.
I liked the army, it was quite effective in this game.
Pairing the Lieutenant with the Devastators is a good strategy. This allows them to re-roll roughly half their failed wounds (as they are wounding most things on a 3+), really improving their firepower output. They were a little less effective in this game against the Starweavers, as they suffered -2 to hit in most cases, making it difficult for them to get many hits on them.
The Vanguard Veterans and Chaplain didn't achieve too much in this game. Deep Striking with assault units is always risky, as there is always the chance they will fail their first charge and be wiped out without doing anything. It was only the amazing saves from the Storm Shield Veterans that kept them alive for so long, as they realistically should have been killed in Luke's second turn. I think starting both units on the table might have been a better tactic in this game, though it would have stopped me from scoring behind enemy lines. I thought about sending the Sternguard into the Eldar deployment zone to score it, but I really needed them to take out the Dark Reapers, as they would have made a mess of much of my army.
The Bikers were also solid. They can put out a lot of firepower and are highly mobile, making them great for maelstrom games.
Another win for the White Scars. I'm not used to winning games in 8th edition yet! Going to have to see if I can keep my streak going.
Great report and lovely scheme on those Harlies, really striking.
ReplyDeleteCheers Siph! Yeah, they were great looking. Would love to see the army when it is completed.
DeleteYeah, I love greyscale colour schemes, and this one is done really well. Made for a very nice contrast with the stark white and red of you White Scars: The duplicitousness of the Alien contrasted with the simple pure Truth of the Imperium.
DeleteHaha, that's some beautiful imagery right there.
DeleteGood win! I add my compliments to the Harlequin color scheme. Very nice looking vehicles. Great write-up, Mike.
ReplyDeleteCheers Dave
Delete