
This week's battle report sees my White Scars take on Tony's Orks. When I arranged to play Tony, I was originally going to take my Guard for a classic Ork/Guard match up. However, I discovered that I don't have my Codex with me in Newcastle, it must be packed away in a box back in Glasgow!

I took my White Scars instead, but opted to go for a different, milder army than I would normally take to make for a better match up.
My army consisted of:
Combined Arms Detachment
Chaplain- Bike, Meltabombs (with BS1 or C)
6 Bikers- Power Axe, Meltabombs (BS1)
5 Bikers- Meltabombs (BS2)
10 Tactical Marines- Meltagun, Meltabombs (TM1 and TM2)
Rhino (R1)
10 Tactical Marines- Flamer, Meltabombs (TM3)
Rhino (R2)
5 Scouts- Bolters (S)
5 Vanguard Veterans- 3 Pairs of Lightning Claws, Two Thunder Hammers and Storm Shields (VV)
10 Assault Marines- Flamer, Power Fist (AM)
6 Scout Bikers- 2 Grenade Launchers, Meltabombs (SB)
10 Devastators- 4 Heavy Bolters (DS)
I went for a mixed combat and shooting force. The Bikes, Vanguard Veterans and Assault Marines would provide some nice counter assault units as the Tactical Marines and Devastators fired at the Ork hordes. We completely forgot to roll for warlord traits, so neither side had one in the game.
Tony's army consisted of:
Combined Arms Detachment
Warboss- Mega Armour (With M or W)
4 Meganobz- 3 Rokkits, One shoota (M)
Battlewagon- 2 Big Shootas (B)
12 Slugga Boyz- Big Shoota, includes Nob with Power Klaw (OB1)
Trukk- Big Shoota (T1)
12 Slugga Boyz- Big Shoota, includes Nob with Power Klaw (OB2)
Trukk- Big Shoota (T2)
12 Slugga Boyz- Big Shoota, includes Nob with Power Klaw (OB3)
Trukk- Big Shoota (T3)
12 Burna Boyz- 2 Meks (BB)
Trukk- Big Shoota (T4)
20 Slugga Boyz- Nob with Power Klaw (OB4)
3 Warbikes- Nob with Power Klaw (WB1)
3 Warbikes- Nob with Power Klaw (WB2)
3 Killa Kans- Rokkit, 2 Big Shootas (K)
Meganobz and a Battlewagon. Kind of wished I had included a couple of Multimeltas and Grav guns!
My plan was to ignore the Battlewagon and Meganobz initially. There was little in my army that could seriously hurt them and I would just need to hope I could contain them. I would focus my firepower on taking out the Trukks to reduce the Orks' mobility and then try and take care of the Mobs on foot. The Burna Boyz would need to be dealt with, their Burnas could make a mess of most of my squads.
We decided to play a good old fashioned, kill each other Kill Points game- the Orks running at the Marines to choppa them to death.
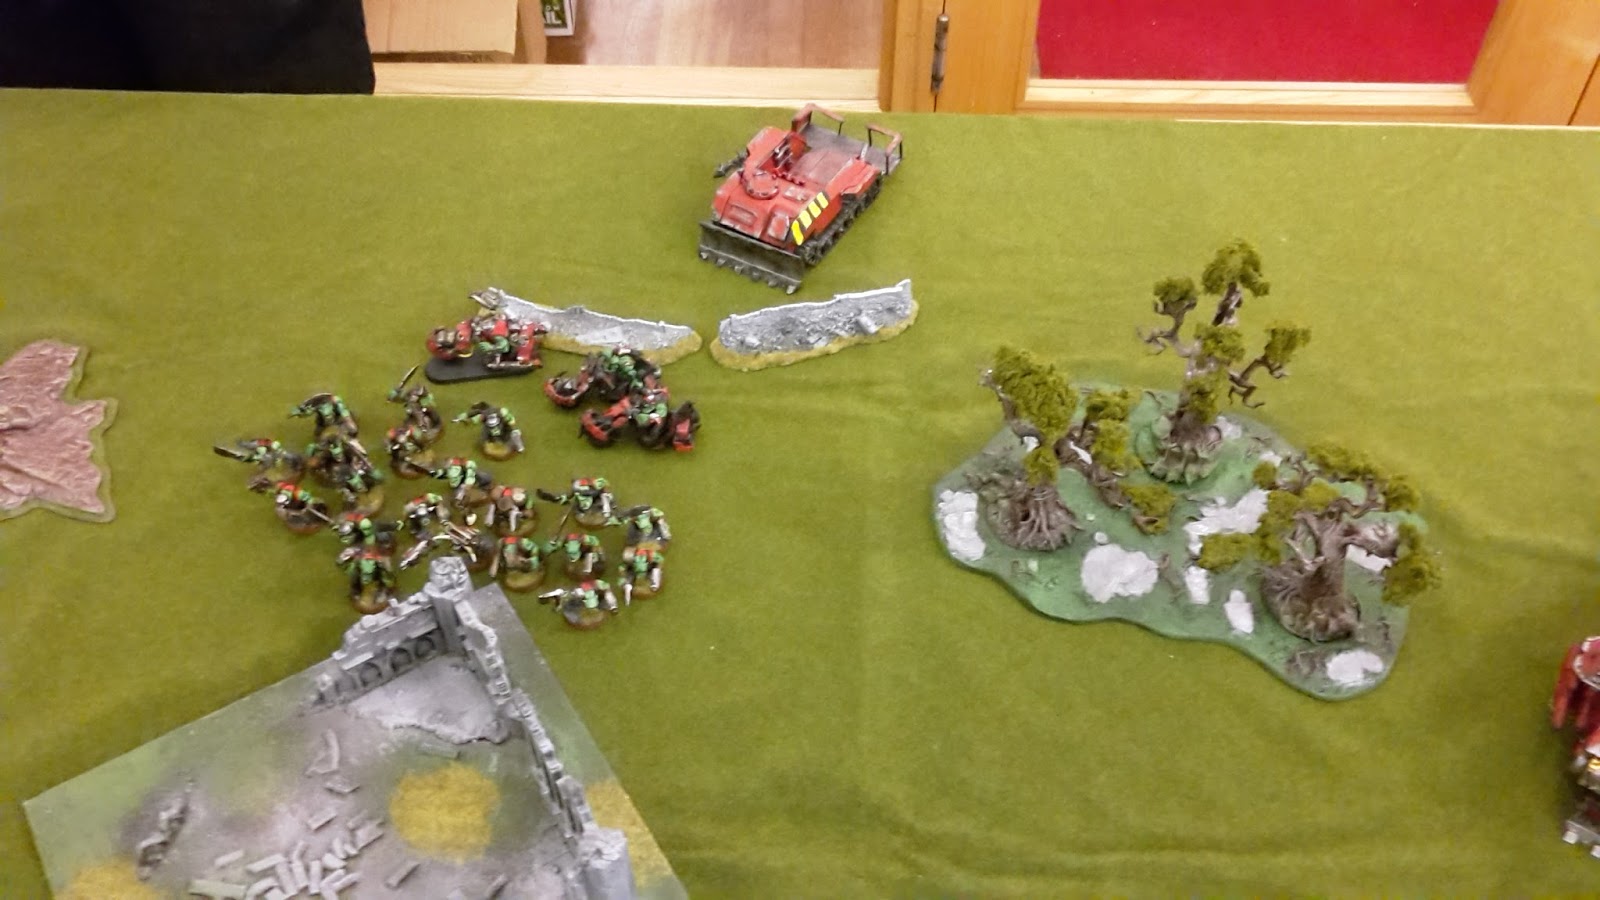
Tony won the roll for deployment and chose to go first. He put the large Boyz mob and two of the Trukks on the right flank. The rest of the army deployed towards the left flank, the Battlewagon near the centre and the Kans on the left.
I decided to focus my army on my left flank. This would take the Battlewagon (and Meganobz) out of the game for at least 3 turns and would mean the Kans would need to slog it across the board. I could focus on clearing the left flank of the Trukks and Boyz mobs, then move onto the survivors in the following turns.
I set up the Devastators behind the barrier, flanked on either side by a Rhino. The Assault Marines and Vanguard Veterans went behind the Devastators, with the Bikes all on the left. I put the Scouts in the woods on my left.


I chose not to seize the initiative and Tony took the first turn.
TURN 1- ORKS

The Orks advanced on the White Scars lines, the two Trukks on the right flank advancing as the large mob picked their way through the cover, running to close the distance further. The forces on the left flank started to reposition to reach the Marine lines.


The two Trukks on the right fired on the Scout Bikers, forcing them to Jink but causing no harm. The Battlewagon opened fire on the Assault Marines, killing one. The Trukk on the left flank turbo-boosted up.
With that, a quick Ork turn was over.
TURN 1- WHITE SCARS

On the White Scars left flank, the Bikers advanced on the Trukks, the Scouts moving up to support them. The Rhino on the right reversed slightly to shield the Assault Marines from the enemy fire.


The Scout Bikers opened fire on the Trukk in front of them, glancing it twice despite snap firing. The Rhino and Scouts opened fire on the Trukk, but failed to cause any damage with their massed shots.
The Bikers fired on Trukk, finally wrecking it. The Ork unit failed their pinning test, losing one Ork as they squabbled.
The other unit of bikers fired at the second Trukk, glancing it once. The Devastators then opened fire, shredding the Ork vehicle in a hail of Heavy Bolter fire.
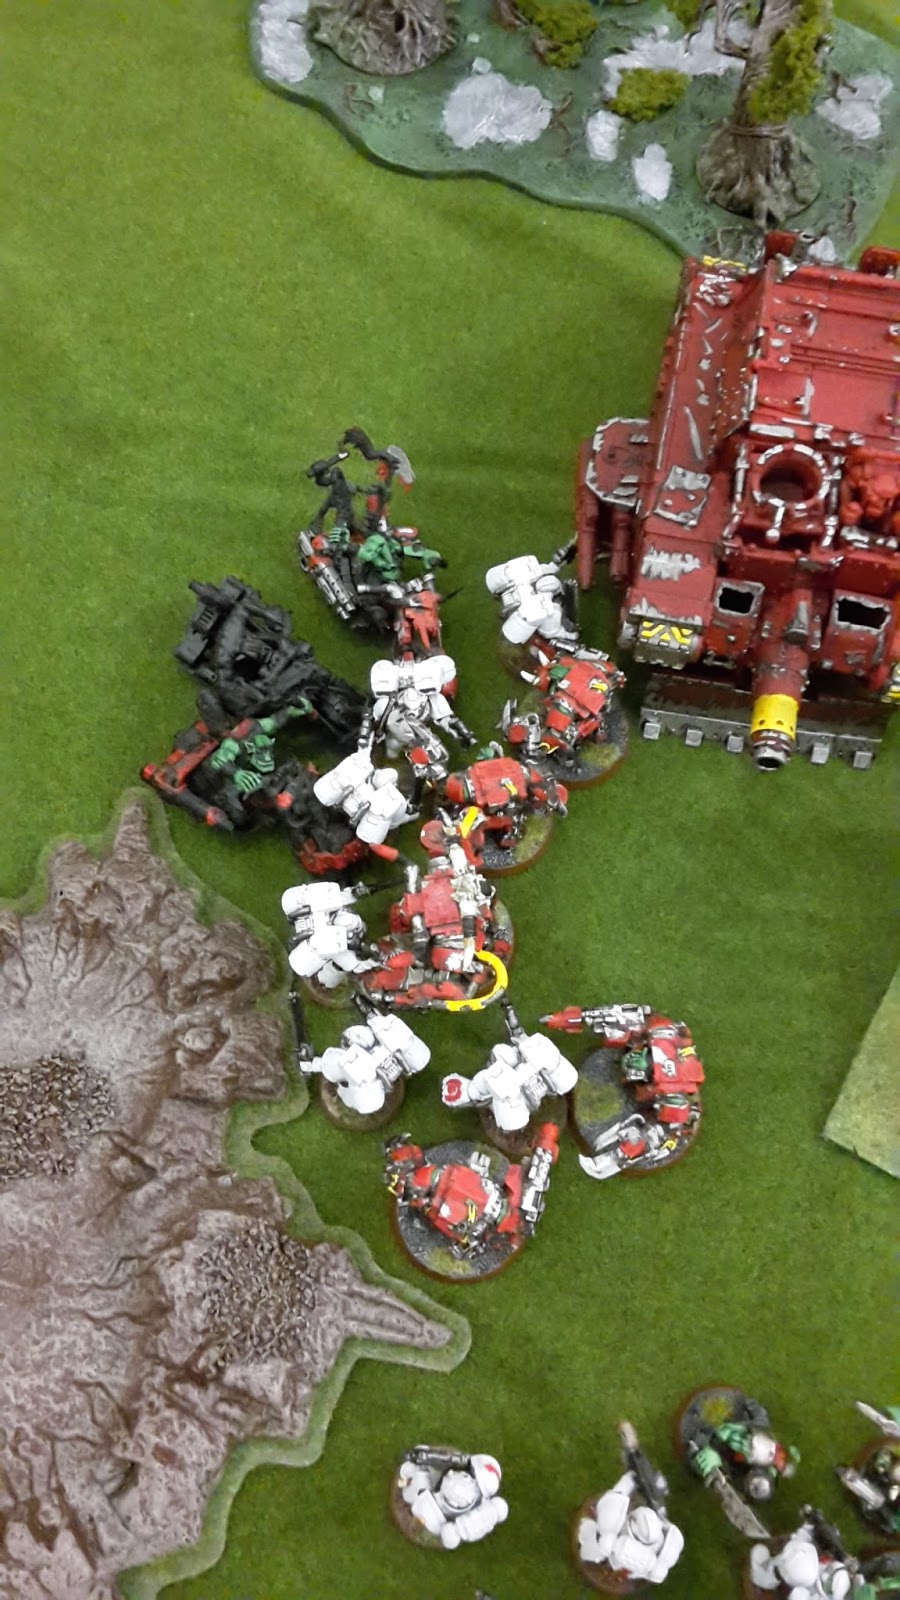
The Bike squads on the left flank assaulted the Orks from the transport vehicles. The Bikers and Scout Bikers assaulted one squad. The Marines struck at the Orks, killing eight in total. The Orks struck back, the Ork Boyz failing to get past the armour of the Marines, but the Nob killing one of the Bikers. The Greenskins lost the combat, but Tony rolled a 1 on the Mob Table and the Orks held firm.


The Chaplain led the other Bike squad against the second unit of Boyz. The Chaplain struck down the Nob in a challenge, while the Marines cut down another 6 Orks. In reply, the Orks killed one of the White Scars warriors. The Orks fled from the combat and were easily cut down and slain by the Bikers.
KILL POINTS:
Orks- 0
White Scars- 3
TURN 2- ORKS

The large Ork mob and Warbikers advanced on the White Scars bikes that were locked in combat, while the Greenskins' right flank continued to advance on the main White Scars line.


The Battlewagon fired on the Devastators with its Big Shootas, killing one of the squad. The Killa Kans fired at the nearest Rhino, glancing it once with their Big Shootas. The nearby Trukk also opened fire, taking another hull point from the Rhino. The Meganobz fired their Rokkits at the transport vehicle, hitting once but somehow failing to glance the Rhino.
The Warbikers and Mob of Orks launched an assault on the White Scars Bikers. The White Scars struck at the depleted Ork unit from the Trukk, but only caused a single wound with their combined attacks. To add insult to lack of injury, the Orks' meagre armour blocked the blow. The Orks struck back with a fury, wiping out the Scout Bikers and killing three of the other Bike squad. The squad failed their morale test and managed to escape from the combat.


TURN 2- WHITE SCARS

The Tactical Squads chose now to strike and the White Scars advanced. One squad moved out to the right flank, the Meltagun Marine getting into range of the Battlewagon, supported by the Assault Marines.
The other Tactical Squad joined the Bikers, Scouts and Vanguard Veterans advancing on the Greenskins on the left flank.


The Tactical squad opened fire with their flamer on the large mob in front of them, killing 6. The Bolters of the squad slew another 8 of the Orks. The Scouts added their Bolter fire to the unit, killing another 4 and leaving only the Nob left.
The nearby Bikers and Rhino fired at the Trukk Boyz they had recently engaged in combat, wiping them out.
The second unit of Bikers fired at the Warbikers, killing two and wounding the Nob after some great rolls by me.
The Devastators opened fire on the Burna Boyz's Trukk, but only managed to glance it once.
The Tactical Squad fired their Meltagun at the Battlewagon, hitting but failing to even glance (I only needed a 6+ on 2D6, but still failed).
Seeing the Meltagun fail, the Assault Marines launched themselves at the Battlewagon. The Marines managed to glance it twice with their attacks. The Sergeant stepped up with his Power Fist, but only managed to penetrate it once and shake it, leaving it on one hull point.

The Chaplain led the Bikers to attack the Warbiker Nob, easily killing him. The Vanguard Veterans attempted to assault the last survivor of the large mob, but failed to make the distance.

At the end of turn 2, things were going well for the White Scars. I had pretty much eliminated the Ork right flank, but the left flank contained the Meganobz and they were ready to assault in turn 3 and a squad of Burna Boyz were ready to make a mess of my power armour.
KILL POINTS:
Orks- 1
White Scars- 5
TURN 3- ORKS

The Battlewagon reversed, the Meganobz leaping out and being joined by the Warbikers as they eyed up the Assault Marines. Nearby, the Trukk sped towards the Tactical marines, the Orks bellowing as they disembarked and advanced on the White Scars' position.
On the other flank, the lone Nob joined the Burna Boyz as they moved to engage the White Scars Bikers.


The Battlewagon and Trukk fired at the Rhino, but failed to do any harm with their Big Shootas. The Killa Kans fired at the transport vehicle and succeeded in finally destroying it. The Meganobz fired at the Assault Marines, killing one with their Rokkits. The Warbikers added their firepower, wounding twice and killing two of the squad.
On the other flank, the Trukk fired at the Vanguard Veterans, but their armour blocked the two wounds against them.
Now came the time for the Orks to assault once more. The Meganobz and Warbikers charged the Assault Marines. The Marines struck first, killing two of the Bikers, while the Sergeant cut down one of the Meganobz with his Power Fist. In reply, the Orks butchered the squad, wiping them out.

The Ork Boyz assaulted the Tactical Squad. The Marines struck at the Orks, but failed to cause any damage. The Slugga Boyz attacked the White Scars. With 44 attacks on the charge, Tony managed to kill only a single Marine (he was using my dice and I warned him how cursed they were!). The Nob did a little better, cutting down two of the Marines. The White Scars failed their morale test and were locked in combat. They attempted to Hit and Run, but failed and were stuck in a desperate battle with the Greenskins.


The lone Nob charged the Bikers, taking a wound from the overwatch fire of the White Scars. The Burna Boyz also launched an assault on the unit. The Chaplain struck, killing two of the Burna Boyz, while the Bikers killed another. The Orks struck back, killing 5 of the squad and leaving only the Chaplain, who managed to Hit and Run from the assault.


TURN 3- WHITE SCARS

The Chaplain joined the survivors of the second Bike squad and advanced once more on the Burna Boyz, while the Vanguard Veterans moved up towards the Trukk.


The Tactical Marines on the right formed a battle line in front of the rampaging Meganobz, hoping to sell their lives to buy the Devastators more time. The Devastators opened fire on the last Warbiker, killing him outright. The Tactical Marines fired at the Meganobz, but their Bolter rounds bounced off the armour with ease.
The Tactical Squad on the left flank fired their flamer at the Burna Boyz. The Pyromaniac Orks must have had a sick affinity with the fire, as despite hitting 6 of them, not a single wound was caused! They were left fortunate against the Boltgun rounds as the combined fire of the Tactical Squad and Bikers wiped them out. The Scouts fired on the lone Nob, killing him.

The Vanguard Veterans assaulted the Trukk, easily ripping it apart with their Lightning Claws.

The Tactical Squad on the right flank struck at the Orks, but were unable to do any damage. This time, the Orks wiped them out, advancing over the wreck of the Rhino towards the Devastators.
KILL POINTS:
Orks- 4
White Scars- 9
TURN 4- ORKS

The Trukk Boyz moved up to engage the Devastators, while the Meganobz advanced on the Tactical Squad. The Killa Kans continued their slow advance on the White Scars lines.


The Battlewagon and Killa Kans opened fire on the Devastators, killing two with their combined firepower.
The Boyz assaulted the Devastators. The overwatch fire hit the Orks twice, but both shots failed to cause a wound. The Orks made their charge, the Devastators striking out as they advanced, killing three of the squad. The Orks attacked in reply, only managing 6 wounds after some terrible rolling from Tony and I made all my armour saves. The Nob then struck, killing one with his Power Klaw. The Orks lost the combat but remained locked, the White Scars failing to hit and run.

The Meganobz charged the Tactical Marines, easily wiping them out for no damage in return.


TURN 4- WHITE SCARS

The White Scars reset their battle line, moving in to position to combat the advancing Orks. The army opened fire on the Meganobz, but were unable to get past their armour.

In the assault phase, the Devastators struck at the Ork, but caused no damage. In reply, the Orks struck down two of the Devastators (I was fortunate in that the Nob missed with all his attacks). The White Scars managed to hit and run towards the new battle line.

At the end of turn 4, things were close. Much of the Ork army had been taken out, but the Meganobz were still relatively intact and looking for more fighting.
KILL POINTS:
Orks- 5
White Scars- 9
TURN 5- ORKS

The Boyz mob advanced on the retreating Devastators, while the rest of the Orks moved up to support them.


The Killa Kans fired at the Vanguard Veterans, killing one of the squad. The Meganobz fired at the Tactical Marines, but failed to cause any damage.
The Ork Boyz assaulted the Devastators, two of the mob falling to the overwatch fire. The rest of the squad made it in. The White Scars struck, killing two. The Orks struck back, this time wiping out the Devastators as the stern eye of the Warboss was now upon them. They consolidated into the nearby ruins.


TURN 5- WHITE SCARS

The Vanguard Veterans launched themselves at the Meganobz, while the Bikers advanced on the Ork Boyz.


The White Scars opened fire on the Boyz in the ruins, killing four of them with their Bolter shots and leaving one left. The Chaplain and Bikers assaulted the lone survivor, their hammer of wrath attacks proving sufficient to wipe the unit out.

The Vanguard Veterans assaulted the Meganobz. The Veterans struck with their Lightning Claws and were able to slay one of the Ork Nobs. The Veteran with the Thunder Hammer Struck, crushing another two of the Nobs. Before they fell, the Meganobz cut down three of the Veterans, the Warboss finishing off the last Veteran to be left alone amongst the carnage.
KILL POINTS:
Orks- 7
White Scars- 11
TURN 6- ORKS

The Killa Kans and Warboss advanced on the ruins. The Kans fired at the Bikers, wounding the Chaplain once with a Rokkit shot.

The Killa Kans assaulted the Bikers, making the charge through the ruins. The Warboss attempted to charge, needing a 7 to make it. Tony rolled a double 1 for the charge roll. Using his single die re-roll, he then proceeded to roll the 6 he needed and the Warboss made it in to combat.
The combined might of the Kans and Warboss was too much for the White Scars and they were butchered.

TURN 6- WHITE SCARS

With little left, the White Scars decided to retreat. The Tactical Marines got back in the Rhino, which sped towards the Ork deployment zone. The Scouts moved back from the Ork advance.

The Scouts fired their Bolters at the Warbos, wounding him once.
With that, the game ended.
KILL POINTS:
Orks- 9
White Scars- 11
VICTORY POINTS:
Orks- 11 (inc. Slay the Warlord and Linebreaker)
White Scars- 13 (inc. Linebreaker and First Blood)
A win for the White Scars.
 |
| End of the game. |
AFTER-BATTLE THOUGHTS
Thanks to Tony for an exciting and very close game. We didn't actually total up the points until the end of the game, so we had no idea how close it was until the end.
I think my refused flank plan worked very well. By deploying on my left flank, I was able to deal with the Trukks and Mob opposite quite quickly. This deployment also kept the Meganobz out of the game until turn 3 and kept the Killa Kans from combat until turn 6.
Towards the final turns, it would have been easy to keep my forces away from the Meganobz and Kans, retreating to the board corner and stopping them from getting into combat with the Bikers and Chaplain. However, that would have been no fun and I decided to embrace my inner Ork and go for it in the assault. As it was, the Vanguard Veterans did really well, killing off the Meganobz before they were taken out themselves.
Both side had some really good luck and some appalling luck with the dice throughout the game, which adds to the fun when writing up the battle reports.
It is good fun to take two relatively balanced armies and just slug it out in a Kill Points game.
As an ork player I did shake my head ruefully at your opponents deployment, I would definitely have had those slow moving killa kans central, right where he positioned that fast unit of warbikers. Especially with the mobility of a white scars army.
ReplyDeleteI would also have been tempted to pull those two right flank truk units back towards the centre on turn 1, flat out if necessary to join with the rest of the army, rather than leave them unsupported like that. It would have meant delaying the assault for a turn but could have hit you in one big green tide instead.
Ah well, easy to say this after the fact, glad you had a good game.
I think his deployment definitely let him down in this instance. I was able to essentially take the Killa Kans completely out of the game.
DeleteIt was nice to play with a different kind of White Scars army here. I'll be focusing on the Deathwatch pretty heavily in the next few months as I try and get an army ready for a tournament.