
This week's battle report saw my Deathwatch take on a Necron Decurion, commanded by Tom, in the Contact Lost Maelstrom mission (3 cards per turn).

My army consisted of:
Black Spear Strike Force
Watch Master- Beacon Angelus
Aquila Kill Team
5 Veterans- Infernus Heavy Bolter
Terminator- Heavy Flamer, Auxiliary Meltagun
Dominatus Kill Team
5 Veterans- 2 Heavy Thunder Hammers, Storm Shield and Power Maul, Black Shield with Power Sword
3 Vanguard Veterans- 2 Pairs Lightning Claws, I Heavy Thunder Hammer
Corvus Blackstar- Auspex Array, Hurricane Bolter
Combined Arms Detachment
Librarian- Level 2, Auspex, Meltabombs
10 Veterans- 4 Frag Cannons, 2 Storm Shields and Auspex
Drop Pod- Locator Beacon
5 Veterans- 5 Stalker Pattern Boltguns
Rhino
4 Bikers- 4 Power Weapons
4 Bikers- 4 Power Weapons
My warlord trait was Bane of Monstrosities, giving me re-rolls to wound and AP against Monstrous Creatures, Tanks and Superheavy Vehicles for the Watch Master.
The Librarian rolled on Fulmination, getting Electrosurge, Magnetokinesis and Electropulse.
This time, I split my forces between the Blackspear Strike Force and the CAD. I decided to try the Librarian with the Stalker Boltgun Veterans. The Stalkers and Bikes would deploy first, with the rest of the army coming in via deep strike as the game went on.
Tom's army consisted of:
Necron Decurion
Reclamation Legion
Overlord- Voidreaper, Mindshackle Scarabs, Phylactery, Resurrection Orb, Tachyon Arrow
5 Lynchguard
5 Immortals
10 Necron Warriors
10 Necron Warriors
3 Tomb Blades- Shadowloom, Shield Vanes, Twin-linked Gauss Blasters
Monolith
Doom Scythe
Canoptek Harvest
Canoptek Spyder
3 Scarabs
3 Wraiths- Two Transdimensional Beamers, Whip Coils
Destroyer Cult
Destroyer Lord- The Gauntlet of Conflagrator, Mindshackle Scarabs, Phylactery, Resurrection Orb, Warscythe
3 Destroyers
3 Destroyers
3 Destroyers
A Decurion is always a tough match up, they are very hard to kill and there are lots of them. Fortunately, they lack Objective Secured, so my best bet would be to focus on scoring the objectives, killing the Necrons where I could, but sacrificing units if it scored me more points.
We placed the objectives as shown below:

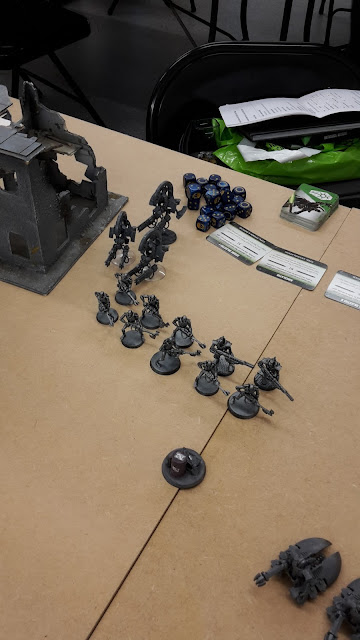
Tom won the roll for deployment and chose to go first. He placed the Canoptek Harvest on his left flank. Next to them went the Monolith, Destroyers, a unit of Warrior and the Lychguard and Immortal. A unit of warriors and the Tomb Blades went to the right flank and he held one unit of Destroyers in reserve.
I deployed the Stalker Boltgun Veterans in the crashed Aquila besides the objective. One unit of Bikers went on each flank, ready to go for the objectives and the Rhino went on my left flank. I kept the rest of the army in reserve to Deep Strike in.


I failed to seize and Tom took the first turn.
TURN 1- NECRONS
In his first turn, Tom drew Objective 1, Objective 6 and Kingslayer (kill the enemy warlord).

The Necrons began their implacable advance on the Deathwatch army, the Wraiths moving up towards the objective and the Destroyers converging on the central objective.


The Necron Warriors opened fire on the Rhino, glancing it once. The Destroyers fired at the Rhino, destroying it. The other Destroyers unit fired at the Veterans in cover, killing one of them. They then used their assault moves to move up and secure the objective, taking a wound in the process.
At the end of his turn, Tom scored First Blood, Objective 1 and Objective 6.
TURN 1- DEATHWATCH
At the start of my first turn, I drew Objective 3, Objective 5 and Blood and Guts (kill an enemy unit in the assault phase).

The Drop Pod crashed to the ground near the centre of the battlefield, the Veterans moving out in their drilled formations to bring their powerful Frag Cannons to bear.
The Librarian picked his way through the cover, moving to the front of the Stalker Boltgun squad. The Bikes advanced on each flank, moving up on the approaching Necrons.


The Librarian attempted to use Magnetokinesis on the Bikers on the right, but failed to manifest the power.
Enacting the Malleus Mission Tactics (Heavy Support re-rolls), Veteran squad 2B targeted the Destroyers on the rock outcrop, killing one and wounding another with their Frag Cannons. The Stalker Veterans added their firepower, wounding another.
Veteran Squad 2A opened fire on the Necron Warriors in front of them, utilising their Frag rounds to cause 16 wounds on the Warriors and felling 7 of them.

The nearby Bikers opened fire on the Tomb Blades, wounding them once. The other unit of Bikers on the right flank fired on the Tomb Spyder. Despite wounding it 7 times, the Necron construct passed all its armour saves and was unharmed.
At the end of my turn, I scored Objective 3 and Objective 5.
VICTORY POINTS:
Necrons- 3
Deathwatch- 2
TURN 2- NECRONS
This turn, Tom drew Reclaim and Capture (hold all the odd numbered objectives) and Age of the Machine (destroy an enemy vehicle) to go with Kingslayer.

The Doom Scythe arrived, moving on the left flank to support the advance of the Wraiths. The Destroyer Lord split off from the Destroyers, moving towards the Deathwatch. The two Destroyers moved out of the rock outcrop, but one died to their dangerous terrain test. The Tomb Blades and rest of the Necron forces moved towards the newly arrived Deathwatch.


The Doom Scythe opened fire on the Bikers, wounding them once, but failing to get past their armour. The Tomb Spyder and Wraiths opened fire on the Bikers, killing one of the squad. The survivors failed their morale test, falling back out of range of the Necrons. This was a good result for me as it put them out of assault range.

The Monolith opened fire on the sniper squad, but the shot scattered off the squad, causing no damage. The Destroyers fired on the same squad, wounding them three times. Fortunately, the cover saved the Deathwatch from harm. The Immortals added their firepower to the barrage, this time they succeeded in killing the Librarian and one of the squad.
The Necron Warriors fired on the the Deathwatch in front of them, wounding them 5 times. Two of the Marines fell to the firestorm. The remainder of the second squad fired at the Deathwatch, but failed to slay any.
The Tomb Blades opened fire on the Bikers, but failed to cause any harm.

The Destroyer Lord assaulted the second Deathwatch Squad, taking a wound from their overwatch fire. The Deathwatch struck at the Lord, wounding him once but the blow bounded off the armour. In reply, the Lord cut down two of the Marines. The Deathwatch failed their morale test and fled from the combat.
At the end of his turn, Tom scored no points and discarded Age of the Machine.
TURN 2- DEATHWATCH
This turn, I drew Objective 4, Objective 5 and had Blood and Guts.

The Deathwatch forces arrived en masse, the Dominatus Kill Team and Aquila Kill Team arriving beside the Locator Beacon on the Drop Pod. One squad of Bikers advanced on the Tomb Blades, while the other moved up on the Wraiths. (Note- I also passed the reserve roll for the Corvus Blackstar, but completely forgot to deploy it this turn!).


The lone Deathwatch Frag Cannon and Aquila Kill Team opened fire on the Destroyer Lord. Despite activating his Resurrection Orb, the Necron was killed in the punishing crossfire.
The Dominatus Team fired on the lone Destroyer, finishing it off. The Bikers fired at the Tomb Blades, killing one of the squad. The Deathwatch squad fired at the Necron Warriors, killing two and leaving one remaining.

On the other flank, the Bikers and Sniper squad fired at the Wraiths, wounding them three times.
The Deathwatch then launched their assaults. I was hoping to take out three units this turn and score extra points for Blood and Guts.
The Bikers assaulted the Wraiths, their hammer of wrath attacks killing one of the squad. The Deathwatch struck at the Wriaths, only scoring two hits with their 9 attacks! They managed to cause one wound, which was saved. The Wraiths hit back at the Bikers, killing one of the squad and drawing the combat.


The Veterans assaulted the lone warrior, easily slaying him. The other squad of Bikers assaulted the Tomb Blades. The Bikers struck at the Tomb Blades, but all their wounds were saved by the Reanimation rolls of the Necrons. The Power Axe then struck, but failed to score a single hit. The combat was drawn as well.

 That did not go as planned. I know taking out all three units was a long shot, but I thought the Tomb Blades would fall quite easily. At the end of my turn, I scored Objective 5 and Blood and Guts. I discarded Objective 4.
VICTORY POINTS:
Necrons- 3
Deathwatch- 5
At the end of the second turn, this were still quite close. I was slightly ahead on points and had taken out some of the Necrons. The bulk of Tom's army was advancing though and the next turn would be interesting.
TURN 3- NECRONS
This turn, Tom drew Objective 3 to go with Kingslayer and Reclaim and Capture.

The Doom Scythe zoomed over the forest canopy, moving to engage the Deathwatch in the rubble, supported by the Destroyers as they also advanced. The Tomb Spyder and Scarab moved to engage the Bikers in combat with the Wraiths.
The Destroyers arrived, moving on the right flank. The rest of the Necron Warriors advanced on the Watch Master's squad.


The Doom Scythe fired at the Stalker unit, killing one of them. The Immortals and Destroyers fired at the squad, killing another one and leaving one survivor left.
The Necron Warriors fired on the Dominatus Kill Team, causing 10 wounds with their massed firepower. The Watch Master stopped four of the shots before taking a wound. I chose to look out sir the rest and managed to fail 3 of the five 3+ saves. The Monolith fired at the squad. The shot scattered back, hitting the Watch Master and the Necron Warriors. Two of the Warriors died, but the Watch Master fortunately made his save. The newly arrived Destroyers fired at the unit, killing another one.


In the assault phase, the Tomb Spyder and Scarabs assaulted the Bikers. The Bikers struck at the Wraith, wounding it once. The Wraith managed to take down a Biker in reply, the massed attacks of the Scarabs were enough to finish off the squad.


On the right flank, the Bikers and Tomb Blades struck at one another, but failed to cause any harm, staying locked in combat.
At the end of his turn, Tom scored no points and discarded Reclaim and Capture.
TURN 3- DEATHWATCH
This turn, I drew Objective 2, Objective 6 and Hold the Line (have 3 friendly units and no enemy units within 12" of my board edge). I could score objective 2 this turn, but Hold the Line would be almost impossible to get this turn.

The Corvus Blackstar arrived, moving on the right flank and flying over the Scarabs. The Watch Master used the power of the Dominus Aegis to extract the Bikers from combat, moving them to support the Kill Teams in their advance. The Aquila Team moved towards the Tomb Blades, while the other Deathwatch advanced on the centre.


The Corvus dropped its bomb payload on the Scarabs. The resulting explosion killed the last Wraith and two Scarab bases.
The Corvus Blackstar, Bikers and Deathwatch Squad 2a opened fire on the Lynchguard. The Overlord activated his Resurrection Orb to help the squad. Despite this, two of the squad still fell.
The Aquila Kill Team fired at the Tomb Blades, killing one. The lone survivor failed his morale test and fell back.
The lone Deathwatch Veteran fired his Frag Cannon at the Necron Warriors, killing one. He then assaulted the squad, but was cut down by the overwatch fire. The Watch Master led his unit in an assault on the Necron Warriors.
The Watch Master swung at the Necrons, but only hit with one of his five attacks! He then failed to wound with his one hit (looks like my rolling was back on form!). The Black Shield attacked the Necrons, killing two of the warriors.
The Necrons then struck back, wounding the unit three times. I decided to take the wounds on my Watch Master, then managed to fail two of the three 2+ saves, leaving him on one wound. Finally, the Heavy Thunder Hammers struck, killing two of the Necron Warriors. The Warriors lost the combat, but passed their morale test.

At the end of the turn, I scored Objective 2 and discarded Hold the Line.
VICTORY POINTS:
Necrons- 3
Deathwatch- 6
TURN 4- NECRONS
This turn, Tom drew Supremacy (hold at least 2 objectives and twice as many as your opponent) to go with Objective 3 and Kingslayer.

The Lynchguard advanced on the Watch Master and his unit, while the Destroyers moved up on the objective.


The Monolith fired at the last member of the Stalker Pattern team, killing him. It also opened fire on the Corvus Blackstar, but failed to do any damage. The Destroyers on the right flank opened fire on the Veterans in front of them, killing one. The Doom Scythe fired at the Bikers, wounding them twice, but failing to get past their armour.
In the assault phase, the Lychguard attempted to assault the Dominatus Kill Team, but failed the charge.
The Watch Master, Blackshield and Veteran struck at the Necrons, but failed to cause any damage. The Necrons struck back in reply, but were unable to harm the Deathwatch. The Heavy Thunder Hammers killed two of the Necron Warriors, the lone survivor passing his morale test.
At the end of the turn, Tom scored Objective 3 and two points for Supremacy.
TURN 4- DEATHWATCH
This turn, I drew Scour the Skies (kill an enemy flyer), Kingslayer (kill the enemy warlord) and Objective 6.

The Bikers moved to secure the central objective, while the Deathwatch moved up on the Lynchguard.


The Bikers and two other Deathwatch units opened fire on the Lynchguard, killing one of the squad and wounding the Overlord.
In the assault phase, the Watch Master finally managed to kill the surviving Necron Warrior.
At the end of my turn, I scored Objective 6.
Unfortunately, we ran out of time there. We both scored Linebreaker, making the final scores:
VICTORY POINTS:
Necrons- 7
Deathwatch- 8
A victory for the Deathwatch
AFTER-BATTLE THOUGHTS
Thanks to Tom for a very close and enjoyable game. He was quite unlucky, another turn and he would have won for sure.
The failed charge of the Lynchguard on turn 4 was very fortunate for me and very unlucky for Tom. Had he made the charge, he would most likely have killed the Kill Team and Watch Master, netting him Slay the Warlord and Kingslayer and probably putting him well ahead in points.
Overall, the army performed quite well. The Kill Teams have some nice re-rolls available to them. The Watch Master and his combat unit were awful against the Necron Warriors. It took them three turns of combat to wipe out 10 Necron Warriors, where it should have only taken one or even two.
The Stalker Pattern boltguns were useful, though I keep forgetting that they are Sniper and should wound on a 4+. This will be useful when firing the AP3 shells at Bikers and tougher opponents where the poisoned 2+ shells are not being used.
This was the first time that I have used the Bomb on the Corvus Blackstar. It was actually quite effective against the Scarabs and could be of use in future games.
I am still enjoying the Deathwatch army, they are taking some getting used to and I look forward to more games with them.
Aquila Kill Team
5 Veterans- Infernus Heavy Bolter
Terminator- Heavy Flamer, Auxiliary Meltagun
Dominatus Kill Team
5 Veterans- 2 Heavy Thunder Hammers, Storm Shield and Power Maul, Black Shield with Power Sword
3 Vanguard Veterans- 2 Pairs Lightning Claws, I Heavy Thunder Hammer
Corvus Blackstar- Auspex Array, Hurricane Bolter
Combined Arms Detachment
Librarian- Level 2, Auspex, Meltabombs
10 Veterans- 4 Frag Cannons, 2 Storm Shields and Auspex
Drop Pod- Locator Beacon
5 Veterans- 5 Stalker Pattern Boltguns
Rhino
4 Bikers- 4 Power Weapons
4 Bikers- 4 Power Weapons
My warlord trait was Bane of Monstrosities, giving me re-rolls to wound and AP against Monstrous Creatures, Tanks and Superheavy Vehicles for the Watch Master.
The Librarian rolled on Fulmination, getting Electrosurge, Magnetokinesis and Electropulse.
This time, I split my forces between the Blackspear Strike Force and the CAD. I decided to try the Librarian with the Stalker Boltgun Veterans. The Stalkers and Bikes would deploy first, with the rest of the army coming in via deep strike as the game went on.
Tom's army consisted of:
Necron Decurion
Reclamation Legion
Overlord- Voidreaper, Mindshackle Scarabs, Phylactery, Resurrection Orb, Tachyon Arrow
5 Lynchguard
5 Immortals
10 Necron Warriors
10 Necron Warriors
3 Tomb Blades- Shadowloom, Shield Vanes, Twin-linked Gauss Blasters
Monolith
Doom Scythe
Canoptek Harvest
Canoptek Spyder
3 Scarabs
3 Wraiths- Two Transdimensional Beamers, Whip Coils
Destroyer Cult
Destroyer Lord- The Gauntlet of Conflagrator, Mindshackle Scarabs, Phylactery, Resurrection Orb, Warscythe
3 Destroyers
3 Destroyers
3 Destroyers
A Decurion is always a tough match up, they are very hard to kill and there are lots of them. Fortunately, they lack Objective Secured, so my best bet would be to focus on scoring the objectives, killing the Necrons where I could, but sacrificing units if it scored me more points.
We placed the objectives as shown below:

Tom won the roll for deployment and chose to go first. He placed the Canoptek Harvest on his left flank. Next to them went the Monolith, Destroyers, a unit of Warrior and the Lychguard and Immortal. A unit of warriors and the Tomb Blades went to the right flank and he held one unit of Destroyers in reserve.
I deployed the Stalker Boltgun Veterans in the crashed Aquila besides the objective. One unit of Bikers went on each flank, ready to go for the objectives and the Rhino went on my left flank. I kept the rest of the army in reserve to Deep Strike in.


I failed to seize and Tom took the first turn.
TURN 1- NECRONS
In his first turn, Tom drew Objective 1, Objective 6 and Kingslayer (kill the enemy warlord).

The Necrons began their implacable advance on the Deathwatch army, the Wraiths moving up towards the objective and the Destroyers converging on the central objective.


The Necron Warriors opened fire on the Rhino, glancing it once. The Destroyers fired at the Rhino, destroying it. The other Destroyers unit fired at the Veterans in cover, killing one of them. They then used their assault moves to move up and secure the objective, taking a wound in the process.
At the end of his turn, Tom scored First Blood, Objective 1 and Objective 6.
TURN 1- DEATHWATCH
At the start of my first turn, I drew Objective 3, Objective 5 and Blood and Guts (kill an enemy unit in the assault phase).

The Drop Pod crashed to the ground near the centre of the battlefield, the Veterans moving out in their drilled formations to bring their powerful Frag Cannons to bear.
The Librarian picked his way through the cover, moving to the front of the Stalker Boltgun squad. The Bikes advanced on each flank, moving up on the approaching Necrons.


The Librarian attempted to use Magnetokinesis on the Bikers on the right, but failed to manifest the power.
Enacting the Malleus Mission Tactics (Heavy Support re-rolls), Veteran squad 2B targeted the Destroyers on the rock outcrop, killing one and wounding another with their Frag Cannons. The Stalker Veterans added their firepower, wounding another.
Veteran Squad 2A opened fire on the Necron Warriors in front of them, utilising their Frag rounds to cause 16 wounds on the Warriors and felling 7 of them.

The nearby Bikers opened fire on the Tomb Blades, wounding them once. The other unit of Bikers on the right flank fired on the Tomb Spyder. Despite wounding it 7 times, the Necron construct passed all its armour saves and was unharmed.
At the end of my turn, I scored Objective 3 and Objective 5.
VICTORY POINTS:
Necrons- 3
Deathwatch- 2
TURN 2- NECRONS
This turn, Tom drew Reclaim and Capture (hold all the odd numbered objectives) and Age of the Machine (destroy an enemy vehicle) to go with Kingslayer.

The Doom Scythe arrived, moving on the left flank to support the advance of the Wraiths. The Destroyer Lord split off from the Destroyers, moving towards the Deathwatch. The two Destroyers moved out of the rock outcrop, but one died to their dangerous terrain test. The Tomb Blades and rest of the Necron forces moved towards the newly arrived Deathwatch.


The Doom Scythe opened fire on the Bikers, wounding them once, but failing to get past their armour. The Tomb Spyder and Wraiths opened fire on the Bikers, killing one of the squad. The survivors failed their morale test, falling back out of range of the Necrons. This was a good result for me as it put them out of assault range.

The Monolith opened fire on the sniper squad, but the shot scattered off the squad, causing no damage. The Destroyers fired on the same squad, wounding them three times. Fortunately, the cover saved the Deathwatch from harm. The Immortals added their firepower to the barrage, this time they succeeded in killing the Librarian and one of the squad.
The Necron Warriors fired on the the Deathwatch in front of them, wounding them 5 times. Two of the Marines fell to the firestorm. The remainder of the second squad fired at the Deathwatch, but failed to slay any.
The Tomb Blades opened fire on the Bikers, but failed to cause any harm.

The Destroyer Lord assaulted the second Deathwatch Squad, taking a wound from their overwatch fire. The Deathwatch struck at the Lord, wounding him once but the blow bounded off the armour. In reply, the Lord cut down two of the Marines. The Deathwatch failed their morale test and fled from the combat.
At the end of his turn, Tom scored no points and discarded Age of the Machine.
TURN 2- DEATHWATCH
This turn, I drew Objective 4, Objective 5 and had Blood and Guts.

The Deathwatch forces arrived en masse, the Dominatus Kill Team and Aquila Kill Team arriving beside the Locator Beacon on the Drop Pod. One squad of Bikers advanced on the Tomb Blades, while the other moved up on the Wraiths. (Note- I also passed the reserve roll for the Corvus Blackstar, but completely forgot to deploy it this turn!).


The lone Deathwatch Frag Cannon and Aquila Kill Team opened fire on the Destroyer Lord. Despite activating his Resurrection Orb, the Necron was killed in the punishing crossfire.
The Dominatus Team fired on the lone Destroyer, finishing it off. The Bikers fired at the Tomb Blades, killing one of the squad. The Deathwatch squad fired at the Necron Warriors, killing two and leaving one remaining.

On the other flank, the Bikers and Sniper squad fired at the Wraiths, wounding them three times.
The Deathwatch then launched their assaults. I was hoping to take out three units this turn and score extra points for Blood and Guts.
The Bikers assaulted the Wraiths, their hammer of wrath attacks killing one of the squad. The Deathwatch struck at the Wriaths, only scoring two hits with their 9 attacks! They managed to cause one wound, which was saved. The Wraiths hit back at the Bikers, killing one of the squad and drawing the combat.


The Veterans assaulted the lone warrior, easily slaying him. The other squad of Bikers assaulted the Tomb Blades. The Bikers struck at the Tomb Blades, but all their wounds were saved by the Reanimation rolls of the Necrons. The Power Axe then struck, but failed to score a single hit. The combat was drawn as well.


VICTORY POINTS:
Necrons- 3
Deathwatch- 5
At the end of the second turn, this were still quite close. I was slightly ahead on points and had taken out some of the Necrons. The bulk of Tom's army was advancing though and the next turn would be interesting.
TURN 3- NECRONS
This turn, Tom drew Objective 3 to go with Kingslayer and Reclaim and Capture.

The Doom Scythe zoomed over the forest canopy, moving to engage the Deathwatch in the rubble, supported by the Destroyers as they also advanced. The Tomb Spyder and Scarab moved to engage the Bikers in combat with the Wraiths.
The Destroyers arrived, moving on the right flank. The rest of the Necron Warriors advanced on the Watch Master's squad.


The Doom Scythe fired at the Stalker unit, killing one of them. The Immortals and Destroyers fired at the squad, killing another one and leaving one survivor left.
The Necron Warriors fired on the Dominatus Kill Team, causing 10 wounds with their massed firepower. The Watch Master stopped four of the shots before taking a wound. I chose to look out sir the rest and managed to fail 3 of the five 3+ saves. The Monolith fired at the squad. The shot scattered back, hitting the Watch Master and the Necron Warriors. Two of the Warriors died, but the Watch Master fortunately made his save. The newly arrived Destroyers fired at the unit, killing another one.


In the assault phase, the Tomb Spyder and Scarabs assaulted the Bikers. The Bikers struck at the Wraith, wounding it once. The Wraith managed to take down a Biker in reply, the massed attacks of the Scarabs were enough to finish off the squad.


On the right flank, the Bikers and Tomb Blades struck at one another, but failed to cause any harm, staying locked in combat.
At the end of his turn, Tom scored no points and discarded Reclaim and Capture.
TURN 3- DEATHWATCH
This turn, I drew Objective 2, Objective 6 and Hold the Line (have 3 friendly units and no enemy units within 12" of my board edge). I could score objective 2 this turn, but Hold the Line would be almost impossible to get this turn.

The Corvus Blackstar arrived, moving on the right flank and flying over the Scarabs. The Watch Master used the power of the Dominus Aegis to extract the Bikers from combat, moving them to support the Kill Teams in their advance. The Aquila Team moved towards the Tomb Blades, while the other Deathwatch advanced on the centre.


The Corvus dropped its bomb payload on the Scarabs. The resulting explosion killed the last Wraith and two Scarab bases.
The Corvus Blackstar, Bikers and Deathwatch Squad 2a opened fire on the Lynchguard. The Overlord activated his Resurrection Orb to help the squad. Despite this, two of the squad still fell.
The Aquila Kill Team fired at the Tomb Blades, killing one. The lone survivor failed his morale test and fell back.
The lone Deathwatch Veteran fired his Frag Cannon at the Necron Warriors, killing one. He then assaulted the squad, but was cut down by the overwatch fire. The Watch Master led his unit in an assault on the Necron Warriors.
The Watch Master swung at the Necrons, but only hit with one of his five attacks! He then failed to wound with his one hit (looks like my rolling was back on form!). The Black Shield attacked the Necrons, killing two of the warriors.
The Necrons then struck back, wounding the unit three times. I decided to take the wounds on my Watch Master, then managed to fail two of the three 2+ saves, leaving him on one wound. Finally, the Heavy Thunder Hammers struck, killing two of the Necron Warriors. The Warriors lost the combat, but passed their morale test.

At the end of the turn, I scored Objective 2 and discarded Hold the Line.
VICTORY POINTS:
Necrons- 3
Deathwatch- 6
TURN 4- NECRONS
This turn, Tom drew Supremacy (hold at least 2 objectives and twice as many as your opponent) to go with Objective 3 and Kingslayer.

The Lynchguard advanced on the Watch Master and his unit, while the Destroyers moved up on the objective.


The Monolith fired at the last member of the Stalker Pattern team, killing him. It also opened fire on the Corvus Blackstar, but failed to do any damage. The Destroyers on the right flank opened fire on the Veterans in front of them, killing one. The Doom Scythe fired at the Bikers, wounding them twice, but failing to get past their armour.
In the assault phase, the Lychguard attempted to assault the Dominatus Kill Team, but failed the charge.
The Watch Master, Blackshield and Veteran struck at the Necrons, but failed to cause any damage. The Necrons struck back in reply, but were unable to harm the Deathwatch. The Heavy Thunder Hammers killed two of the Necron Warriors, the lone survivor passing his morale test.
At the end of the turn, Tom scored Objective 3 and two points for Supremacy.
TURN 4- DEATHWATCH
This turn, I drew Scour the Skies (kill an enemy flyer), Kingslayer (kill the enemy warlord) and Objective 6.

The Bikers moved to secure the central objective, while the Deathwatch moved up on the Lynchguard.


The Bikers and two other Deathwatch units opened fire on the Lynchguard, killing one of the squad and wounding the Overlord.
In the assault phase, the Watch Master finally managed to kill the surviving Necron Warrior.
At the end of my turn, I scored Objective 6.
Unfortunately, we ran out of time there. We both scored Linebreaker, making the final scores:
VICTORY POINTS:
Necrons- 7
Deathwatch- 8
 |
| End of the game. |
A victory for the Deathwatch
AFTER-BATTLE THOUGHTS
Thanks to Tom for a very close and enjoyable game. He was quite unlucky, another turn and he would have won for sure.
The failed charge of the Lynchguard on turn 4 was very fortunate for me and very unlucky for Tom. Had he made the charge, he would most likely have killed the Kill Team and Watch Master, netting him Slay the Warlord and Kingslayer and probably putting him well ahead in points.
Overall, the army performed quite well. The Kill Teams have some nice re-rolls available to them. The Watch Master and his combat unit were awful against the Necron Warriors. It took them three turns of combat to wipe out 10 Necron Warriors, where it should have only taken one or even two.
The Stalker Pattern boltguns were useful, though I keep forgetting that they are Sniper and should wound on a 4+. This will be useful when firing the AP3 shells at Bikers and tougher opponents where the poisoned 2+ shells are not being used.
This was the first time that I have used the Bomb on the Corvus Blackstar. It was actually quite effective against the Scarabs and could be of use in future games.
I am still enjoying the Deathwatch army, they are taking some getting used to and I look forward to more games with them.
Hello I love your reports. Could you possibly show the exact point valves for every unit in your Deathwatch army, thank you.
ReplyDelete