
Welcome to my battle report for game 2 of Rapid Fire 2015. The last post gave an overview of the tournament and my report for game 1, where my White Scars took on an Ork army.
The second game of the Saturday saw the White Scars taking on Duncan's Necron Decurion list on table 6. The mission was Cleanse and Control using Hammer and Anvil deployment. Cleanse and Control is a maelstrom mission, where up to 3 cards are drawn each turn. Having faced a Decurion once before, I knew that they were extremely durable, but lacked objective secured, so I would have some advantages in a maelstrom mission (namely my mobility and objective secured). It was a lovely looking army, so was sure to be a great looking game regardless of how it went.

As a reminder, my list consisted of:
Kor'sarro Khan- Moondrakken (with CS)
Librarian- Mastery Level 2, Auspex, Meltabombs, Force Sword, Bolt Pistol (with C)
5 Command Squad- Mounted on bikes, 4 grav guns, 2 storm shields, Apothecary (CS)
5 Bikers- 2 Grav guns, sergeant has meltabombs (GB1)
5 Bikers- 2 Grav guns, sergeant has meltabombs (GB2)
5 Bikers- 2 Meltaguns, sergeant has meltabombs (MB)
10 Tactical marines- Meltagun, sergeant has combi-melta and meltabombs (TS1 and TS2)
Drop Pod- Storm Bolter (DP2)
5 Scouts- Bolt pistols, close combat weapons, sergeant has meltabombs (Sc)
Landspeeder Storm- Heavy Bolter, Cerberus Missile launcher (LS)
Drop Pod- Deathwind missile launcher (DP1)
Stormtalon- TL assault cannons, skyhammer missile launcher (ST)
2 Attack Bikes- Multimeltas (AB)
5 Devastators- 4 Missile Launchers (D)
Rhino- Storm Bolter (R)
3 Centurions- Grav amps and grav cannons, hurricane bolters (C)
Once again, my Librarian ended up with Psychic Shriek and Prescience.
Duncan's army consisted of:
Reclamation Legion
Necron Overlord- Staff of Light, Veil of Darkness (with I)
10 Necron Warriors (W1)
10 Necron Warriors (W2)
5 Immortals (I)
8 Tomb Blades (TB1)
8 Tomb Blades (TB2)
8 Tomb Blades (TB3)
5 Flayed Ones (FO)
Destroyer Cult
Destroyer Lord- Warscythe, Resurrection Orb, Phase Shifter (DL)
5 Destroyers (D1)
3 Destroyers (D2)
3 Destroyers (D3)
3 Heavy Destroyers (HD)
Looks to be quite a solid list, but slow (with the exception of the Tomb Blades). The Hammer and Anvil deployment should help me keep away from the Necron units as much as possible. I was also pleased to see no Wraiths in the list.
It's hard to make a plan for maelstrom missions as you don't know what cards you will get. I would instead focus on trying to score as many cards as possible and not worry too much about killing the enemy (as it is very difficult to do for a Decurion).
We deployed the objectives as shown in the map below.
 |
| Maelstrom objectives and their numbers. |
I won the roll for table side and chose the side with three objectives in my deployment zone and one close by. I also won the roll for deployment and chose to go first, hoping to rack up some points before my units started getting destroyed.
I deployed the Devastators beside an objective behind the woods, with the Landspeeder beside them. The Rhino went on the other flank beside another objective. The bikes and attack bikes deployed forward, ready to move to seize objectives or get to the enemy deployment zone. I kept one unit of grav bikers in reserve to Outflank later in the game.
Duncan deployed the Destroyers and Tomb Blades far forward. One unit of Necron Warriors went on the hill, the other behind some ruins on an objective. Another unit of Tomb Blades and Destroyers went in a second line of advance. The Flayed ones infiltrated forward into some ruins outside the deployment zone.
 |
| Deployment. |


For Draw Blood, I chose the unit of Warriors on the hill and Duncan chose the grav bikers on the board. He failed to seize and I got the first turn.
TURN 1- WHITE SCARS
 |
| Turn 1- White Scars. |
On turn 1, I drew Objective 1, objective 6 and Hold the Line (Have 3 scoring units and no enemy units in my deployment zone). Objective 1 was close enough to grab, but objective 6 was deep in enemy territory. Hold the Line would be easy to achieve.
The centurion drop pod arrived, landing in front of the enemy lines beside objective 5, the Centurions moved out into the cover of the woods. I hoped the pod could contest the objective to make it harder to score and that the centurions would hold up the Necrons for a turn or two. The grav gun bikers advanced on objective 1, the Attack Bikes covering their advance from the ruins. The other two biker units moved up to engage the enemy at long range.


In the psychic phase, the Librarian managed to cast Prescience on the Centurions. They then opened fire on the Destroyer unit in front of them. The grav cannons caused 13 wounds, two of which got past the re-animation rolls and were taken on the Destroyer Lord. The hurricane bolters caused 5 wounds, but they were all saved.
The grav bikers fired at the Tomb Blades, the grav guns failed to damage, but their bolters killed one of the Jetbikes. The Command Squad fired their grav guns at the Flayed Ones, killing two of the squad.
The Attack Bikes fired at the Destroyers, their one wound saved by the cover. The Devastators then launched 4 frag missiles at the Destroyers. Despite causing 12 wounds, not a single Necron fell thanks to armour saves and re-animation saves.
I scored Objective 1 and Hold the line, then discarded objective 6.
TURN 1- NECRONS
Duncan drew Objective 2, Objective 6 and Big Game Hunter.
The Necrons advanced, many units clustering around the newly arrived centurions. The rest of the army moved up to face the bikers.


In the shooting phase, a unit of Tomb Blades targeted the closest bike unit, causing 8 wounds and killing two bikers. A unit of Destroyers followed up, causing three wounds that the Jinking unit saved. Two more units of Destroyers focused their firepower on the grav bikers and wiped them out.


A unit of Tomb Blades and Destroyers targeted the Centurions for destruction. The White Scars went to ground to increase their cover save, so only took one wound from the enemy firepower.
The final unit of Destroyers fired at the Command Squad, killing one despite their Jinking. The Necron warriors targeted the drop pod, but were unable to harm the enemy vehicle.

In the assault phase, the Destroyer Lord led a unit of Destroyers and Tomb Blades in an assault on the Centurion. The Librarian struck at the Tomb Blades, slaying one. The Centurions caused a wound, but it was saved by the Tomb Blade's armour. The Necrons struck back, killing two Centurions and leaving one on one wound. The final Centurion and Librarian Hit and Ran out of combat, hoping to clear some distance between themselves and the Necrons.

Duncan scored Objective 6 this turn.
VICTORY POINTS:
White Scars- 2
Necrons- 1 (+ Draw Blood)
A decent turn for me, I was slightly ahead on points, but had lost a unit in the process. Surprisingly, the Centurions were still alive after turn 1.
TURN 2- WHITE SCARS
This turn, I drew Objective 3, Objective 1 and Psychological Warfare (make the enemy fail a morale, pinning or Fear test). I could easily claim the two objectives, but would be hard pressed to cause enough casualties to force a morale check, never mind the slim chance they would fail one.
The second drop pod arrived, crashing to the ground beside objective 1 and disgorging the two tactical squads, the Stormtalon arriving to cover their deployment. The Attack Bikes advanced on the Tomb Blades on my left, while Khan led the Command Squad and Meltagun bikers back towards my board edge.


The Librarian cast psychic shriek on the Destroyers, periling in the process and taking a wound. The witchfire power hit and I rolled for the result- a triple one! No damage to the unit (not even grots would be wounded by that). He then failed to cast Prescience on the Centurions.
The drop pod fired its Deathwind launcher at the Tomb Blades. The blast caused 5 wounds, but they were all saved. The newly arrived tactical squads fired at the tomb blades, killing two of the enemy jetbikes. The Centurion added his firepower, causing no wounds, but forcing the unit to Jink. The Stormtalon added its firepower, killing another two Necrons.
The Attack Bikes fired at the Tomb Blades in the wood, causing two wounds that were saved by cover. The Devastators fired their Krak missiles at a Destroyer unit, but all four wounds were saved by cover.
The attack bikes assaulted the Tomb Blades in the forest. The overwatch fire proved brutal, killing one bike before they reached the enemy. The surviving bikers struck at the Necrons, but neither side could cause any damage and both units remained locked in combat.
I scored objectives 3 and 4 and discarded Psychological Warfare.
TURN 2- NECRONS
This turn, Duncan drew Objective 1 and retained Objective 2 and Big Game Hunter from last turn.
The Necron units continued to advance, moving towards my deployment zone and circling the drop pods and tactical marines. The Necron Overlord activated Veil of Darkness and teleported towards my deployment zone, landing in the forest just outside it (Duncan forgot to do this in the movement phase, remembering half way through the shooting phase, but I had no objections to him doing it late).


On the left flank, the Destroyers fired at the Centurions, their one wound being saved by the cover.
A unit of Destroyers targeted the closest tactical squad, slaying three of the enemy warriors. A unit of Tomb Blades snap fired at the same unit, killing one more. Two more units of Destroyers fired at the further away tactical squad. Despite going to ground, three marines died from their combined firepower.


A unit of Tomb Blades fired at the Stormtalon, but were unable to damage the flyer.
Both units of Necron Warriors targeted the nearest Drop pod, but could not damage the White Scars vehicle. The Immortals targeted the Command squad but were unable to kill any of the elite warriors.
In the combat, the attack bike failed to wound any of the Tomb Blades and took one wound in return. The attack bike passed its morale check and managed to Hit and Run out of combat.
At the end of turn 2, Duncan did not score any maelstrom points.
VICTORY POINTS:
White Scars- 4
Necrons- 1 (+ Draw Blood)
A good turn for me, I managed to score a few more victory points and did not lose any units.
TURN 3- WHITE SCARS
This turn, I drew Objective 1, Objective 5 and Assassinate (kill an enemy character). One drop pod currently controlled objective 5 and I also had a unit on objective 1, I would just need to see if I could kill a character.
The second grav bike unit Outflanked on my right, moving to engage the Necron Warriors.

The Command Squad and Meltagun squad advanced on the Immortals and Overlord, the skilled riders weaving their way through the forest.

The attack bike and lone tactical marine moved towards the Necron deployment zone. The Librarian and Centurion retreated towards the White Scars deployment zone.

The Librarian cast Prescience on the Command Squad. He then followed up by casting Psychic Shriek on the Immortals and succeeded in killing one.
In the shooting phase, one half of the board targeted the Immortals. The Command squad managed to kill one of the Immortals, while the combined firepower of the Landspeeder storm, meltagun bike unit and devastators accounted for another 4 dead Immortals.

On the other side of the board, the newly arrived grav bike squad managed to kill 5 of the Necron warriors.
In the assault phase, the command squad charged the last Immortal and Overlord. The hammer of wrath attacks slew the last Immortal and the Command Squad cut down the Overlord, gaining slay the Warlord.
At the end of my turn, I scored all three points for my maelstrom cards.
TURN 3- NECRONS
Duncan still held Objective 1, Objective 2 and Big Game Hunter from last turn.
The Necrons split their attention between the two end of the board. Several Destroyer and Tomb Blade units moved to engage the Command Squad. Several other units moved to engage the White Scars scattered around the board.


One unit of Tomb Blades fired at the Command squad, causing two wounds and two dead Veterans. The unit of 5 Destroyers fired at the unit, killing the Apothecary. Another unit of Tomb Blades and unit of Destroyers fired at the Command squad, wiping the unit out.

A third unit of Destroyers fired at the tactical marine's drop pod, causing a hull point worth of damage. The final Destroyer unit fired at the Centurion and Librarian, wiping the unit out.
On the other side of the board, the Necron Warriors fired at the attack bike, taking his final wound and wiping out the unit. The Tomb Blade unit fired at the grav bike squad, killing three of them. The second Warrior unit fired at the Stormtalon, but the Jinking flyer suffered no damage.
In the assault phase, the Destroyer Lord charged the damaged drop pod, easily destroying it.

With that, Duncan scored all three points for his cards this turn.
VICTORY POINTS:
White Scars- 7 (+Slay the Warlord)
Necrons- 4 (+ Draw Blood and Slay the Warlord)
A mixed turn for me, I had scored full points again an managed to kill the enemy warlord, but Duncan had also scored full points and had destroyed a serious chunk of my army in the process.
TURN 4- WHITE SCARS
This turn, I drew Overwhelming Firepower (destroy an enemy unit with shooting), No Prisoners (destroy an enemy unit) and Hungry for Glory (issue a challenge). This could be achievable, by wiping out an enemy unit in the shooting phase, I could score two points. I planned to sacrifice the Scouts to issue a challenge this turn and gain the final point.
The remnants of the meltagun bike unit moved to engage the Flayed Ones, while the Landspeeder storm moved alongside them and the Scouts moved out to engage the Destroyer Lord.
The Stormtalon went into hover mode and moved towards the board edge, turning to fire upon the Necron Warriors. The grav bikers and tactical marine moved to engage the Warriors too.
The meltagun bikers fired at the Flayed Ones, killing the two remaining squad members.
In the assault phase, the Scouts assaulted the Destroyer Lord, the Sergeant issuing a challenge. Amazingly, the Scouts were able to strike the Destroyer Lord down in combat and consolidated into the nearby ruins.
The grav bikers and tactical marine assaulted the Necron warriors, the tactical marine being slain by overwatch fire. The bikers crashed into combat with the Necrons, but neither side could cause any damage, resulting in a drawn combat.
At the end of the turn, I scored all three cards once again.
TURN 4- NECRONS
In this turn, Duncan drew Objective 5, Objective 5 and Scour the Skies.
Once again, the Necrons moved to engage the few remaining White Scars units. Destroyers moved towards the Devastators, Tomb Blades towards the Stormtalon and Tomb Blades towards the last drop pod.


In the shooting phase, the unengaged Warrior unit fired at the Landspeeder storm, stripping a hull point from the Jinking flyer. A Tomb Blade unit finished the job, wrecking the skimmer.
Another unit of Tomb Blades fired at the Stormtalon, easily wrecking the enemy flyer (I forgot the Tomb Blades ignored cover saves when I went in to hover mode).
A Destroyer unit fired at the Drop pod, wrecking the enemy vehicle and claiming objective 5. A unit of Destroyers and Tomb Blades targeted the meltagun bikers, wiping the unit out despite their Jinking.
In the White Scars deployment zone, a unit of Destroyers fired at the Devastators, killing two. The survivors broke, fleeing the battlefield.
In the combat phase, the bikers and Warriors struck at one another, each unit losing one member. With that, the game was over as we ran out of time. Duncan scored all three points for his card this turn.
The final score was:
VICTORY POINTS:
White Scars- 10 (+ Slay the Warlord and Linebreaker)
Necrons- 7 (+ Draw Blood, Slay the Warlord and Linebreaker)
This score gave me 12 Tournament points for Duncan's 8 Tournament points.
AFTER-BATTLE THOUGHTS
Thanks to Duncan for such a tense and interesting game, towards the end I thought I was in serious risk of being tabled (I had 8 models left at the end of the game).
Overall, my few plans for the game worked well. I think that using the Centurions and the Tactical squad as speed bumps to delay the Necron army worked well. I think it allowed me to score the required objective markers on my side of the board and to claim some objectives with the drop pods. Keeping a bike unit in reserve was also useful, allowing me to claim linebreaker late in the game (they most likely would have been wiped out had they deployed at the start of the game).
I was really surprised when the Scouts took out the Destroyer Lord. I was fully expecting to lose the combat, but I only really needed to issue the challenge to score the point that turn.
Objective secured was also crucial in this game as it allowed me to deny Duncan some scoring opportunities. The game was pretty brutal for the Scars, with very few models surviving, but it was worth sacrificing them to gain points in the mission. The cards were on my side in this scenario, as I was able to score all but 2 of them over the course of the game.
I was really happy with two wins so far, especially in this game as my army tends to struggle against Necrons. The next post will detail my battle report of the last game of the Saturday, where my White Scars take on an Eldar army.
The centurion drop pod arrived, landing in front of the enemy lines beside objective 5, the Centurions moved out into the cover of the woods. I hoped the pod could contest the objective to make it harder to score and that the centurions would hold up the Necrons for a turn or two. The grav gun bikers advanced on objective 1, the Attack Bikes covering their advance from the ruins. The other two biker units moved up to engage the enemy at long range.


In the psychic phase, the Librarian managed to cast Prescience on the Centurions. They then opened fire on the Destroyer unit in front of them. The grav cannons caused 13 wounds, two of which got past the re-animation rolls and were taken on the Destroyer Lord. The hurricane bolters caused 5 wounds, but they were all saved.
The grav bikers fired at the Tomb Blades, the grav guns failed to damage, but their bolters killed one of the Jetbikes. The Command Squad fired their grav guns at the Flayed Ones, killing two of the squad.
The Attack Bikes fired at the Destroyers, their one wound saved by the cover. The Devastators then launched 4 frag missiles at the Destroyers. Despite causing 12 wounds, not a single Necron fell thanks to armour saves and re-animation saves.
I scored Objective 1 and Hold the line, then discarded objective 6.
TURN 1- NECRONS
 |
| Turn 1- Necrons. |
Duncan drew Objective 2, Objective 6 and Big Game Hunter.
The Necrons advanced, many units clustering around the newly arrived centurions. The rest of the army moved up to face the bikers.


In the shooting phase, a unit of Tomb Blades targeted the closest bike unit, causing 8 wounds and killing two bikers. A unit of Destroyers followed up, causing three wounds that the Jinking unit saved. Two more units of Destroyers focused their firepower on the grav bikers and wiped them out.


A unit of Tomb Blades and Destroyers targeted the Centurions for destruction. The White Scars went to ground to increase their cover save, so only took one wound from the enemy firepower.
 |
| The grav bikers are eliminated. |
The final unit of Destroyers fired at the Command Squad, killing one despite their Jinking. The Necron warriors targeted the drop pod, but were unable to harm the enemy vehicle.

In the assault phase, the Destroyer Lord led a unit of Destroyers and Tomb Blades in an assault on the Centurion. The Librarian struck at the Tomb Blades, slaying one. The Centurions caused a wound, but it was saved by the Tomb Blade's armour. The Necrons struck back, killing two Centurions and leaving one on one wound. The final Centurion and Librarian Hit and Ran out of combat, hoping to clear some distance between themselves and the Necrons.

Duncan scored Objective 6 this turn.
VICTORY POINTS:
White Scars- 2
Necrons- 1 (+ Draw Blood)
A decent turn for me, I was slightly ahead on points, but had lost a unit in the process. Surprisingly, the Centurions were still alive after turn 1.
TURN 2- WHITE SCARS
 |
| Turn 2- White Scars. |
This turn, I drew Objective 3, Objective 1 and Psychological Warfare (make the enemy fail a morale, pinning or Fear test). I could easily claim the two objectives, but would be hard pressed to cause enough casualties to force a morale check, never mind the slim chance they would fail one.
The second drop pod arrived, crashing to the ground beside objective 1 and disgorging the two tactical squads, the Stormtalon arriving to cover their deployment. The Attack Bikes advanced on the Tomb Blades on my left, while Khan led the Command Squad and Meltagun bikers back towards my board edge.

The Librarian cast psychic shriek on the Destroyers, periling in the process and taking a wound. The witchfire power hit and I rolled for the result- a triple one! No damage to the unit (not even grots would be wounded by that). He then failed to cast Prescience on the Centurions.
The drop pod fired its Deathwind launcher at the Tomb Blades. The blast caused 5 wounds, but they were all saved. The newly arrived tactical squads fired at the tomb blades, killing two of the enemy jetbikes. The Centurion added his firepower, causing no wounds, but forcing the unit to Jink. The Stormtalon added its firepower, killing another two Necrons.
The Attack Bikes fired at the Tomb Blades in the wood, causing two wounds that were saved by cover. The Devastators fired their Krak missiles at a Destroyer unit, but all four wounds were saved by cover.
The attack bikes assaulted the Tomb Blades in the forest. The overwatch fire proved brutal, killing one bike before they reached the enemy. The surviving bikers struck at the Necrons, but neither side could cause any damage and both units remained locked in combat.
I scored objectives 3 and 4 and discarded Psychological Warfare.
TURN 2- NECRONS
 |
| Turn 2- Necrons. |
This turn, Duncan drew Objective 1 and retained Objective 2 and Big Game Hunter from last turn.
The Necron units continued to advance, moving towards my deployment zone and circling the drop pods and tactical marines. The Necron Overlord activated Veil of Darkness and teleported towards my deployment zone, landing in the forest just outside it (Duncan forgot to do this in the movement phase, remembering half way through the shooting phase, but I had no objections to him doing it late).


On the left flank, the Destroyers fired at the Centurions, their one wound being saved by the cover.
A unit of Destroyers targeted the closest tactical squad, slaying three of the enemy warriors. A unit of Tomb Blades snap fired at the same unit, killing one more. Two more units of Destroyers fired at the further away tactical squad. Despite going to ground, three marines died from their combined firepower.


A unit of Tomb Blades fired at the Stormtalon, but were unable to damage the flyer.
Both units of Necron Warriors targeted the nearest Drop pod, but could not damage the White Scars vehicle. The Immortals targeted the Command squad but were unable to kill any of the elite warriors.
In the combat, the attack bike failed to wound any of the Tomb Blades and took one wound in return. The attack bike passed its morale check and managed to Hit and Run out of combat.
At the end of turn 2, Duncan did not score any maelstrom points.
VICTORY POINTS:
White Scars- 4
Necrons- 1 (+ Draw Blood)
A good turn for me, I managed to score a few more victory points and did not lose any units.
TURN 3- WHITE SCARS
 |
| Turn 3- White Scars. |
This turn, I drew Objective 1, Objective 5 and Assassinate (kill an enemy character). One drop pod currently controlled objective 5 and I also had a unit on objective 1, I would just need to see if I could kill a character.
The second grav bike unit Outflanked on my right, moving to engage the Necron Warriors.

The Command Squad and Meltagun squad advanced on the Immortals and Overlord, the skilled riders weaving their way through the forest.

The attack bike and lone tactical marine moved towards the Necron deployment zone. The Librarian and Centurion retreated towards the White Scars deployment zone.

The Librarian cast Prescience on the Command Squad. He then followed up by casting Psychic Shriek on the Immortals and succeeded in killing one.
In the shooting phase, one half of the board targeted the Immortals. The Command squad managed to kill one of the Immortals, while the combined firepower of the Landspeeder storm, meltagun bike unit and devastators accounted for another 4 dead Immortals.

On the other side of the board, the newly arrived grav bike squad managed to kill 5 of the Necron warriors.
In the assault phase, the command squad charged the last Immortal and Overlord. The hammer of wrath attacks slew the last Immortal and the Command Squad cut down the Overlord, gaining slay the Warlord.
At the end of my turn, I scored all three points for my maelstrom cards.
TURN 3- NECRONS
 |
| Turn 3- Necrons. |
Duncan still held Objective 1, Objective 2 and Big Game Hunter from last turn.
The Necrons split their attention between the two end of the board. Several Destroyer and Tomb Blade units moved to engage the Command Squad. Several other units moved to engage the White Scars scattered around the board.


One unit of Tomb Blades fired at the Command squad, causing two wounds and two dead Veterans. The unit of 5 Destroyers fired at the unit, killing the Apothecary. Another unit of Tomb Blades and unit of Destroyers fired at the Command squad, wiping the unit out.
 |
| The Command Squad are targeted for elimination. |

A third unit of Destroyers fired at the tactical marine's drop pod, causing a hull point worth of damage. The final Destroyer unit fired at the Centurion and Librarian, wiping the unit out.
On the other side of the board, the Necron Warriors fired at the attack bike, taking his final wound and wiping out the unit. The Tomb Blade unit fired at the grav bike squad, killing three of them. The second Warrior unit fired at the Stormtalon, but the Jinking flyer suffered no damage.
In the assault phase, the Destroyer Lord charged the damaged drop pod, easily destroying it.

With that, Duncan scored all three points for his cards this turn.
VICTORY POINTS:
White Scars- 7 (+Slay the Warlord)
Necrons- 4 (+ Draw Blood and Slay the Warlord)
A mixed turn for me, I had scored full points again an managed to kill the enemy warlord, but Duncan had also scored full points and had destroyed a serious chunk of my army in the process.
TURN 4- WHITE SCARS
 |
| Turn 4- White Scars |
This turn, I drew Overwhelming Firepower (destroy an enemy unit with shooting), No Prisoners (destroy an enemy unit) and Hungry for Glory (issue a challenge). This could be achievable, by wiping out an enemy unit in the shooting phase, I could score two points. I planned to sacrifice the Scouts to issue a challenge this turn and gain the final point.
The remnants of the meltagun bike unit moved to engage the Flayed Ones, while the Landspeeder storm moved alongside them and the Scouts moved out to engage the Destroyer Lord.
The Stormtalon went into hover mode and moved towards the board edge, turning to fire upon the Necron Warriors. The grav bikers and tactical marine moved to engage the Warriors too.
The meltagun bikers fired at the Flayed Ones, killing the two remaining squad members.
In the assault phase, the Scouts assaulted the Destroyer Lord, the Sergeant issuing a challenge. Amazingly, the Scouts were able to strike the Destroyer Lord down in combat and consolidated into the nearby ruins.
 |
| The Scouts are victorious and consolidate to the ruins. |
The grav bikers and tactical marine assaulted the Necron warriors, the tactical marine being slain by overwatch fire. The bikers crashed into combat with the Necrons, but neither side could cause any damage, resulting in a drawn combat.
At the end of the turn, I scored all three cards once again.
TURN 4- NECRONS
 |
| Turn 4- Necrons. |
In this turn, Duncan drew Objective 5, Objective 5 and Scour the Skies.
Once again, the Necrons moved to engage the few remaining White Scars units. Destroyers moved towards the Devastators, Tomb Blades towards the Stormtalon and Tomb Blades towards the last drop pod.


In the shooting phase, the unengaged Warrior unit fired at the Landspeeder storm, stripping a hull point from the Jinking flyer. A Tomb Blade unit finished the job, wrecking the skimmer.
Another unit of Tomb Blades fired at the Stormtalon, easily wrecking the enemy flyer (I forgot the Tomb Blades ignored cover saves when I went in to hover mode).
A Destroyer unit fired at the Drop pod, wrecking the enemy vehicle and claiming objective 5. A unit of Destroyers and Tomb Blades targeted the meltagun bikers, wiping the unit out despite their Jinking.
In the White Scars deployment zone, a unit of Destroyers fired at the Devastators, killing two. The survivors broke, fleeing the battlefield.
In the combat phase, the bikers and Warriors struck at one another, each unit losing one member. With that, the game was over as we ran out of time. Duncan scored all three points for his card this turn.
 |
| Units left at the end of the game. |
VICTORY POINTS:
White Scars- 10 (+ Slay the Warlord and Linebreaker)
Necrons- 7 (+ Draw Blood, Slay the Warlord and Linebreaker)
This score gave me 12 Tournament points for Duncan's 8 Tournament points.
AFTER-BATTLE THOUGHTS
Thanks to Duncan for such a tense and interesting game, towards the end I thought I was in serious risk of being tabled (I had 8 models left at the end of the game).
Overall, my few plans for the game worked well. I think that using the Centurions and the Tactical squad as speed bumps to delay the Necron army worked well. I think it allowed me to score the required objective markers on my side of the board and to claim some objectives with the drop pods. Keeping a bike unit in reserve was also useful, allowing me to claim linebreaker late in the game (they most likely would have been wiped out had they deployed at the start of the game).
I was really surprised when the Scouts took out the Destroyer Lord. I was fully expecting to lose the combat, but I only really needed to issue the challenge to score the point that turn.
Objective secured was also crucial in this game as it allowed me to deny Duncan some scoring opportunities. The game was pretty brutal for the Scars, with very few models surviving, but it was worth sacrificing them to gain points in the mission. The cards were on my side in this scenario, as I was able to score all but 2 of them over the course of the game.
I was really happy with two wins so far, especially in this game as my army tends to struggle against Necrons. The next post will detail my battle report of the last game of the Saturday, where my White Scars take on an Eldar army.
Rapid Fire 2015:
Game 2- White Scars vs Necrons
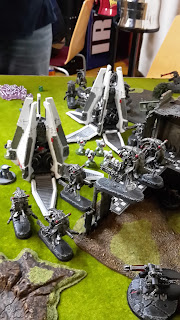
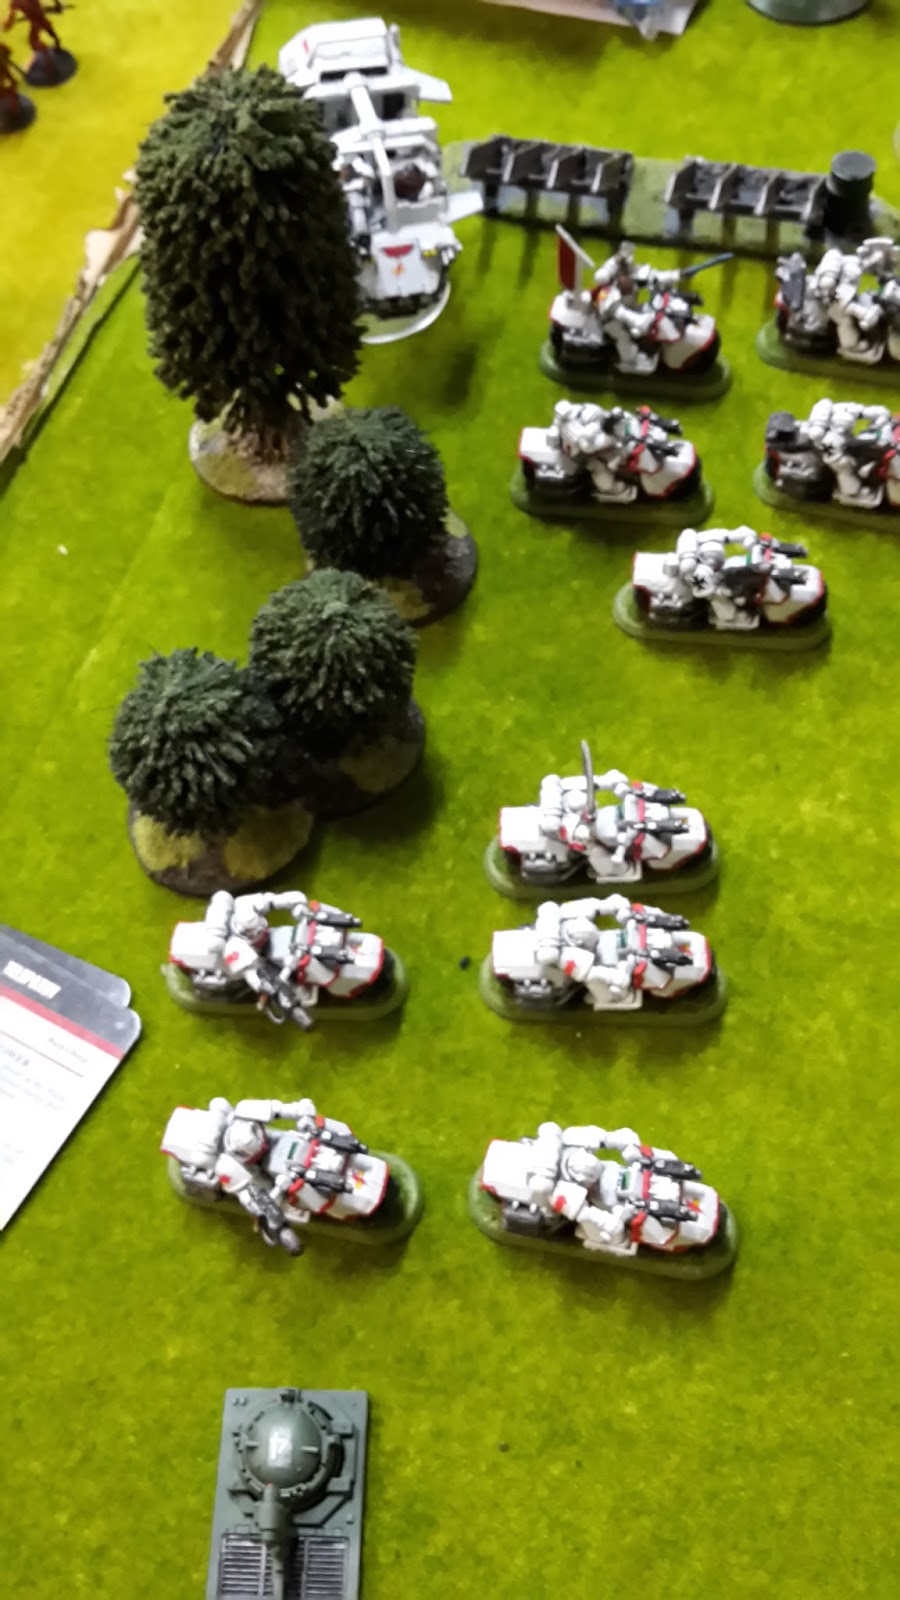
Armies on Display
Hi corrm,
ReplyDeleteJust wanted to comment on the way you present your reports. Initially I was surprised you used rectangles to represent 40k units. However, the fact you have the combination of diagrams and photos makes it a perfect choice. On one hand the reader has a very clear diagram and can assess the overall situation at a glance and on the other the pictures help to see the details.
Really good idea and makes it a very interesting read even for a person who played his last 40k game in 4th edition :)
Thanks a lot and keep up the great work!
Cheers!
Thanks Swordmaster, I originally got the idea of using the maps when I saw them on your blog for your own battle reports, I think I even asked what program you were using (so give yourself a pat on the back too!), I think they add a lot to the report as you say, giving a nice overview of the turn that can be missing from the description and photos.
DeleteI originally looked at using the individual round bases for my battle reports, but it looked far too messy when I was finished. Far too many circles on the map and little indication of what each unit was, it just became a convoluted mess. I think the squares work much better, keeps the unit together and gives a nice military map-type feel.
Enjoying your own reports at the moment too, particularly your thoughts on Kings of War and efforts to keep fantasy going. I got back into fantasy with the release of End Times and was sad to see it go. Will need to get more games of fantasy in and try Kings of War at some point.
You welcome! I am glad to know my blog was helpful for others, that is fantastic!
DeleteI totally agree about skirmish formation, even in fantasy, where not all the units are like that it may get confusing and messy. So great you can use squares in 40k too. It actually reminds me about real military maps where different formations are still represented by appropriate squares.
But the fact you can also provide pictures shows that what looks neat on the map is real hell and chaos on the battlefield!
I am very happy to know you like the most recent reports and I hope I will be able to provide them on regular basis too. let me know when you are going to give fantasy games, whichever it might be, a go!
Cheers!
Have to agree that the little maps are great... remind me of the old white dwarf battle reports when they were still worth reading.
ReplyDeleteGood luck with the tourney! Very much enjoying your regular battle reports... always a good read.
Cheers Phil.
DeleteWell done! I think I would have marked the Immortals for Draw Blood and gone after them with the Centurions on the drop, tho. Even when First Blood isn't a thing, that kind of jump right off the bat tends to shake a lot of opponents.
ReplyDeleteCheers WestRider! I thought about that, but the way he deployed at the start meant I had nowhere to put the pod that could get near the Immortals in line of sight.
DeleteAh, from the map, it looked like there was more room between them and the board edge to drop in there. I sometimes have trouble with distances if I can't actually see it in person.
DeleteYeah, its hard to get the map to scale sometimes.
DeleteNice report. I'm surprised that you podded the centurions where you did, but then as you say it did work. I read that and was like "no, what are you doing!"
ReplyDeleteBut it seems like it turned out fine.
That was most likely my thoughts when I did it too! I guess I'm just lucky it worked out in the end.
DeleteGreat Report.
ReplyDeleteI love the mix of maps and pictures.
how do you play the objective cards if a card is drawn that is not achievable, such as Necrons drawing the one about manifesting a power.
Thanks, glad you are enjoying them.
DeleteI forgot to add the objective card info. At the tournament it was ruled that an impossible to achieve card could be discarded and re-drawn without penalty. I think that's how most people tend to play it- it's too unfair to be penalised for something that is impossible to achieve.
is that impossible at the beginning of the game or that turn?
Deletee.g. cast power, you could have done it earlier but your lib has now died
This one is trickier to answer. We played impossible for the rest of the game. For example, if my Librarian had died, I could discard 'cast power' if drawn as that would not be possible. However, if my opponent drew "Scour the skies" (destroy an enemy flyer) and my Stormtalon had not yet arrived, he would not be able to re-draw as this could be achieved in subsequent turns when it showed up. If the flyer had already been destroyed, he could re-draw without penalty.
DeleteI have played in tournaments where the "impossibility" of a card is by list at the start of the game. I think this also penalises you as you can kill an enemy psyker, then draw the card and you would be stuck with it even though you had previously achieved it and it was now impossible to achieve. Only a few of the cards are retroactive, for example, Kingslayer awards you a point if you have killed the enemy warlord this turn or a previous turn.
I have also played tournaments where you are stuck with impossible cards. That is not much fun as it feels like you can struggle to achieve anything.