
Game 4 was at the start of day 2 of the Warhammer World Grand Tournament (Heat 1). In this game, my Deathwatch and Astra Militarum would be facing off against Jon's Necrons in the Resupply Drop Eternal War mission.

In this mission, at the start of the third turn, a player nominates three objectives and randomly selects one to stay on the table. The other player randomly selects which of the other three stays, so you end up fighting over 2 objectives.

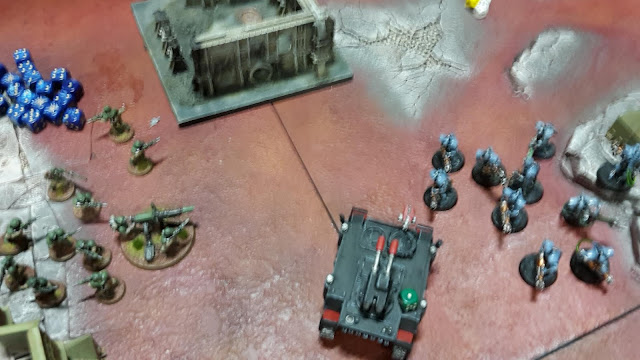
TURN 2- DEATHWATCH/ASTRA MILITARUM

The Kill Team and Watch Master moved into the woods to target the Destroyers. The Frag Cannon Kill Team disembarked from the Rhino, moving up on the Necron Warriors, the Watch Captain moving up behind the Rhino to support them. The Razorback began to move up on the enemy forces. The Infantry squad on the right moved up to get into range of the Destroyers with their rapid fire Lasguns.


The Frag Cannon Kill Team targeted the Necron Warriors, using a Doctrine to wound them on a 2+. The squad did 12 wounds, killing 9 of the Necrons and leaving one remaining. Unfortunately, the Shotguns no longer had line of sight to kill the last surviving warrior.
The Storm Bolter Kill Team fired on the Destroyers with their Hellfire Shells, causing 18 wounds and killing 2 Destroyers.
The Infantry squad fired on the last Necron Warrior, killing him with a Krak grenade from the Grenade Launcher. The Lascannon Team fired at a Destroyer, killing one.


The Watch Master fired at the last Destroyer in the unit, killing him with his Guardian Spear. Fortunately for me, the squad was wiped out and could not return in Jon's next turn.
The Razorback fired on the second Destroyer unit, killing one of the squad. The backfield Infantry Squad fired at them, wounding once, but the Destroyer made its invulnerable save.
In the charge phase, the Watch Master and Kill Team assaulted the Cryptek, the Watch Master easily slaying him in combat.

A good second turn for me. I had taken out a big unit of Necron Warriors and Destroyers, leaving me in a better board position than I thought I would be after my first turn!
TURN 3- NECRONS
At the start of his turn, Jon selected three objectives and rolled to see which one stayed. He rolled up Objective 4 in the forest to the south, right in the heat of the action on the battlefield.

Before his Reanimation Rolls, I used the Overkill stratagem on the Destroyers. None of the Necron machines was able to reanimate this turn.
The Scarabs moved onto the key objective, while the Immortals advanced on the Watch Master and Kill Team. The Destroyers moved up on the Frag Cannon Kill Team, while the Necron Warriors moved towards the objective. The Overlord used My Will Be Done on the Destroyers, as well as the Necron Warriors using a stratagem. This left Jon on 3 command points, while I was on four.


In the shooting phase, the Immortals fired at the Watch Master and Kill Team. The Watch Master took 7 wounds, two of which got through his armour. The Kill Team took 10 wounds and four Veterans fell. The Warriors fired on the last member of the Kill Team, slaying him.
The Cryptek fired at the Watch Master, hitting three times, but failing to wound.
The Destroyers fired at the Frag Cannon Kill Team, doing 8 wounds. I saved 2 wounds on the Storm Shield with one command point re-roll, but the Storm Shield Veteran fell, quickly followed by the rest of the squad. One Destroyer fired at the Rhino, taking four wounds from it.


In the assault phase, the Immortals and Overlord charged the Watch Master.
The Overlord struck at the Watch Master, wounding three times and one getting through his Iron Halo save. The Immortals did one more wound on the Watch Master.

The Deathwatch character struck back, doing three wounds on the Overlord. Jon only passed one save with one command point re-roll. I rolled for the 2D3 wounds and 2 got through to the Overlord.
TURN 3- DEATHWATCH/ASTRA MILITARUM
At the start of my turn, I rolled for the other three objectives and kept Objective 6 in the ruins held by the Infantry squad.

The Combi-Melta Kill Team disembarked from the Razorback to move up on the Destroyers, the Rhino moving up to their right, while the Watch Captain headed straight for the enemy unit. In the backfield, the Conscripts and Company Commander advanced towards the Necron lines.
I was aware that Jon still had the Veil of Darkness to use. I wanted to try and push the forces further away from my objective if he decided to go after it. At the end of the phase, I brought in the Vanguard Veterans and Assassin to the south to go after the objective held by the Scarabs.


In the shooting phase, the Company Commander tried to order the Conscripts to Move, Move, Move, but I failed the roll, even with a command point re-roll. The Company Commander issued the order to himself, moving up to create a buffer between himself and the objective.
In the shooting phase, the Lascannon of the southern Infantry squad fired the Destroyers, hitting and wounding. I rolled a 2 for damage, using a command point re-roll, but rolled a 1! The Lasguns of the squad managed to do another wound, while the Rhino was finally able to take the final wound and slay a Destroyer.
The Assassin and Vanguard Veterans fired on the Scarabs, doing 4 wounds on the unit.


The Meltagun Kill Team fired their Hellfire Bolts at the Destroyers, taking four wounds from the unit. The Meltaguns only did a single wound, which was saved by the Destroyers' invulnerable save.
In the charge phase, the Rhino launched a multi-charge on the Immortals and Destroyers, hoping to soak up the overwatch fire for the Watch Captain. I rolled a double 1 for the charge distance, so used a command point re-roll, but rolled another 1! Fortunately, the transport vehicle made it into combat with the Immortals.
The Watch Captain charged the Destroyers, taking no damage from overwatch. The Combi-Melta Kill Team tried to join him, but failed to make the distance. The Assassin and Vanguard Veterans tried to charge the Scarabs, but could not make the distance either.
The Watch Captain struck at the Destroyers, using a Doctrine so that he would be wounding on a 2+ (and keeping both command points). The Captain managed 3 wounds with one CP re-roll, killing 2 of the Destroyers.
The Rhino did no damage to the Immortals. The Watch Master struck at the Overlord, doing 3 wounds. One got through his invulnerable save, and I rolled a 3 for damage, slaying the Overlord.
The Immortals struck back at the Watch Master, taking him down to a single wound.
At the end of turn 3, things were in the balance. We both held our own objectives, but Jon was ahead with First Blood. My failed charges were tough, as I was hoping to go after the Scarabs and grab the objective from them, forcing Jon to deal with the Vanguard Veterans. As it was, the game was still in the balance.
TURN 4- NECRONS

Despite using the Overkill stratagem once more, two Destroyers returned to the unit in combat with the Watch Captain.
The Destroyers and Immortals fell back from combat, while the backfield Immortals advanced to get into the action (they no longer needed to block my reserves).

The Necron Lord then unleashed the power of the Veil of Darkness, teleporting himself and the Necron Warriors to beside the objective held by the Scarabs.
The Immortals that advanced fired on the Watch Captain. Despite needing a 4+ to hit, Jon scored 15 hits out of 20, wounding the Captain 9 times. I saved all but 2 wounds. The Cryptek fired his Staff of Light at the Captain, wounding him once, but my Storm Shield saved the attack.

The Destroyers opened fire on the Deathwatch Captain, wounding him 6 times. I failed one invulnerable save, but fortunately for me, he only took a single point of damage, leaving him on 2 wounds.
The Necron Warriors fired at the Vanguard Veterans, killing the unit in a volley of Gauss fire.
TURN 4- DEATHWATCH/ASTRA MILITARUM

The Rhino moved down to support the Assassin, as he moved up on the Scarabs. The Watch Master and Watch Captain moved up to engage the Cryptek and Destroyers. The Combi-Melta Kill Team also moved up.
Thinking about the end game, the Infantry squad to the south moved up on the objective, while the Conscripts and Company Commander advanced towards the enemy deployment zone. With Jon having First Blood, I needed Linebreaker to even the score, as we would likely hold one objective each.
The Combi-Melta Squad fired on the Destroyers, wounding them 5 times with their Hellfire Bolts. Jon failed four saves and two Destroyers perished. The Watch Master did 2 wounds on the last Destroyer, while the Watch Captain was able to kill him with a Krak grenade.
The Infantry squad fired their Lasguns at the Necron Warriors, killing four of the squad, the Rhino killing another one.The Lascannon of the Razorback fired at the Immortals, killing one.
The Rhino assaulted the Necron Warriors, taking two wounds from overwatch fire, the Assassin moving in to support the vehicle. The Watch Captain and Watch Master assaulted the Cryptek.
In the fight phase, the Watch Master killed the Cryptek. The Assassin killed one Necron Warrior. The Necrons did no damage in reply.
At the end of turn 4, things were pretty even. It just depended how long the game would go on and whether I could grab Linebreaker.
TURN 5- NECRONS

The Reanimation Protocols brought back one Necron Warrior and one Immortal.
The Warriors fell back from combat, while the Scarabs moved up on the objective. The other Immortal squad moved up on the Deathwatch characters.

The Immortals opened fire on the Combi-Melta Kill Team, wounding them 10 times and obliterating the squad.
The other Immortal squad split their fire between the Watch Master and Watch Captain, killing both characters in a hail of Tesla fire.

The Scarabs charged the Rhino, putting one wound on it for no damage in reply.
TURN 5- DEATHWATCH/ASTRA MILITARUM

The warlord Company Commander led his Infantry Squad towards the objective, while the other Infantry Squad ran after the Conscripts.
The Razorback moved up on the Immortals, while the Rhino fell back from combat with the Scarabs. The Infantry Squad moved into the forest, joined by the Assassin.


In the shooting phase, I used Move, Move, Move to move the Infantry Squad and Company Commander on the objective, while the other Infantry Squad and Company Commander advanced towards the enemy deployment zone.
The Razorback killed one Scarab base, while the Infantry Squad killed two Necron Warriors.
In the charge phase, the Razorback charged the Immortals, while the Infantry Squad and Assassin charged the Scarabs.
The Assassin killed the last of the Scarabs, consolidating into the Necron Warriors. I decided not to sent in the Infantry Squad as well, as I didn't want the Necron Warriors to kill them off the objective.

The Necrons attacked the Assassin, but were unable to harm him.


At the end of my turn, things were looking good. I currently held both objectives, while Jon only had Fist Blood. Plus, Jon only had one Immortal unit that could shoot in his next turn. If the game ended now, I would win.
Jon rolled to see if the game would continue and it did! Where is that final whistle when you need it?!?
TURN 6- NECRONS

The Immortals fell back from combat with the Razorback, while the other Immortal squad moved up on the Infantry Squad holding the objective.


The Necron Warriors stayed locked in combat. If the Infantry squad were killed, they could consolidate towards the objective to secure it in the Fight phase.
The Immortals fired on the Infantry Squad. Jon used his last command point on Solar Pulse to deny my cover save. The Immortals did 16 wounds on the Guardsmen, easily killing the squad.


In the fight phase, the Necrons surrounded the objective and attacked the Assassin, wounding him once. The Culexus was able to kill two more Necron warriors.
TURN 6- DEATHWATCH/ASTRA MILITARUM

The Razorback moved up on one Immortal squad, while the Rhino moved up on another. The Astra Militarum Squads to the north advanced into the enemy deployment zone.

In the charge phase, the Razorback charged one unit of Immortals, while the Rhino charged another. The plan was to stop them firing next turn and stop me from scoring Linebreaker.
We rolled to see if the game ended and it did. The final score was:
VICTORY POINTS:
Necrons- 4 (1 objective and First Blood)
Deathwatch/Astra Militarum- 4 (1 objective and Linebreaker)
Another hard-fought draw.
AFTER-BATTLE THOUGHTS
Thanks to Jon for a fun and very tactical game.
I was so close to stealing the win at the end there! Had the game finished on turn 5, I would have scored the victory, but it went on to turn 6 and the game ended in a draw.
I think bringing the reserves on in turn 1 was a good idea, overall. While they didn't do all that much damage, they did provide Jon with a key target to focus his firepower on. Had I not brought them in, I think Jon would have got a lot of board control, moving to secure all the objectives on his half of the board, and severely limited my ability to deploy the reserves.
I should have probably brought in the Vanguard Veterans as well, but I wasn't sure what objective would remain and wanted to be prepared to deploy them around the board. As it was, they really didn't do much, as they failed their charge against the Scarabs. That seems to be a regular occurrence with the Vanguard Veterans.
The terrain was also a big factor in this game. It severely reduced the sight of my Infantry Squad holding the objective in my deployment zone. This means that much of the time the Lascannon was reduced to killing a single Warrior for several turns.
I was worried that Jon would send the Necron Warriors and Lord after the objective in my deployment zone. With that amount of firepower, my Infantry squad would not hold up for long. I moved my units to block them, but he might have been able to get to it given three turns. Once he had committed the Veil of Darkness, I was able to shuffle my Infantry Squads around to go for Linebreaker, as well as holding the objective.
If he had sent the big unit of Necron Warriors after my objective, I think the Immortals may have been able to do enough to claim the objective to the south. They have a lot of strong firepower, as well as having "objective secured" to steal it from my Assassin and Rhino.
This was a tough game and did go down as one of my favourites. I really wasn't sure which way it was going to go, seriously thinking that I had lost it after a disastrous turn 1.
The game times were as follows:
Deployment- 10 mins
Necron Turn 1- 10 mins
DW Turn 1- 12 mins
Necron Turn 2- 15 mins
DW Turn 2- 13 mins
Necron Turn 3- 15 mins
DW Turn 3- 23 mins
Necron Turn 4- 12 mins
DW Turn 4- 15 mins
Necron Turn 5- 8 mins
DW Turn 5- 10 mins
Necron Turn 6- 12 mins
DW Turn 6- 5 mins
As you can see, a pretty even spread of turn times for the game. So, at the end of game 4, I was on one win, one loss and two draws. A win in the next game would push me ahead for my target for the tournament, only getting one loss.
Warhammer World GT Heat 1
Game 1- Deathwatch/Astra Militarum vs Astra Militarum/Adeptus Custodes/Imperial Knights
Game 2- Deathwatch/Astra Militarum vs Imperial Knights
Game 3- Deathwatch/Astra Militarum vs Deathwatch
Game 4- Deathwatch/Astra Militarum vs Necrons
Game 5- Deathwatch/Astra Militarum vs Astra Militarum

In this mission, at the start of the third turn, a player nominates three objectives and randomly selects one to stay on the table. The other player randomly selects which of the other three stays, so you end up fighting over 2 objectives.
My army consisted of:
Battalion Detachment (Deathwatch)
Watch Master- Guardian Spear (WM)
Watch Captain- Jump Pack, Thunder Hammer, Storm Shield (WC)
Kill Team 1: Watch Sergeant and 9 Veterans- 10 Storm Bolters, 2 Storm Shields, 8 Chainswords (KT1)
Kill Team 2: Intercessor Sergeant and 9 Intercessors- Bolt Rifles, Bolt Pistols, Auxiliary Grenade Launcher (KT2)
Kill Team 3: Watch Sergeant and 4 Veterans- 2 Frag Cannons, Storm Shield, 3 Shotguns, 2 Chainswords (KT3). 5 Vanguard Veterans- 4 Bolt Pistols, 3 Chainswords, Storm Shield, Pair of Lightning Claws (VV)
Rhino- 2 Storm Bolters (R)
Kill Team 4: Watch Sergeant and 4 Veterans- 3 Combi-Meltas, 2 Bolters, Storm Shield, 4 Chainswords (KT4)
Razorback- Twin Lascannons, Storm Bolter (Rz)
Battalion Detachment (Astra Militarum, Cadian)
Company Commander- Plasma Pistol, Chainsword, Grand Strategist Warlord Trait, Kurov's Aquila (CC1)
Company Commander- Laspistol, Chainsword (CC2)
Infantry Squad- Lascannon, Grenade Launcher (IS1)
Infantry Squad- Lascannon, Grenade Launcher (IS2)
Infantry Squad- Lascannon (IS3)
30 Conscripts- Lasguns (C)
Auxiliary Detachment (Assassins)
Culexus Assassin (A)
Jon's army consisted of:
Battalion Detachment (Necrons, Mephrit Dynasty)
Necron Lord- Hyperphase Sword, Veil of Darkness (Relic) (L)
Cryptek- Staff of Light, Chronometron (C1)
Overlord- Hyperphase Sword (O)
20 Necron Warriors- Gauss Flayers (NW1)
19 Necron Warriors- Gauss Flayers (NW2)
10 Immortals- Tesla Carbines (I1)
10 Immortals- Tesla Carbines (I2)
Outrider Detachment (Necrons, Mephrit Dynasty)
Cryptek- Staff of Light, Chronometron (C2)
6 Destroyers- Gauss Cannons (D1)
5 Destroyers- Gauss Cannons (D2)
3 Scarab Swarms (S)
Necrons are a tough prospect in 8th edition. You really need to wipe out a squad when you fire at them, as leaving just one alive can bring back most of the unit with a good round of Resurrection rolls.
The large units of Necron Warriors would be strong if they could get in rapid fire range, going up to -2 AP with each shot, making light of my power armour. The Destroyers were also a tough unit to take on, able to put out a lot of good firepower in the shooting phase.
We set up the objectives as shown below:

We rolled off and got Search and Destroy deployment (table quarters). I got to choose deployment and chose the side with a some good line of sight blocking terrain, as well as the majority of the objectives.

We then deployed our forces. I was conscious of Jon's ability to deep strike a selected unit, so wanted to block off some options for him. I put one Infantry squad in my deployment corner, along with my Warlord Company Commander to make it more difficult to get him. I put one Infantry squad on either flank, near the objectives. I spread the conscripts along my deployment zone to move up on the objectives and block enemy reserves. I put the Razorback towards my table edge to keep it out of range of the enemy guns, with the Rhino further forward behind some cover, with the Jump Pack Watch Captain next to them. I put the rest of my units in reserve, using the Teleportarium stratagem on the usual three units.
Jon deployed the two units of Destroyers and Warriors at the edge of his deployment zone, supported by the Necron characters. He placed the Scarabs behind the Bastion, with one unit of Immortals on the Bastion and another at the back of his deployment zone, presumably to block my reserves from coming in behind his lines.


Jon got the +1 to go first and won the first turn. I also failed to seize the initiative and he took the first turn.
TURN 1- NECRONS

The Scarabs moved around the Bastion towards the objective, while the rest of the forward Necron forces moved towards the enemy lines. The Overlord used My Will Be Done on the warriors on the left.


At the start of the shooting phase, Jon used the Talent for Annihilation stratagem on the Necron Warriors and targeted the Conscripts. I used the Take Cover stratagem, as the Necrons fired, killing 10 of the Guardsmen. Both Destroyers units added their firepower, killing another 18 and reducing the squad to 2 models.
Fortunately for me, no more Necron guns were in range. In the morale phase, I used Insane Bravery to keep the Conscripts alive and deny Jon First Blood.
TURN 1- DEATHWATCH/ASTRA MILITARUM

At the start of my turn, I selected the Fast Attack Mission Tactics to use throughout the game, hoping it would help me deal with the Destroyers.
The Rhino moved up to behind the cover of the containers. I figured with four objectives to the north, there would be a lot of fighting there and wanted the Frag Cannons to get into range. The Watch Captain moved up, using the cover of the Rhino to protect him from the enemy guns. The remaining Conscripts and the Company Commander moved back to the safety of their lines.
I debated whether to bring in my reserves at this point. Normally, I would wait till turn 2 to bring them in better positions. However, I figured that giving Jon another free turn would not be a good idea. He could move his Destroyers and Warriors forward and block off much of the board for me. I decided to strike while the Necrons were all clustered around the centre. Plus, I hoped to steal First Blood from Jon, who would definitely get it in the following turn.

I brought in the Storm Bolter Kill Team, Intercessors and Watch Master at the edge of my deployment zone.
In the shooting phase, the Intercessors opened fire on the Destroyers on my right flank. I had to use the Kraken Bolts due to range, so used the Doctrine to wound them on a 4+. The Primaris Marines only managed 7 wounds on the Destroyers, but I was stunned when Jon made five out of seven 5+ saves! One Destroyer took a couple of wounds only.
The Storm Bolter Veterans fired at the Necron Warriors, causing 28 wounds with their Hellfire Bolts and killing 12 of the squad.
My reserves had arrived in force and struck at the enemy army with a damp sizzle. In all honesty, I thought my tactic to bring in my reserves early had just cost me the game. I had committed the bulk of my reserves and not even destroyed a single enemy unit!
The Infantry Squad fired their Lascannon at the Destroyers, killing one. The Razorback added its firepower, killing one more in the squad. Another Infantry Squad had to target the second unit of Destroyers, killing one of the squad.
With that, my turn ended. A pretty lacklustre affair, with only a handful of casualties being caused to the Necrons. I figured I would struggle to survive for many turns against the return firepower.
TURN 2- NECRONS

Before Jon made his Reanimation Protocols, I used the Overkill stratagem on the Necron Warriors, giving them -1 to the roll. Jon used the Enhanced Reanimation stratagem to re-roll rolls of 1 on the Reanimation and brought back only 2 warriors. One Destroyer from each unit was also brought back. Annoyingly for me, my entire turn had only killed 10 Necron Warriors and 2 Destroyers!
He then used My Will Be Done on the destroyers, using another stratagem to use it on the Necron Warriors as well.
The Scarabs moved up towards the objective, while the Necrons moved up to engage the Deathwatch reserves. The Immortals moved down from the top level of the Bastion.
In the shooting phase, the Destroyers opened fire on the Intercessors with the Extermination Protocols stratagem, wounding them 10 times and killing 9. The Cryptek fired at the lone survivor, but failed to hit.
The Necron Warriors opened fire on the Storm Bolter Kill Team, slaying 5 of the squad.
The Immortals in the Bastion fired at the lone Intercessor, wounding him four times, but he make all his saves and survived.
Finally, the second unit of Destroyers split their fire between the Storm Bolter Kill Team and lone Intercessor. The Primaris Marine was slain to give Jon first blood. The Kill Team took 5 wounds, but the Storm Shield Veteran blocked all 5 wounds after a great round of saves from me.

In the morale phase, I used two command points on Insane Bravery to keep the Storm Bolter Kill Team alive.
That could have been a lot worse for me. Jon did get first blood for wiping out the Intercessors, but by all rights, the Storm Bolter Kill Team should have been slain as well. However, my Storm Shield saves were on fire and blocked the firepower from almost an entire squad of Destroyers. Things were starting to look up for me now.
TURN 2- DEATHWATCH/ASTRA MILITARUM

The Kill Team and Watch Master moved into the woods to target the Destroyers. The Frag Cannon Kill Team disembarked from the Rhino, moving up on the Necron Warriors, the Watch Captain moving up behind the Rhino to support them. The Razorback began to move up on the enemy forces. The Infantry squad on the right moved up to get into range of the Destroyers with their rapid fire Lasguns.


The Frag Cannon Kill Team targeted the Necron Warriors, using a Doctrine to wound them on a 2+. The squad did 12 wounds, killing 9 of the Necrons and leaving one remaining. Unfortunately, the Shotguns no longer had line of sight to kill the last surviving warrior.
The Storm Bolter Kill Team fired on the Destroyers with their Hellfire Shells, causing 18 wounds and killing 2 Destroyers.
The Infantry squad fired on the last Necron Warrior, killing him with a Krak grenade from the Grenade Launcher. The Lascannon Team fired at a Destroyer, killing one.


The Watch Master fired at the last Destroyer in the unit, killing him with his Guardian Spear. Fortunately for me, the squad was wiped out and could not return in Jon's next turn.
The Razorback fired on the second Destroyer unit, killing one of the squad. The backfield Infantry Squad fired at them, wounding once, but the Destroyer made its invulnerable save.
In the charge phase, the Watch Master and Kill Team assaulted the Cryptek, the Watch Master easily slaying him in combat.

A good second turn for me. I had taken out a big unit of Necron Warriors and Destroyers, leaving me in a better board position than I thought I would be after my first turn!
TURN 3- NECRONS
At the start of his turn, Jon selected three objectives and rolled to see which one stayed. He rolled up Objective 4 in the forest to the south, right in the heat of the action on the battlefield.

Before his Reanimation Rolls, I used the Overkill stratagem on the Destroyers. None of the Necron machines was able to reanimate this turn.
The Scarabs moved onto the key objective, while the Immortals advanced on the Watch Master and Kill Team. The Destroyers moved up on the Frag Cannon Kill Team, while the Necron Warriors moved towards the objective. The Overlord used My Will Be Done on the Destroyers, as well as the Necron Warriors using a stratagem. This left Jon on 3 command points, while I was on four.


In the shooting phase, the Immortals fired at the Watch Master and Kill Team. The Watch Master took 7 wounds, two of which got through his armour. The Kill Team took 10 wounds and four Veterans fell. The Warriors fired on the last member of the Kill Team, slaying him.
The Cryptek fired at the Watch Master, hitting three times, but failing to wound.
The Destroyers fired at the Frag Cannon Kill Team, doing 8 wounds. I saved 2 wounds on the Storm Shield with one command point re-roll, but the Storm Shield Veteran fell, quickly followed by the rest of the squad. One Destroyer fired at the Rhino, taking four wounds from it.


In the assault phase, the Immortals and Overlord charged the Watch Master.
The Overlord struck at the Watch Master, wounding three times and one getting through his Iron Halo save. The Immortals did one more wound on the Watch Master.

The Deathwatch character struck back, doing three wounds on the Overlord. Jon only passed one save with one command point re-roll. I rolled for the 2D3 wounds and 2 got through to the Overlord.
TURN 3- DEATHWATCH/ASTRA MILITARUM
At the start of my turn, I rolled for the other three objectives and kept Objective 6 in the ruins held by the Infantry squad.

The Combi-Melta Kill Team disembarked from the Razorback to move up on the Destroyers, the Rhino moving up to their right, while the Watch Captain headed straight for the enemy unit. In the backfield, the Conscripts and Company Commander advanced towards the Necron lines.
I was aware that Jon still had the Veil of Darkness to use. I wanted to try and push the forces further away from my objective if he decided to go after it. At the end of the phase, I brought in the Vanguard Veterans and Assassin to the south to go after the objective held by the Scarabs.


In the shooting phase, the Company Commander tried to order the Conscripts to Move, Move, Move, but I failed the roll, even with a command point re-roll. The Company Commander issued the order to himself, moving up to create a buffer between himself and the objective.
In the shooting phase, the Lascannon of the southern Infantry squad fired the Destroyers, hitting and wounding. I rolled a 2 for damage, using a command point re-roll, but rolled a 1! The Lasguns of the squad managed to do another wound, while the Rhino was finally able to take the final wound and slay a Destroyer.
The Assassin and Vanguard Veterans fired on the Scarabs, doing 4 wounds on the unit.


The Meltagun Kill Team fired their Hellfire Bolts at the Destroyers, taking four wounds from the unit. The Meltaguns only did a single wound, which was saved by the Destroyers' invulnerable save.
In the charge phase, the Rhino launched a multi-charge on the Immortals and Destroyers, hoping to soak up the overwatch fire for the Watch Captain. I rolled a double 1 for the charge distance, so used a command point re-roll, but rolled another 1! Fortunately, the transport vehicle made it into combat with the Immortals.
The Watch Captain charged the Destroyers, taking no damage from overwatch. The Combi-Melta Kill Team tried to join him, but failed to make the distance. The Assassin and Vanguard Veterans tried to charge the Scarabs, but could not make the distance either.
The Watch Captain struck at the Destroyers, using a Doctrine so that he would be wounding on a 2+ (and keeping both command points). The Captain managed 3 wounds with one CP re-roll, killing 2 of the Destroyers.
The Rhino did no damage to the Immortals. The Watch Master struck at the Overlord, doing 3 wounds. One got through his invulnerable save, and I rolled a 3 for damage, slaying the Overlord.
The Immortals struck back at the Watch Master, taking him down to a single wound.
At the end of turn 3, things were in the balance. We both held our own objectives, but Jon was ahead with First Blood. My failed charges were tough, as I was hoping to go after the Scarabs and grab the objective from them, forcing Jon to deal with the Vanguard Veterans. As it was, the game was still in the balance.
TURN 4- NECRONS

Despite using the Overkill stratagem once more, two Destroyers returned to the unit in combat with the Watch Captain.
The Destroyers and Immortals fell back from combat, while the backfield Immortals advanced to get into the action (they no longer needed to block my reserves).

The Necron Lord then unleashed the power of the Veil of Darkness, teleporting himself and the Necron Warriors to beside the objective held by the Scarabs.
The Immortals that advanced fired on the Watch Captain. Despite needing a 4+ to hit, Jon scored 15 hits out of 20, wounding the Captain 9 times. I saved all but 2 wounds. The Cryptek fired his Staff of Light at the Captain, wounding him once, but my Storm Shield saved the attack.

The Destroyers opened fire on the Deathwatch Captain, wounding him 6 times. I failed one invulnerable save, but fortunately for me, he only took a single point of damage, leaving him on 2 wounds.
The Necron Warriors fired at the Vanguard Veterans, killing the unit in a volley of Gauss fire.
TURN 4- DEATHWATCH/ASTRA MILITARUM

The Rhino moved down to support the Assassin, as he moved up on the Scarabs. The Watch Master and Watch Captain moved up to engage the Cryptek and Destroyers. The Combi-Melta Kill Team also moved up.
Thinking about the end game, the Infantry squad to the south moved up on the objective, while the Conscripts and Company Commander advanced towards the enemy deployment zone. With Jon having First Blood, I needed Linebreaker to even the score, as we would likely hold one objective each.
The Combi-Melta Squad fired on the Destroyers, wounding them 5 times with their Hellfire Bolts. Jon failed four saves and two Destroyers perished. The Watch Master did 2 wounds on the last Destroyer, while the Watch Captain was able to kill him with a Krak grenade.
The Infantry squad fired their Lasguns at the Necron Warriors, killing four of the squad, the Rhino killing another one.The Lascannon of the Razorback fired at the Immortals, killing one.
The Rhino assaulted the Necron Warriors, taking two wounds from overwatch fire, the Assassin moving in to support the vehicle. The Watch Captain and Watch Master assaulted the Cryptek.
In the fight phase, the Watch Master killed the Cryptek. The Assassin killed one Necron Warrior. The Necrons did no damage in reply.
At the end of turn 4, things were pretty even. It just depended how long the game would go on and whether I could grab Linebreaker.
TURN 5- NECRONS

The Reanimation Protocols brought back one Necron Warrior and one Immortal.
The Warriors fell back from combat, while the Scarabs moved up on the objective. The other Immortal squad moved up on the Deathwatch characters.

The Immortals opened fire on the Combi-Melta Kill Team, wounding them 10 times and obliterating the squad.
The other Immortal squad split their fire between the Watch Master and Watch Captain, killing both characters in a hail of Tesla fire.

The Scarabs charged the Rhino, putting one wound on it for no damage in reply.
TURN 5- DEATHWATCH/ASTRA MILITARUM

The warlord Company Commander led his Infantry Squad towards the objective, while the other Infantry Squad ran after the Conscripts.
The Razorback moved up on the Immortals, while the Rhino fell back from combat with the Scarabs. The Infantry Squad moved into the forest, joined by the Assassin.


In the shooting phase, I used Move, Move, Move to move the Infantry Squad and Company Commander on the objective, while the other Infantry Squad and Company Commander advanced towards the enemy deployment zone.
The Razorback killed one Scarab base, while the Infantry Squad killed two Necron Warriors.
In the charge phase, the Razorback charged the Immortals, while the Infantry Squad and Assassin charged the Scarabs.
The Assassin killed the last of the Scarabs, consolidating into the Necron Warriors. I decided not to sent in the Infantry Squad as well, as I didn't want the Necron Warriors to kill them off the objective.

The Necrons attacked the Assassin, but were unable to harm him.


At the end of my turn, things were looking good. I currently held both objectives, while Jon only had Fist Blood. Plus, Jon only had one Immortal unit that could shoot in his next turn. If the game ended now, I would win.
Jon rolled to see if the game would continue and it did! Where is that final whistle when you need it?!?
TURN 6- NECRONS

The Immortals fell back from combat with the Razorback, while the other Immortal squad moved up on the Infantry Squad holding the objective.


The Necron Warriors stayed locked in combat. If the Infantry squad were killed, they could consolidate towards the objective to secure it in the Fight phase.
The Immortals fired on the Infantry Squad. Jon used his last command point on Solar Pulse to deny my cover save. The Immortals did 16 wounds on the Guardsmen, easily killing the squad.


In the fight phase, the Necrons surrounded the objective and attacked the Assassin, wounding him once. The Culexus was able to kill two more Necron warriors.
TURN 6- DEATHWATCH/ASTRA MILITARUM

The Razorback moved up on one Immortal squad, while the Rhino moved up on another. The Astra Militarum Squads to the north advanced into the enemy deployment zone.


In the charge phase, the Razorback charged one unit of Immortals, while the Rhino charged another. The plan was to stop them firing next turn and stop me from scoring Linebreaker.
We rolled to see if the game ended and it did. The final score was:
VICTORY POINTS:
Necrons- 4 (1 objective and First Blood)
Deathwatch/Astra Militarum- 4 (1 objective and Linebreaker)
 |
| End of the game. |
Another hard-fought draw.
AFTER-BATTLE THOUGHTS
Thanks to Jon for a fun and very tactical game.
I was so close to stealing the win at the end there! Had the game finished on turn 5, I would have scored the victory, but it went on to turn 6 and the game ended in a draw.
I think bringing the reserves on in turn 1 was a good idea, overall. While they didn't do all that much damage, they did provide Jon with a key target to focus his firepower on. Had I not brought them in, I think Jon would have got a lot of board control, moving to secure all the objectives on his half of the board, and severely limited my ability to deploy the reserves.
I should have probably brought in the Vanguard Veterans as well, but I wasn't sure what objective would remain and wanted to be prepared to deploy them around the board. As it was, they really didn't do much, as they failed their charge against the Scarabs. That seems to be a regular occurrence with the Vanguard Veterans.
The terrain was also a big factor in this game. It severely reduced the sight of my Infantry Squad holding the objective in my deployment zone. This means that much of the time the Lascannon was reduced to killing a single Warrior for several turns.
I was worried that Jon would send the Necron Warriors and Lord after the objective in my deployment zone. With that amount of firepower, my Infantry squad would not hold up for long. I moved my units to block them, but he might have been able to get to it given three turns. Once he had committed the Veil of Darkness, I was able to shuffle my Infantry Squads around to go for Linebreaker, as well as holding the objective.
If he had sent the big unit of Necron Warriors after my objective, I think the Immortals may have been able to do enough to claim the objective to the south. They have a lot of strong firepower, as well as having "objective secured" to steal it from my Assassin and Rhino.
This was a tough game and did go down as one of my favourites. I really wasn't sure which way it was going to go, seriously thinking that I had lost it after a disastrous turn 1.
The game times were as follows:
Deployment- 10 mins
Necron Turn 1- 10 mins
DW Turn 1- 12 mins
Necron Turn 2- 15 mins
DW Turn 2- 13 mins
Necron Turn 3- 15 mins
DW Turn 3- 23 mins
Necron Turn 4- 12 mins
DW Turn 4- 15 mins
Necron Turn 5- 8 mins
DW Turn 5- 10 mins
Necron Turn 6- 12 mins
DW Turn 6- 5 mins
As you can see, a pretty even spread of turn times for the game. So, at the end of game 4, I was on one win, one loss and two draws. A win in the next game would push me ahead for my target for the tournament, only getting one loss.
Warhammer World GT Heat 1
Game 1- Deathwatch/Astra Militarum vs Astra Militarum/Adeptus Custodes/Imperial Knights
Game 2- Deathwatch/Astra Militarum vs Imperial Knights
Game 3- Deathwatch/Astra Militarum vs Deathwatch
Game 4- Deathwatch/Astra Militarum vs Necrons
Game 5- Deathwatch/Astra Militarum vs Astra Militarum
Good stuff, that was a tense one. All very tactical until the very end.
ReplyDeleteThanks Rory, it was certainly a tough game.
DeleteThat was a nail-biter! Well done staying on target, and actually managing to get into a winning position in Turn 5.
ReplyDeleteMy experience with Vanguard Veterans Charging from Deep Strike is that it's too much of a gamble unless you've got someone like Shrike who can give them a full re-roll on their Charge, or something like that Blood Angel Stratagem that lets them Charge 3d6. Just a Command Re-roll isn't reliable enough.
I agree. Most of the time they arrive, fail the charge and get butchered. They were more effective in my 5th game, where I started with them on the table.
Deletemy plan is to drop chute in Reivers near a Librarian whom casts Veil of Time on them, then casts Psychic Fortress on whomever closest to their Psyker/a squad of Storm Bolter vets teleported nearby, then I have a teleported Apothecary close whom summons the Watch Master with the Beacon Angelis (a Lord of Hidden Knowledge deployed earlier.)
ReplyDeleteHi Eric, not sure what this comment is in reply to?
Delete