
Welcome to the battle report for my final game of day 2 of Caledonian Revolution 2016. After scraping a minor win in the last game, I found myself playing at the same table once more against William and his Tyranids.

The mission for game 5 was Big Guns Never Tire (5 objectives), with Tactical Escalation for the maelstrom mission (one card on turn 1, two on turn 2, etc.). The deployment was Hammer and Anvil.
My army consisted of:
Scarblade Strike Force
Hunting Force
Khan- Moondrakken (with CS)
Command Squad- Bikes, Apothecary, 4 grav guns, 4 storm shields, Banner of the Eagle (CS)
6 Bikers- 2 grav guns, sergeant with power axe and meltabombs (BS1)
6 Bikers- 2 grav guns, sergeant with meltabombs (BS2)
Attack Bike- Multimelta (AB)
6 Scout Bikers- 2 Grenades launchers, sergeant with meltabombs and homing beacon (SB)
Stormbringer Squadron
5 Scouts- bolt pistols, combat weapons, sergeant with meltabombs (S1)
Landspeeder Storm- Heavy Bolter, Cerberus Launcher (LS1)
Landspeeder- Multimelta, Typhoon Missile Launcher (L)
Combined Arms Detachment
Chaplain- Bike, Hunter's Eye, Meltabombs (with CS or C2)
5 Scouts- Bolters, sergeant with meltabombs (S2)
Landspeeder Storm- Heavy Bolter, Cerberus Launcher (LS2)
3 Bikers- 2 meltaguns, sergeant with meltabombs (BS3)
3 Centurions- Grav cannons and grav amps, hurricane bolters (C)
Drop Pod (DP)
Stormhawk Interceptor- TL assault cannon, Skyhammer missile launcher, Las-talon (SI)
Khan was my warlord.
William's army consisted of:
Tyrant Node
Hive Tyrant 1- Two sets of Scything Talons, Norn Crown, Regeneration, Warlord (with TG)
3 Tyrant Guard- Crushing Claws (TG)
3 Venomthropes (V)
Endless Swarm
3 Warriors- Scything Talons, Devourers (TW)
19 Hormagaunts- adrenal gland (H1)
19 Hormagaunts- adrenal gland (H2)
20 Hormagaunts- adrenal gland (H3)
14 Termagaunts- fleshborers, 4 Devourers (T1)
14 Termagaunts- fleshborers, 4 Devourers (T2)
15 Termagaunts- fleshborers, 4 Devourers (T3)
Combined Arms Detachment
Hive Tyrant 2- Wings, electroshock grubs, two set of twin-linked Devourers with brainleach worms (HT2)
Hive Tyrant 3- Wings, electroshock grubs, two set of twin-linked Devourers with brainleach worms (HT3)
3 Ripper Swarm (R1)
3 Ripper Swarm (R2)
His warlord trait gave him Move through cover within 12". His psychic powers were:
Hive Tyrant 1- Paroxysm, Onslaught
Hive Tyrant 2- Horror, Onslaught
Hive Tyrant 3- Catalyst, Horror.
The Endless Swarm formation was interesting; a destroyed unit could come back on the board on a 4+. These units would definitely win a war of attrition with my own units. My plan was to advance on the Tyranids, using my bolters and double hammer of wrath hits to deal with the small tyranids and my grav guns to deal with the bigger ones.
We set up the objectives as shown below:
William won the roll for deployment zone and chose the side with the more open field. I won the roll for deployment and chose to go first.
I deployed the Command Squad in the middle and a unit of bikers on either side, as far forward as possible. The rest of my units deployed just behind them.
William then deployed. All his bigger Tyranid creatures went right at the back on his deployment zone, out of range of most of my guns. The Endless Swarm went between them and my forces, each unit curving around the others to get in range of the Synapse creatures and the Venomthropes for a boost to their cover save.
I then Infiltrated by Scout Bikers in the centre. Night fighting was going to be in effect for the game. William failed to seize and I scouted most of my army forwards. Only the three-man bike squad stayed back to hold an objective.


For the Hunting Force, my targets were:
Primary- Warlord Hive Tyrant
Secondary- Venomthropes
Tertiary- Warriors
TURN 1- WHITE SCARS
In the first turn, I drew Objective 5.

The White Scars continued their advance, moving into close range to deal with the approaching Tyranids. The drop pod crashed to the ground, just behind the ruins in the centre of the battlefield, the Centurions climbing up the ruins for a better vantage point. The Chaplain left the Command Squad to join the Centurions, his Ignores Cover would be better suited for their hurricane bolters.


The bikers on the left fired their bolters at the Gaunts in front of them, killing 3. The Landspeeder Storm and Scouts within fired at the same unit, killing one with their combined firepower (many of the Gaunts were getting a 2+ cover save this turn).
The Scout Bikers fired at another Gaunt squad, killing another 3. The Centurions turned their attention to another squad of Hormagaunts advancing on them, wiping the unit out with their grav cannons and hurricane bolters.
On the right flank, the Command Squad, bike squad and Landspeeder storm fired on the approaching Gaunts, killing 7 in total.
The Landspeeder fired at a Venomthrope and managed to kill one outright with its krak missiles (after William failed his 2+ cover save).
At the end of my turn, I scored Objective 5, one kill point and first blood.
TURN 1- TYRANIDS
This turn, William drew Scour the Skies (kill an enemy flyer).

The Swarm advanced on the White Scars, leaping over the intervening terrain. The flying Hive Tyrants took to the air, swooping over the swarm to support their advance. The larger Tyranid creatures kept their distance from the enemy guns. A unit form the endless swarm returned to the field.


In the psychic phase, one of the Hive Tyrants cast Onslaught on the Gaunts in front. The creature was successful, but perilled in the process, taking a wound and forgeting Dominion. The flying Hive Tyrants then cast Catalyst on themselves and Dominion on themselves.
In the shooting phase, one Hive Tyrant opened fire on the Centurions. The squad took 10 wounds, the Chaplain being the closest. I failed only 2 look out sir rolls and then proceeded to fail both armour saves, losing the Chaplain! The Centurions saved all the other wounds.
The second Hive Tyrant fired at the Centurions, wounding them 8 times, but failing to get past the armour of the Centurions.
The Termagaunts fired at one biker squad on the right flank, killing one biker with their devourers. Another squad fired at the second unit of bikers. Despite causing only 2 wounds, another biker fell.
The Hormagaunts attempted to charge the Scout Bikers, but failed to make the distance.
At the end of his turn, William scored one kill point. That was not too brutal a turn for me, but I failed four of the five 3+ saves I was required to make that turn. I hoped that this was not going to be a recurring them.
VICTORY POINTS:
White Scars- Maelstrom 1, Kill Points 1
Tyranids- Maelstrom 0, Kill Points 1
TURN 2- WHITE SCARS
This turn, I drew Objective 4 and Behind Enemy Lines.

The White Scars continued to advance on the enemy. One Landspeeder Storm moved up, turbo-boosting to get in range of the enemy deployment zone.


The Landspeeder Storm opened up on a Gaunt unit, killing one of the squad. The Centurions fired at another unit, killing 11 of the squad in total. The Landspeeder fired at a Venomthrope, killing another of the squad.
The other bike units did not shoot in order to assault the enemy. The four bike units charged two units of Gaunts. Each unit did 22 hammer of wrath hits, enough to wipe out one unit of Gaunts and all the gaunts engaged with the Command Squad.


At the end of my turn, I scored Objective 4, Behind Enemy Lines and one kill point.
TURN 2- TYRANIDS
This turn, William drew Scour the Skies and Supremacy (hold 3 objectives).

The Tyranids continued to advance on the White Scars, another unit from the endless swarm returning to the field. The Flyrants switched positions, while a unit of Termagaunts and the Warriors advanced on the Landspeeder Storm. One of the Ripper Swarms arrived, but mishapped on deep striking and went back into reserve.


In the psychic phase, the two forward Hive Tyrants cast Catalyst on themselves, then Dominion. They attempted to cast Paroxysm on the bikers, but the attempt was denied.
The Hive Tyrant fired at the Scout Bikers, wounding them 10 times. Despite Jinking, I failed 5 saves. leaving one of the unit. The other Hive Tyrant fired at the bikers in front of them, wounding them 9 times. I failed three saves. Both units failed their morale tests and fell back.

The Termagaunts fired at the Landspeeder Storm. Despite only firing 7 shots, they glanced the speeder 3 times. I failed all three Jink saves, the speeder being destroyed and the Scouts inside were pinned after failing their morale test.

Another unit of Termagaunts fired at the second Landspeeder Storm, glancing the jinking skimmer once.
The Tyranid Warriors and Gaunts charged the Scouts. The Scouts struck at the Gaunts, but some abysmal rolling by me saw only 2 termagaunts fall. The Warriors struck down 3 of the Scouts in reply. I failed my morale check (yet again), but managed to hit and run out of combat.


At the end of his turn, William scored a single kill point. That was a tough turn for me. My saving throw rolls were well below average and I lost a lot of models. In addition, I failed all 4 morale tests I was require to take that turn. My luck was not improving much.
VICTORY POINTS:
White Scars- Maelstrom 3, Kill Points 2
Tyranids- Maelstrom 0, Kill Points 2
TURN 3- WHITE SCARS
This turn, I drew Supremacy (hold 3 objectives), Hungry for Glory (issue a challenge) and Overwhelming Firepower (kill 3 units in the shooting phase).

The Stormhawk failed to arrive again (despite only needing a 2+). The White Scars decided to retreat from the advancing Tyranids, one bike squad moving up to support the retreat of the Scouts.


The Command Squad fired at the nearest Hive Tyrant, wounding it once, but failing to get past its Jink save. The Centurions fired at another of the flying Hive Tyrants. Their bolters wounded it twice. The Grav cannons hit 3 times, but only wounded once (after failing to roll a 3+ on two dice, with re-rolls!). The one wound was saved.
The Landspeeder fired at the Tyranid Warriors, killing one of the squad. The bikers on the right flank fired at the approaching Gaunts, killing 6 of the squad.
At the end of my turn, I scored Supremacy for 2 points and discarded Hungry for Glory.
TURN 3- TYRANIDS
This turn, William drew Objective 4, Supremacy and Scour the Skies.

The two Ripper Swarms arrived, each unit going after a separate objective. The flying Hive Tyrants and Gaunts advanced on the White Scars.


In the psychic phase, the Hive Tyrant cast Catalyst on a unit of Gaunts. It then cast Horror on the Centurions, who subsequently failed their pinning test. The Hive Mind attempted to cast Horror on the Scouts, but the attempt was denied.
A unit of Gaunts fired at the bike squad on the left flank, wounding them 3 times out of 6 shots. I then failed two saves and two bikers died. The Warriors fired at the bikers, but failed to wound. The bikers failed their morale check and fell back.
The Hive Tyrant fired at the Landspeeder, penetrating it once. Naturally, I failed my jink save and the speeder was shaken.
The other Hive Tyrant fired at a biker unit, killing one of the squad. They passed their morale test, the first unit to do so in this game.
The Hormagaunts assaulted the Centurions. The Centurions struck at the Gaunts, killing one. The Hormagaunts struck at the Centurions, wounding them 3 times. True to form for this game, I failed two of my three 2+ saves and one Centurion fell. The Centurions hit and ran from the combat.
At the end of his turn, William scored Supremacy (for 2 points) and objective 4.
VICTORY POINTS:
White Scars- Maelstrom 5, Kill Points 2
Tyranids- Maelstrom 3, Kill Points 2
TURN 4- WHITE SCARS
This turn, I drew Objective 6, Scour the Skies, Assassinate (kill an enemy character) and Overwhelming Firepower.

The Stormhawk finally arrived, moving up the centre of the battlefield. The Centurions and Command Squad advanced on the Ripper Swarm. On the left flank, the bikers and Landspeeder Storm advanced on the second unit of Rippers.


The squads on the left flank opened fire on the Rippers, killing the unit with their combined firepower.
The Command Squad fired at the Ripper in front of them, killing only one base after some terrible rolling. The attack bike and Stormhawk fired at the unit, wiping them out. The Centurions fired on the flying Hive Tyrant, wounding it once with their grav fire.
The bikers on the right flank fired at the Gaunts in front of them, wiping out the unit.
At the end of my turn, I scored Overwhelming Firepower and three kill points. I discarded Assassinate.
TURN 4- TYRANIDS
This turn, William drew Scour the Skies, Behind Enemy Lines, Objective 1 and Objective 2.

The Hive Tyrants moved to take on the Stormhawk, vector striking the unit. One of the strikes penetrated the flyer, forcing it to snap fire. The Gaunts continued to advance on the White Scars as the larger Tyranid creatures moved up the right flank.


In the psychic phase, the Hive Tyrants cast Catalyst on themselves. Another Hive Tyrant cast Paroxysm on the Command Squad, reducing their WS and BS by 3. The Hive Mind then cast Onslaught on a unit of Termagaunts and Dominion on the two Hive Tyrants (William had only failed to cast a single psychic power the whole game so far).
The two flyrants opened fire on the Stormhawk, glancing once and penetrating three times with their combined firepower. I failed two of my Jink saves and the flyer was destroyed.
The Termagaunts opened fire on the bikers on the left flank, but failed to kill any. On the right flank, a unit of Termagaunts ran up to get in range of the Landspeeder Storm, opening fire on the speeder thanks to Onslaught. Out of the 10 shots, William scored two glancing hits. Naturally, I failed both Jink saves and the vehicle was wrecked. The Scouts inside were not pinned (for once).
In the assault phase, three units of Hormagaunts charged the Command Squad. The overwatch fire of the unit took out the remnants of one squad. The other two units hit the elite warriors. Khan swung at a unit of Gaunts, killing two of them. One unit of Hormagaunts struck back (the other charged through terrain). They caused 5 wounds on the squad and I lost three of the unit. The Command Squad struck back, wounding one Hormagaunt, but it made its 6+ armour save and was spared. The other unit of Hormagaunts struck at the Command Squad, killing another of the elite warriors and wounding Khan twice. I lost the combat, failing my Ld8 morale check (even with Khan's re-roll). Khan led the Apothecary out of combat, hitting and running towards the enemy deployment zone.

At the end of his turn, William scored Scour the Skies and two kill points. I scored one kill point for the Gaunt unit.
VICTORY POINTS:
White Scars- Maelstrom 7, Kill Points 6
Tyranids- Maelstrom 4, Kill Points 3
TURN 5- WHITE SCARS
This turn, I drew Objective 1, No Prisoners, Big Game Hunter, Scour the Skies and Blood and Guts. I would be hard pressed to score many of these this turn.

On the right flank, the Bike Squad and Command Squad advanced on the Gaunt unit. The Scouts advanced on the Central objective and the Centurions moved up on the Gaunt unit. The White Scars then surrounded the objectives near them. I put three units on each one, so that the flying Hive Tyrants could only target kill two off of each one.


In the shooting phase, the Bikers, Khan and the Apothecary and the Landspeeder fired at the Gaunt unit in front of them, wiping them out.
The Centurions fired on the Hormagaunts in front of them, killing 5.
I planned to charge the Hormagaunt unit with the Centurions. If I could lock them in combat, the objective secured Scouts could claim the central objective and William would be unable to kill them in the next turn. Given my luck for this game, I shouldn't have been surprised when I failed the 3" charge on a double 1.
At the end of my turn, I scored Objective 1 and one kill point.
TURN 5- TYRANIDS
This turn, William drew Objective 1, Objective 2, Hungry for Glory, Blood and Guts and Overwhelming Firepower.

The two flying Hive Tyrants landed on the nearby objectives. One unit of Hormagaunts advanced on the Scouts, while the other advanced on the Centurions. A unit of Termagaunts advanced on the Command Squad.


In the shooting phase, one Hive Tyrant fired at the Scout Bikers, wounding him 8 times. Amazingly, he passed all his Jink saves. The other fired at the Scouts in my deployment zone, killing 3 of the squad. I passed my morale test and the objective secure scouts stayed put.
The Termagaunts fired at Khan and the Apothecary. The unit caused 2 wounds on them and I naturally failed both 3+ saves, losing Khan and the Apothecary.

The Hormagaunts charged the Scouts in the centre, easily killing them. The other unit of Hormagaunts charged the Centurions, wounding them once for no loss in return.


With that, the game ended. William scored 3 kill points and slay the Warlord.
VICTORY POINTS:
White Scars- Maelstrom 8, Kill Points 7
Tyranids- Maelstrom 4, Kill Points 7
At the end of the game, William scored 2 objectives (for 6 points) and I scored one objective (for 3 points). I noticed that we actually made an error when totalling up the scores. I the same number of kill points, but we thought that William had scored more during the game. There were so many Gaunt units intermixed and recycling that I lost count of how many I had killed during the game. By my count, William killed the Chaplain, Khan, Command Squad, both Landspeeder Storms, one Scout squad and the Stormhawk for 7 KP. By my count, I killed three units of Termagaunts, two units of Hormagaunts and the two Ripper Swarms for 7 KP.
As a result, we put the game down as a 13 vs 12 victory for William, when it should have actually been a 12 vs 12 draw:
White Scars- 3 VP primary + 8 VP secondary + 0 VP kill point differential + First Blood = 12 VP
Tyranids- 6 VP Primary + 4 VP secondary + 0 VP kill point differential + Slay the Warlord + Line Breaker = 12 VP
AFTER-BATTLE THOUGHTS
A single 3+. That's all I needed to win the game. A single 3+ on any one of 4 dice during the final turn would have won me the game.
Thanks to William for a very exciting, close and tense game of 40k.
I actually felt quite confident going into the game. I figured my twin-linked bolters and double hammer of wrath hits would easily deal with the Gaunts and my grav weapons would deal with the larger creatures. Sometimes the dice gods look upon your hubris and laugh.
I know I frequently complain about my bad rolling, but I cannot recall a single game where I have rolled worse than I did in this game. Even William said that my rolling was abysmal, while his seemed to be on fire this game. He could not stop rolling 6's to penetrate my skimmers and flyer, while I struggled to get even average dice rolls.
Some particular lowlights of the game were:
As I said above, had I made the 3" charge from the Centurions on the Hormagaunts or kept just Khan or the Apothecary alive by passing one of the two 3+ saves, I would have probably won the game.
As well as abysmal dice rolling, I think there were a few errors that I made during the game.
I should not have sent the Landspeeder Storm and Scouts after Behind Enemy Lines on turn 2, or should just have send the Storm, disembarking the Scouts before it moved off. This move sacrificed almost 2 of my units for one victory point. It should have been more prudent to save the objective secured unit for later in the game.
I should have dealt with the Flyrants earlier. This would have been tough. Not only was William getting cover saves for the flying Hive Tyrants by placing them in ruins, he was also conferring cover saves to units behind the Hive Tyrants that I shot through. I queried both these points with the TO, but was overruled in both cases. As you will know, Flyrants are incredibly powerful. They only have to fly 12" each turn, but have a 360 degree firing arc. They also get cover saves due to terrain without having to Jink and have not lost Skyfire like other flyers.
Other than that, I don't think there is much I could have done in the game Sometimes your dice are against you and your opponent will not stop rolling 6's.
So at the end of two days gaming, I was on three wins and two losses (really one loss and a draw). Looking at the rankings, this placed me 35 out of 75 players. I had had 5 great games of 40k and had achieved both my goals for the tournament (win 3 games and place in the top half).
I will be doing my army review for the tournament and have two great armies of display posts coming up. I hope you have enjoyed my reports from the tournament.
Caledonian Revolution 2016
Game 1- White Scars vs Tau/Grey Knights
Game 2- White Scars vs Necrons
Game 3- White Scars vs Dark Angels
Game 4- White Scars vs Imperial Knights/Space Marines
Game 5- White Scars vs Tyranids
Khan was my warlord.
William's army consisted of:
Tyrant Node
Hive Tyrant 1- Two sets of Scything Talons, Norn Crown, Regeneration, Warlord (with TG)
3 Tyrant Guard- Crushing Claws (TG)
3 Venomthropes (V)
Endless Swarm
3 Warriors- Scything Talons, Devourers (TW)
19 Hormagaunts- adrenal gland (H1)
19 Hormagaunts- adrenal gland (H2)
20 Hormagaunts- adrenal gland (H3)
14 Termagaunts- fleshborers, 4 Devourers (T1)
14 Termagaunts- fleshborers, 4 Devourers (T2)
15 Termagaunts- fleshborers, 4 Devourers (T3)
Combined Arms Detachment
Hive Tyrant 2- Wings, electroshock grubs, two set of twin-linked Devourers with brainleach worms (HT2)
Hive Tyrant 3- Wings, electroshock grubs, two set of twin-linked Devourers with brainleach worms (HT3)
3 Ripper Swarm (R1)
3 Ripper Swarm (R2)
His warlord trait gave him Move through cover within 12". His psychic powers were:
Hive Tyrant 1- Paroxysm, Onslaught
Hive Tyrant 2- Horror, Onslaught
Hive Tyrant 3- Catalyst, Horror.
The Endless Swarm formation was interesting; a destroyed unit could come back on the board on a 4+. These units would definitely win a war of attrition with my own units. My plan was to advance on the Tyranids, using my bolters and double hammer of wrath hits to deal with the small tyranids and my grav guns to deal with the bigger ones.
We set up the objectives as shown below:
 |
| Objective 6 was not in use for the "Big Guns Never Tire" objectives. |
William won the roll for deployment zone and chose the side with the more open field. I won the roll for deployment and chose to go first.
I deployed the Command Squad in the middle and a unit of bikers on either side, as far forward as possible. The rest of my units deployed just behind them.
William then deployed. All his bigger Tyranid creatures went right at the back on his deployment zone, out of range of most of my guns. The Endless Swarm went between them and my forces, each unit curving around the others to get in range of the Synapse creatures and the Venomthropes for a boost to their cover save.
I then Infiltrated by Scout Bikers in the centre. Night fighting was going to be in effect for the game. William failed to seize and I scouted most of my army forwards. Only the three-man bike squad stayed back to hold an objective.


For the Hunting Force, my targets were:
Primary- Warlord Hive Tyrant
Secondary- Venomthropes
Tertiary- Warriors
TURN 1- WHITE SCARS
In the first turn, I drew Objective 5.

The White Scars continued their advance, moving into close range to deal with the approaching Tyranids. The drop pod crashed to the ground, just behind the ruins in the centre of the battlefield, the Centurions climbing up the ruins for a better vantage point. The Chaplain left the Command Squad to join the Centurions, his Ignores Cover would be better suited for their hurricane bolters.


The bikers on the left fired their bolters at the Gaunts in front of them, killing 3. The Landspeeder Storm and Scouts within fired at the same unit, killing one with their combined firepower (many of the Gaunts were getting a 2+ cover save this turn).
The Scout Bikers fired at another Gaunt squad, killing another 3. The Centurions turned their attention to another squad of Hormagaunts advancing on them, wiping the unit out with their grav cannons and hurricane bolters.
On the right flank, the Command Squad, bike squad and Landspeeder storm fired on the approaching Gaunts, killing 7 in total.
The Landspeeder fired at a Venomthrope and managed to kill one outright with its krak missiles (after William failed his 2+ cover save).
At the end of my turn, I scored Objective 5, one kill point and first blood.
TURN 1- TYRANIDS
This turn, William drew Scour the Skies (kill an enemy flyer).

The Swarm advanced on the White Scars, leaping over the intervening terrain. The flying Hive Tyrants took to the air, swooping over the swarm to support their advance. The larger Tyranid creatures kept their distance from the enemy guns. A unit form the endless swarm returned to the field.


In the psychic phase, one of the Hive Tyrants cast Onslaught on the Gaunts in front. The creature was successful, but perilled in the process, taking a wound and forgeting Dominion. The flying Hive Tyrants then cast Catalyst on themselves and Dominion on themselves.
In the shooting phase, one Hive Tyrant opened fire on the Centurions. The squad took 10 wounds, the Chaplain being the closest. I failed only 2 look out sir rolls and then proceeded to fail both armour saves, losing the Chaplain! The Centurions saved all the other wounds.
The second Hive Tyrant fired at the Centurions, wounding them 8 times, but failing to get past the armour of the Centurions.
The Termagaunts fired at one biker squad on the right flank, killing one biker with their devourers. Another squad fired at the second unit of bikers. Despite causing only 2 wounds, another biker fell.
The Hormagaunts attempted to charge the Scout Bikers, but failed to make the distance.
At the end of his turn, William scored one kill point. That was not too brutal a turn for me, but I failed four of the five 3+ saves I was required to make that turn. I hoped that this was not going to be a recurring them.
VICTORY POINTS:
White Scars- Maelstrom 1, Kill Points 1
Tyranids- Maelstrom 0, Kill Points 1
TURN 2- WHITE SCARS
This turn, I drew Objective 4 and Behind Enemy Lines.

The White Scars continued to advance on the enemy. One Landspeeder Storm moved up, turbo-boosting to get in range of the enemy deployment zone.


The Landspeeder Storm opened up on a Gaunt unit, killing one of the squad. The Centurions fired at another unit, killing 11 of the squad in total. The Landspeeder fired at a Venomthrope, killing another of the squad.
The other bike units did not shoot in order to assault the enemy. The four bike units charged two units of Gaunts. Each unit did 22 hammer of wrath hits, enough to wipe out one unit of Gaunts and all the gaunts engaged with the Command Squad.


At the end of my turn, I scored Objective 4, Behind Enemy Lines and one kill point.
TURN 2- TYRANIDS
This turn, William drew Scour the Skies and Supremacy (hold 3 objectives).

The Tyranids continued to advance on the White Scars, another unit from the endless swarm returning to the field. The Flyrants switched positions, while a unit of Termagaunts and the Warriors advanced on the Landspeeder Storm. One of the Ripper Swarms arrived, but mishapped on deep striking and went back into reserve.


In the psychic phase, the two forward Hive Tyrants cast Catalyst on themselves, then Dominion. They attempted to cast Paroxysm on the bikers, but the attempt was denied.
The Hive Tyrant fired at the Scout Bikers, wounding them 10 times. Despite Jinking, I failed 5 saves. leaving one of the unit. The other Hive Tyrant fired at the bikers in front of them, wounding them 9 times. I failed three saves. Both units failed their morale tests and fell back.

The Termagaunts fired at the Landspeeder Storm. Despite only firing 7 shots, they glanced the speeder 3 times. I failed all three Jink saves, the speeder being destroyed and the Scouts inside were pinned after failing their morale test.

Another unit of Termagaunts fired at the second Landspeeder Storm, glancing the jinking skimmer once.
The Tyranid Warriors and Gaunts charged the Scouts. The Scouts struck at the Gaunts, but some abysmal rolling by me saw only 2 termagaunts fall. The Warriors struck down 3 of the Scouts in reply. I failed my morale check (yet again), but managed to hit and run out of combat.


At the end of his turn, William scored a single kill point. That was a tough turn for me. My saving throw rolls were well below average and I lost a lot of models. In addition, I failed all 4 morale tests I was require to take that turn. My luck was not improving much.
VICTORY POINTS:
White Scars- Maelstrom 3, Kill Points 2
Tyranids- Maelstrom 0, Kill Points 2
TURN 3- WHITE SCARS
This turn, I drew Supremacy (hold 3 objectives), Hungry for Glory (issue a challenge) and Overwhelming Firepower (kill 3 units in the shooting phase).

The Stormhawk failed to arrive again (despite only needing a 2+). The White Scars decided to retreat from the advancing Tyranids, one bike squad moving up to support the retreat of the Scouts.


The Command Squad fired at the nearest Hive Tyrant, wounding it once, but failing to get past its Jink save. The Centurions fired at another of the flying Hive Tyrants. Their bolters wounded it twice. The Grav cannons hit 3 times, but only wounded once (after failing to roll a 3+ on two dice, with re-rolls!). The one wound was saved.
The Landspeeder fired at the Tyranid Warriors, killing one of the squad. The bikers on the right flank fired at the approaching Gaunts, killing 6 of the squad.
At the end of my turn, I scored Supremacy for 2 points and discarded Hungry for Glory.
TURN 3- TYRANIDS
This turn, William drew Objective 4, Supremacy and Scour the Skies.

The two Ripper Swarms arrived, each unit going after a separate objective. The flying Hive Tyrants and Gaunts advanced on the White Scars.


In the psychic phase, the Hive Tyrant cast Catalyst on a unit of Gaunts. It then cast Horror on the Centurions, who subsequently failed their pinning test. The Hive Mind attempted to cast Horror on the Scouts, but the attempt was denied.
A unit of Gaunts fired at the bike squad on the left flank, wounding them 3 times out of 6 shots. I then failed two saves and two bikers died. The Warriors fired at the bikers, but failed to wound. The bikers failed their morale check and fell back.
The Hive Tyrant fired at the Landspeeder, penetrating it once. Naturally, I failed my jink save and the speeder was shaken.
The other Hive Tyrant fired at a biker unit, killing one of the squad. They passed their morale test, the first unit to do so in this game.
The Hormagaunts assaulted the Centurions. The Centurions struck at the Gaunts, killing one. The Hormagaunts struck at the Centurions, wounding them 3 times. True to form for this game, I failed two of my three 2+ saves and one Centurion fell. The Centurions hit and ran from the combat.
At the end of his turn, William scored Supremacy (for 2 points) and objective 4.
VICTORY POINTS:
White Scars- Maelstrom 5, Kill Points 2
Tyranids- Maelstrom 3, Kill Points 2
TURN 4- WHITE SCARS
This turn, I drew Objective 6, Scour the Skies, Assassinate (kill an enemy character) and Overwhelming Firepower.

The Stormhawk finally arrived, moving up the centre of the battlefield. The Centurions and Command Squad advanced on the Ripper Swarm. On the left flank, the bikers and Landspeeder Storm advanced on the second unit of Rippers.


The squads on the left flank opened fire on the Rippers, killing the unit with their combined firepower.
The Command Squad fired at the Ripper in front of them, killing only one base after some terrible rolling. The attack bike and Stormhawk fired at the unit, wiping them out. The Centurions fired on the flying Hive Tyrant, wounding it once with their grav fire.
The bikers on the right flank fired at the Gaunts in front of them, wiping out the unit.
At the end of my turn, I scored Overwhelming Firepower and three kill points. I discarded Assassinate.
TURN 4- TYRANIDS
This turn, William drew Scour the Skies, Behind Enemy Lines, Objective 1 and Objective 2.

The Hive Tyrants moved to take on the Stormhawk, vector striking the unit. One of the strikes penetrated the flyer, forcing it to snap fire. The Gaunts continued to advance on the White Scars as the larger Tyranid creatures moved up the right flank.


In the psychic phase, the Hive Tyrants cast Catalyst on themselves. Another Hive Tyrant cast Paroxysm on the Command Squad, reducing their WS and BS by 3. The Hive Mind then cast Onslaught on a unit of Termagaunts and Dominion on the two Hive Tyrants (William had only failed to cast a single psychic power the whole game so far).
The two flyrants opened fire on the Stormhawk, glancing once and penetrating three times with their combined firepower. I failed two of my Jink saves and the flyer was destroyed.
The Termagaunts opened fire on the bikers on the left flank, but failed to kill any. On the right flank, a unit of Termagaunts ran up to get in range of the Landspeeder Storm, opening fire on the speeder thanks to Onslaught. Out of the 10 shots, William scored two glancing hits. Naturally, I failed both Jink saves and the vehicle was wrecked. The Scouts inside were not pinned (for once).
In the assault phase, three units of Hormagaunts charged the Command Squad. The overwatch fire of the unit took out the remnants of one squad. The other two units hit the elite warriors. Khan swung at a unit of Gaunts, killing two of them. One unit of Hormagaunts struck back (the other charged through terrain). They caused 5 wounds on the squad and I lost three of the unit. The Command Squad struck back, wounding one Hormagaunt, but it made its 6+ armour save and was spared. The other unit of Hormagaunts struck at the Command Squad, killing another of the elite warriors and wounding Khan twice. I lost the combat, failing my Ld8 morale check (even with Khan's re-roll). Khan led the Apothecary out of combat, hitting and running towards the enemy deployment zone.

At the end of his turn, William scored Scour the Skies and two kill points. I scored one kill point for the Gaunt unit.
VICTORY POINTS:
White Scars- Maelstrom 7, Kill Points 6
Tyranids- Maelstrom 4, Kill Points 3
TURN 5- WHITE SCARS
This turn, I drew Objective 1, No Prisoners, Big Game Hunter, Scour the Skies and Blood and Guts. I would be hard pressed to score many of these this turn.

On the right flank, the Bike Squad and Command Squad advanced on the Gaunt unit. The Scouts advanced on the Central objective and the Centurions moved up on the Gaunt unit. The White Scars then surrounded the objectives near them. I put three units on each one, so that the flying Hive Tyrants could only target kill two off of each one.


In the shooting phase, the Bikers, Khan and the Apothecary and the Landspeeder fired at the Gaunt unit in front of them, wiping them out.
The Centurions fired on the Hormagaunts in front of them, killing 5.
I planned to charge the Hormagaunt unit with the Centurions. If I could lock them in combat, the objective secured Scouts could claim the central objective and William would be unable to kill them in the next turn. Given my luck for this game, I shouldn't have been surprised when I failed the 3" charge on a double 1.
At the end of my turn, I scored Objective 1 and one kill point.
TURN 5- TYRANIDS
This turn, William drew Objective 1, Objective 2, Hungry for Glory, Blood and Guts and Overwhelming Firepower.

The two flying Hive Tyrants landed on the nearby objectives. One unit of Hormagaunts advanced on the Scouts, while the other advanced on the Centurions. A unit of Termagaunts advanced on the Command Squad.


In the shooting phase, one Hive Tyrant fired at the Scout Bikers, wounding him 8 times. Amazingly, he passed all his Jink saves. The other fired at the Scouts in my deployment zone, killing 3 of the squad. I passed my morale test and the objective secure scouts stayed put.
The Termagaunts fired at Khan and the Apothecary. The unit caused 2 wounds on them and I naturally failed both 3+ saves, losing Khan and the Apothecary.

The Hormagaunts charged the Scouts in the centre, easily killing them. The other unit of Hormagaunts charged the Centurions, wounding them once for no loss in return.


With that, the game ended. William scored 3 kill points and slay the Warlord.
VICTORY POINTS:
White Scars- Maelstrom 8, Kill Points 7
Tyranids- Maelstrom 4, Kill Points 7
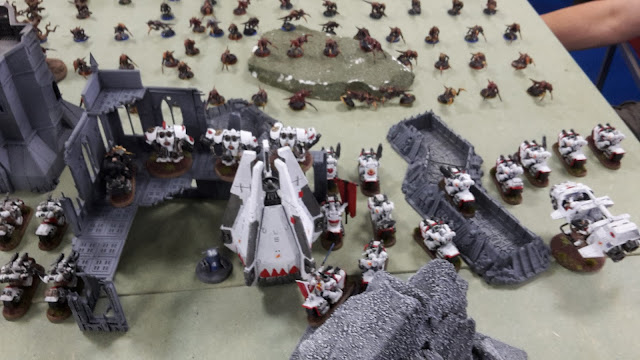
 |
| End of the game. |
At the end of the game, William scored 2 objectives (for 6 points) and I scored one objective (for 3 points). I noticed that we actually made an error when totalling up the scores. I the same number of kill points, but we thought that William had scored more during the game. There were so many Gaunt units intermixed and recycling that I lost count of how many I had killed during the game. By my count, William killed the Chaplain, Khan, Command Squad, both Landspeeder Storms, one Scout squad and the Stormhawk for 7 KP. By my count, I killed three units of Termagaunts, two units of Hormagaunts and the two Ripper Swarms for 7 KP.
As a result, we put the game down as a 13 vs 12 victory for William, when it should have actually been a 12 vs 12 draw:
White Scars- 3 VP primary + 8 VP secondary + 0 VP kill point differential + First Blood = 12 VP
Tyranids- 6 VP Primary + 4 VP secondary + 0 VP kill point differential + Slay the Warlord + Line Breaker = 12 VP
AFTER-BATTLE THOUGHTS
A single 3+. That's all I needed to win the game. A single 3+ on any one of 4 dice during the final turn would have won me the game.
Thanks to William for a very exciting, close and tense game of 40k.
I actually felt quite confident going into the game. I figured my twin-linked bolters and double hammer of wrath hits would easily deal with the Gaunts and my grav weapons would deal with the larger creatures. Sometimes the dice gods look upon your hubris and laugh.
I know I frequently complain about my bad rolling, but I cannot recall a single game where I have rolled worse than I did in this game. Even William said that my rolling was abysmal, while his seemed to be on fire this game. He could not stop rolling 6's to penetrate my skimmers and flyer, while I struggled to get even average dice rolls.
Some particular lowlights of the game were:
- Failing only two look out Sir rolls for my Chaplain, then failing both those saves to lose the Chaplain on turn 1.
- Failing four of the five 3+ armour saves I was required to make on turn 1.
- Failing 9 of the 13 morale and pinning tests I was required to take during the game.
- Failing a 3" charge on the centurions in turn 5.
- Failing both 3+ saves of the two wounds caused on the Apothecary and Khan on turn 5.
- Failing two 2+ reserve rolls for my Stormhawk on turns 2 and 3.
As I said above, had I made the 3" charge from the Centurions on the Hormagaunts or kept just Khan or the Apothecary alive by passing one of the two 3+ saves, I would have probably won the game.
As well as abysmal dice rolling, I think there were a few errors that I made during the game.
I should not have sent the Landspeeder Storm and Scouts after Behind Enemy Lines on turn 2, or should just have send the Storm, disembarking the Scouts before it moved off. This move sacrificed almost 2 of my units for one victory point. It should have been more prudent to save the objective secured unit for later in the game.
I should have dealt with the Flyrants earlier. This would have been tough. Not only was William getting cover saves for the flying Hive Tyrants by placing them in ruins, he was also conferring cover saves to units behind the Hive Tyrants that I shot through. I queried both these points with the TO, but was overruled in both cases. As you will know, Flyrants are incredibly powerful. They only have to fly 12" each turn, but have a 360 degree firing arc. They also get cover saves due to terrain without having to Jink and have not lost Skyfire like other flyers.
Other than that, I don't think there is much I could have done in the game Sometimes your dice are against you and your opponent will not stop rolling 6's.
So at the end of two days gaming, I was on three wins and two losses (really one loss and a draw). Looking at the rankings, this placed me 35 out of 75 players. I had had 5 great games of 40k and had achieved both my goals for the tournament (win 3 games and place in the top half).
I will be doing my army review for the tournament and have two great armies of display posts coming up. I hope you have enjoyed my reports from the tournament.
Caledonian Revolution 2016
Game 1- White Scars vs Tau/Grey Knights
Game 2- White Scars vs Necrons
Game 3- White Scars vs Dark Angels
Game 4- White Scars vs Imperial Knights/Space Marines
Game 5- White Scars vs Tyranids
Man, I really feel for you here. Seriously, just reading that batrep makes me angry at your dice. You had the game in the bag, sometimes it's just not fair. Wow I'm really annoyed now! With this one and the necron game being scored correctly you might have placed much higher!
ReplyDeleteIn the last turn when you lost your command squad you didn't mention failing your fnp rolls, too, but I'm assuming you didn't forget them. The 'behind enemy lines' decision I probably would've handled the same way even though like you pointed out that wasn't ideal perhaps. The strategic fall back early on was a good call imo. Something else you could've possibly done was to refuse a flank and hit one of his hard, but that's tough to evaluate without being there. Honestly, when I saw the matchup I was certain you'd pull off a win knowing that you're a good player. It just wasn't meant to be. On that note, just last week I tossed one of my Infinity D20 out the window during a game, and the rest of them into the trash can after - I don't really believe in bad luck but sometimes it's just too much. Next time you'll do better for sure!
Yeah, it's a little annoying after the fact. Innes also pointed out that I was only a few points behind the player that won best Space Marine army, so with my correct scores, I may have had a shot. However, the correct score in the Necron game would have probably resulted in a much tougher 3rd game, which I may have done worse in, so there is no way to tell.
DeleteYeah, I also failed my FNP rolls on the Command Squad. My Apothecary did bugger all in this game, as I think I only passed a single FNP roll the whole game.
A refused flank attack may have been the way to go, focusing on killing one side of the board. I didn't mention it, but in the second turn, my Command Squad and bike squad killed everything in range in combat. This meant some of the Gaunt unit survived as they were spread out across the board. The extra kill point had I made it in may have made all the difference, but I'll never know.
Yeah, after the punishing firepower on his second turn, I felt that if I didn't withdraw, I would be swamped and wiped out easily. My plan was to actually hold him up in his deployment zone for as long as possible, allowing my backfield units to score the objectives and keep them off them for the end of the game. But that one turn of shooting (and terrible saves) really turned it around I think.
Normally I have a smile at people blaming their dice but really yours shafted you.
ReplyDeleteYeah, it was pretty brutal. I don't want it to sound like my bad rolling was the only reason I lost, William played a great game too. I just thought my rolling was far too funny not to share in the report.
DeleteBikes are relentless, so you can shoot and charge, you did yourself no favours there. Bad dice, I feel for you, I'm great at rolling ones! Another great report thanks
ReplyDeleteI know they can shoot and charge. If this is turn 2, I was concerned about shooting myself out of charge range, or decreasing the number of hammer of wrath hits I could get. I figured they would have more chance of taking out the unit.
DeleteGlad you enjoyed it.
it happens to the best of us every now and then. you must have upset the dice gods at some point in the previous 4 games. the only solution for this is a sacrifice!
ReplyDeletei have never done well against the nids, going back as far as 4th edition. no matter what i choose it is always a hard slog against them. as mentioned in your other post a refused flank may have helped as he wouldn't have been able to bring his full force to bear on you. also refusing to engage a turn longer may have spread his forces out a bit more. that may have been more difficult with the maelstrom missions (why i like them so much no castling!).
i look forward to your review of your list and see if you think it has the same strengths and weaknesses as i do.
well done on a top half finish and thank you for these reports. i know how time consuming they can be (as i have yet to write mine up from months ago!)
Cheers toonboy! The reports do take a while, but I think they are worth it.
Delete