
In the final game of day 1 of the North West Open, my Deathwatch found themselves going up against Nick and his army of Imperial Knights!
I must say, I was not expecting to see an army of 4 Knights this low down in the rankings, and I was certainly not looking forward to the game. My army struggles to deal with vehicles as it is, so four of them with that many wounds and that volume of firepower and combat ability was a daunting task.
The mission for game 3 was ITC scenario 1- Retrieval. The Eternal War mission was to hold the four retrieval objectives. Two of the objectives would be the two maelstrom objectives for this game. The maelstrom table for this game was:
- Hold Maelstrom Objective 1
- Hold Maelstrom Objective 2
- Have a unit at least partially within 12" of the enemy deployment edge (behind enemy lines)
- Destroy an enemy unit
- Destroy an enemy unit
- Have at least 3 of your and none of your opponent's units in your deployment zone (hold the line)
As with all the ITC mission, you roll 3 dice at the start of your turn to generate 3 unique maelstrom objectives and pick two objectives to score. These can only be scored at the start of your following turn. In addtion, if you roll hold objective 1 and 2, you can exchange them to hold 3 objectives for 3 points. If you roll two lots of destroy an enemy unit, you can exchange it for kill 3 enemy units for 3 points.
The tertiary missions were Big Game Hunter (whoever kills the unit with the highest power level), Linebreaker and Slay the warlord.
The tertiary missions were Big Game Hunter (whoever kills the unit with the highest power level), Linebreaker and Slay the warlord.
My army consisted of:
Battalion Detachment
Watch Master (W)
Watch Captain- Jump Pack, Pair Lightning Claws (W)
Kill Team 1- 5 Veterans, Vanguard Veteran with Pair Lightning Claws, 3 Frag Cannons, Storm Shield. (KT1)
Kill Team 2- 5 Veterans, 2 Missile Launchers, 3 Stalker Boltguns (KT2)
Kill Team 3- 5 Veterans, 2 Missile Launchers, 3 Stalker Boltguns (KT3)
Kill Team 4- 5 Veterans, Meltagun, 3 combi-Meltas (KT4)
Kill Team 5- 5 Veterans, 2 Frag Cannons (KT5)
Rhino (R)
Drop Pod- Storm Bolter (DP)
6 Vanguard Veterans- 2 Pairs Lightning Claws, Power Sword and Bolt Pistol, 3 with Bolt Pistols and Chainswords (VV1)
3 Deathwatch Bikers- Power Axe, Power Sword (DB1)
3 Deathwatch Bikers- two Power Swords (DB2)
Corvus Blackstar- Auspex Array, Hurricane Bolter, Twin Assault Cannons, 2 Blackstar Rocket Launchers (CB)
Vindicare Assassin (V)
6 Command Points
My Warlord was the Watch Master, who took the Tenacious Survivor warlord trait.
Nick's army consisted of:
Superheavy Detachment
Cerastus Knight-Acheron- Acheron Flame Cannon, Reaper Chainfist, Twin Heavy Bolter, Titanic Feet (Ach)
Cerastus Knight-Atropos- Atropos Ioscutter, Graviton Singularity Cannon, Titanic Feet (Atr)
Cerastus Knight-Lancer- Cerastus Shock Lance, Shock Blast, Titanic Feet (Lan)
Knight Errant- Ironstorm Missile Pod, Meltagun, Thermal Cannon, Thunderstrike Gaunlet (Err)
6 Command Points


Nick's army had no warlord trait, but his warlord was the Knight Atropos. A beautiful looking Knight army, but I had no idea how I would fare against it. I had yet to play Knights in 8th edition, but had a feeling that they wouldn't be the easiest to take down.
If this was an ETC game, my plan would be to ignore trying to kill the Knights for as much as possible and focus simply on scoring as many maelstrom points as possible. This would work as I would be scoring the points at the end of each of my turns, able to sacrifice a unit at a time to score maximum points and hope that I survived to the end of the game to contest or score some objectives. However, as this was an ITC game, that meant in order to score the objectives, I would need to leave a unit in the open holding the objective for an enemy turn. I doubt any of my units could withstand the firepower of even one of the Knights for very long, so that limited what I could score. Also, given a third of the objectives were for killing an enemy unit, my odds of scoring this were not great. This meant I would have to try and damage or destroy the Knights as much as possible to make them less effective and try and hide with my faster moving elements to pounce on the objectives at the end of the game.
The two maelstrom objectives had to be placed at least 18" from your own table edge, so we ended up with an objective near the centre of the board on each flank. I placed my own Retrieval objective on top of one of the bastions to protect it with one of my long range shooting units. Nick placed his in the middle of his deployment zone.

The deployment order was as follows:


I decided to bring in the Drop Pod next to the objective on Nick's deployment zone. The Meltagun Kill Team and Watch Master made their way into the cover of the ruins on their right.


The Knight Acheron charged the Kill Team in front of it, taking 15 hits from the overwatch of the Frag Cannons and taking three unsaved wounds (only 24 more to go!). The Knight Atropos charged the Deathwatch Bikers, suffering no wounds from overwatch fire.
The Acheron used its Titanic Feet on the Kill Team, easily wiping out the squad. The Knight Atropos managed to kill two of the Deathwatch Bikers, leaving one survivor who was unable to harm the mighty vehicle.
TURN 2- DEATHWATCH
In my second turn, I scored one malestrom point for being Behind Enemy Lines. This turn, I chose Behind Enemy Lines and Kill an Enemy Unit.

The Deathwatch Biker fell back from combat, moving towards the enemy deployment zone. On the other flank, the Watch Captain made a move for the enemy deployment zone as well, hoping to get into the cover of the ruins there in the following turn. Kill Team 1 moved up on the Knight Errant, as did the unit of Bikers.


The Kill Team fired their Frag Cannons at the Knight Errant, hitting 19 times and wounding 6 times. Nick only failed a single 4+ save, taking a single wound on the Knight. The Bikers added their firepower, wounding 4 times and Nick failed two more saves from the Vengeance shells (-2AP). The Assassin added his firepower, wounding the Knight Errant two more times.
One of the Missile Launcher Kill Teams fired at the Knight Errant, hitting twice after using a command point re-roll and wounding once, but Nick made his 5+ save. The other Missile Launcher Kill Team added their firepower, hitting and wounding once and taking 6 damage from it (it was now down to 10 wounds).
The Drop Pod fired at the Knight Acheron, but did no damage.
At the end of turn 2, things were in the balance. The Knights were decimating my army, but I had already killed one and had severely damaged another.
MAELSTROM POINTS:
Imperial Knights- 2
Deathwatch- 1
TURN 3- IMPERIAL KNIGHTS
This turn, Nick scored both his maelstrom points from last turn. He also chose Destroy an Enemy Unit and Hold Objective 1.

The Knight Acheron moved up towards the Watch Captain, while the Knight Atropos moved to hold the objective.
6 Command Points
My Warlord was the Watch Master, who took the Tenacious Survivor warlord trait.
Nick's army consisted of:
Superheavy Detachment
Cerastus Knight-Acheron- Acheron Flame Cannon, Reaper Chainfist, Twin Heavy Bolter, Titanic Feet (Ach)
Cerastus Knight-Atropos- Atropos Ioscutter, Graviton Singularity Cannon, Titanic Feet (Atr)
Cerastus Knight-Lancer- Cerastus Shock Lance, Shock Blast, Titanic Feet (Lan)
Knight Errant- Ironstorm Missile Pod, Meltagun, Thermal Cannon, Thunderstrike Gaunlet (Err)
6 Command Points


Nick's army had no warlord trait, but his warlord was the Knight Atropos. A beautiful looking Knight army, but I had no idea how I would fare against it. I had yet to play Knights in 8th edition, but had a feeling that they wouldn't be the easiest to take down.
If this was an ETC game, my plan would be to ignore trying to kill the Knights for as much as possible and focus simply on scoring as many maelstrom points as possible. This would work as I would be scoring the points at the end of each of my turns, able to sacrifice a unit at a time to score maximum points and hope that I survived to the end of the game to contest or score some objectives. However, as this was an ITC game, that meant in order to score the objectives, I would need to leave a unit in the open holding the objective for an enemy turn. I doubt any of my units could withstand the firepower of even one of the Knights for very long, so that limited what I could score. Also, given a third of the objectives were for killing an enemy unit, my odds of scoring this were not great. This meant I would have to try and damage or destroy the Knights as much as possible to make them less effective and try and hide with my faster moving elements to pounce on the objectives at the end of the game.
The two maelstrom objectives had to be placed at least 18" from your own table edge, so we ended up with an objective near the centre of the board on each flank. I placed my own Retrieval objective on top of one of the bastions to protect it with one of my long range shooting units. Nick placed his in the middle of his deployment zone.

The deployment order was as follows:
- Knight Lancer
- Kill Team 2 (missile launchers)
- Knight Atropos
- Kill Team 3 (missile launchers)
- Knight Errant
- Vanguard Veterans (reserve)
- Knight Acheron
- Rest of my army
A very quick deployment for Nick. He spread his four Knights over his deployment zone evenly, preventing me from focusing on one area of the battlefield. I deployed both missile launcher Kill Teams in cover, one in the centre holding the objective and one on the left flank, supported by the Rhino and one of the Bike Squad. The other Bikers went in the centre, hidden behind the Bastion. I put the Corvus Blackstar on the right flank, opposite the weakest of the Knights and put the Assassin in the ruins just in front of it.


We rolled off for first turn and both rolled a 6, meaning Nick won it thanks to having deployed first. I failed to seize and Nick took the first turn. This was probably for the best, as my best chance of winning would be to grab the objectives on the last turn of the game.
TURN 1- IMPERIAL KNIGHTS
On his first turn, Nick chose Hold Objective 2 and Destroy an enemy unit as his objectives.

The Knights all moved up towards the Deathwatch lines, eager to get into range of the enemy units.


In the shooting phase, the Knight Acheron started proceedings, firing at the Corvus Blackstar with its Acheron flame cannons. The weapon hit 9 times and wounded 5. I managed to make two of my 5+ saves, but each wound caused 3 damage, stripping 9 wounds from the flyer with the first shot. The Heavy Bolter fired at the Corvus, but did no harm.


The Knight Errant then added its firepower. The Thermal Cannon fired three shots, but only one of them hit. Nick used a Command Point re-roll to try and score a second hit, but this failed. The one hit managed to wound though and took 6 wounds from the Flyer, destroying it. Only one of the squad inside perished, after I used my own Command Point re-roll to save another.

The Knight Lancer fired at the Missile Launcher Kill Team in the centre, killing one of the squad only. Finally, the Knight Atropos fired at the Rhino. Nick rolled a 6 on the weapon, making it super charged. He scored four hits and four wounds, putting a massive 24 damage on the Rhino and obliterating it utterly. Two of the squad perished as the disembarked.
A pretty brutal first turn for the Knights. They had decimated whatever they had fired at. The one saving grace was that it did take half the enemy army to destroy the Corvus Blackstar. It was worth it though, as Nick had cut my mobility in half.
TURN 1- DEATHWATCH
In my first turn, I chose Hold the Line and Behind Enemy Lines. I doubted I could score Hold the Line, as the Knights would be in my deployment zone the following turn, but could score Behind Enemy Lines with some luck.

The unit of Bikers on the left flank moved up on the objective, hoping to draw one of the Knights out of position. The Frag Cannon Kill Teams advanced on the Knights in front of them, the second unit of Bikers moving to support the squad on the left.


I decided to bring in the Drop Pod next to the objective on Nick's deployment zone. The Meltagun Kill Team and Watch Master made their way into the cover of the ruins on their right.
In the shooting phase, the Meltagun Kill Team opened fire on the Knight Lancer. They hit with all four shots and wounded twice. I tried to use a re-roll for a third wound, but was unsuccessful. The two shots did 9 wounds on the Knight.
The Kill Team in front of the Lancer fired their Frag Cannons at it. The two cannons managed a fantastic 22 hits between them. I must have used up all my good rolling, as this only translated to 3 wounds (despite wounding on a 5+), but the Knight did take 2 wounds. The Bikers fired at the same target with their Vengeance shells, causing another two wounds. The Drop Pod even managed to add its firepower, wounding it once more.
The Kill Team in the ruins on the left fired their Krak Missiles at the Lancer, hitting and wounding once, taking another 3 wounds from it. The Stalker Bolters of the squad managed to do another two wounds, leaving it on 8 left.
On the right flank, the Kill Team fired their Frag Cannons at the Knight Errant, hitting 13 times and wounding 6 times. The Knight took 3 of the wounds. The other Missile Launcher Kill Team fired at the Knight Errant, hitting once, but failing to wound. The Stalkers fired at the Knight Lancer, wounding it once with their Vengeance shells.
The Vindicare added his firepower, hitting and wounding the Knight Lancer and taking three wounds from it.
Finally, the second unit of Bikers fired at the Knight Lancer. Some great rolls saw them cause four wounds and the Knight was finally destroyed. Fortunately, it did not explode.
At the end of my turn, I had actually managed to take down one of the Knights with pretty much the entire firepower of my army. Pity I hadn't rolled kill an enemy unit as one of my objectives.
TURN 2- IMPERIAL KNIGHTS
On turn 2, Nick scored both his maelstrom points from last turn. This turn he chose Behind Enemy Line and Kill an Enemy Unit.

The Knight Atropos moved up towards the Bikers on the right flank, while the Knight Acheron moved up to the second unit of Bikers and Kill Team in the centre. The Knight Errant moved up beside the ruins sheltering the Kill Team and Vindicare Assassin.


The Knight Acheron turned its flame cannon on the Meltagun Kill Team, getting a great 12 hits on his 2D6 roll and wounding 9 times. I failed 5 of my nine 4+ saves and the unit perished (Nick simply kept rolling 6's for number of shots and damage at this stage, it was getting very infuriating).
The Knight Errant fired its missile pod at Kill Team 1 in the ruins, killing one of the squad. It tried to fire the Meltagun at the Assassin, but missed with the shot. It then turned the Thermal Cannon at Kill Team 2 in the Bastion, hitting and wounding with the two shots and killing two of the Stalker Bolter Marines.
The Knight Atropos fired at Kill Team 3 in the ruins on the right, killing three of the squad with its Shock Blast. The Lance gun hit and wounded the squad, but I made my 6+ armour save.
The Knight Acheron charged the Kill Team in front of it, taking 15 hits from the overwatch of the Frag Cannons and taking three unsaved wounds (only 24 more to go!). The Knight Atropos charged the Deathwatch Bikers, suffering no wounds from overwatch fire.
The Acheron used its Titanic Feet on the Kill Team, easily wiping out the squad. The Knight Atropos managed to kill two of the Deathwatch Bikers, leaving one survivor who was unable to harm the mighty vehicle.
TURN 2- DEATHWATCH
In my second turn, I scored one malestrom point for being Behind Enemy Lines. This turn, I chose Behind Enemy Lines and Kill an Enemy Unit.

The Deathwatch Biker fell back from combat, moving towards the enemy deployment zone. On the other flank, the Watch Captain made a move for the enemy deployment zone as well, hoping to get into the cover of the ruins there in the following turn. Kill Team 1 moved up on the Knight Errant, as did the unit of Bikers.


The Kill Team fired their Frag Cannons at the Knight Errant, hitting 19 times and wounding 6 times. Nick only failed a single 4+ save, taking a single wound on the Knight. The Bikers added their firepower, wounding 4 times and Nick failed two more saves from the Vengeance shells (-2AP). The Assassin added his firepower, wounding the Knight Errant two more times.
One of the Missile Launcher Kill Teams fired at the Knight Errant, hitting twice after using a command point re-roll and wounding once, but Nick made his 5+ save. The other Missile Launcher Kill Team added their firepower, hitting and wounding once and taking 6 damage from it (it was now down to 10 wounds).
The Drop Pod fired at the Knight Acheron, but did no damage.
At the end of turn 2, things were in the balance. The Knights were decimating my army, but I had already killed one and had severely damaged another.
MAELSTROM POINTS:
Imperial Knights- 2
Deathwatch- 1
TURN 3- IMPERIAL KNIGHTS
This turn, Nick scored both his maelstrom points from last turn. He also chose Destroy an Enemy Unit and Hold Objective 1.

The Knight Acheron moved up towards the Watch Captain, while the Knight Atropos moved to hold the objective.


The Knight Acheron fired its Flame Cannon at Kill Team 1, scoring 10 hits on 2D6 and wounding four times. I failed three of my four 4+ saves and half the squad died. It then fired its Twin Heavy Bolter at the Watch Captain, wounding him three times. Once more my saves were great, as I failed two of my 3+ saves and he took three wounds.


The Knight Errant split its fire between the Bikers and Assassin. The Thermal Cannon fired the Assassin, missing with its one shot. Nick used a command point re-roll, but missed with that too. The Meltagun also missed the Assassin.
It then fired the missile pods at the lone Biker, wounding him three times. I failed two of my saves and the Biker perished.
The Atropos fired at the Missile Launcher Kill Team in the ruins. The Shock Blast overheated, wounding the Knight once, but still managed to hit the unit and wipe them out.
In the charge phase, the Knight Errant assaulted the Biker unit. The Knight Acheron assaulted the lone survivor of Kill Team 1, suffering one wound in overwatch and also failing the charge.


In the fight phase, the Knight Errant attacked the Bikers, killing two of the squad. The Sergeant with the Power Sword managed to wound the Knight once in reply.
TURN 3- DEATHWATCH
In turn 3, I scored Behind enemy lines for one point. This turn, I chose Behind Enemy Lines and Kill an Enemy unit.

The Vanguard Veterans arrived from reserve, landing out of line of sight in the ruins on the right flank. The Watch Captain advanced to join them, using a command point re-roll to make the distance. The Watch Master moved into cover from the Knights as well.
The Biker fell back from combat, as the lone Frag Cannon Marine moved up to support him.


The Veteran fired his Frag Cannon at the Knight Errant, only wounding it once. The Assassin hit and wounded the Knight. Nick failed his 6+ armour save, using a command re-roll to try and save it but failed once more. The Assassin took three wounds from the Knight. The Kill Team fired their Missile Launchers at the Knight, hitting twice (with the use of another re-roll) and wounding once. Nick failed his armour save and the Krak Missile took four more wounds, leaving it on just one wound.
The lone Biker and lone Veteran charged the Knight Errant. The Thermal Cannon hit the Veteran on overwatch, utterly obliterating him. The Biker then charged the Knight. The Thermal Cannon once more hit in overwatch, but somehow failed to wound. The Meltagun hit in overwatch, but also failed to wound! Amazingly, the Biker survived.
The Deathwatch Sergeant struck at the Knight, hitting once with his three attacks. He managed to wound the Knight Errant and slay him in combat! That was not the expected result!

MAELSTROM POINTS:
Imperial Knights- 4
Deathwatch- 2
At the end of turn 3, I had managed to take out a second Knight. Now I would just have to see if I could survive till the end of the game. I doubted I had enough firepower left to take out a third Knight.
TURN 4- IMPERIAL KNIGHTS
In turn 4, Nick scored Objective 1. This turn, he chose Destroy an enemy unit and Hold Objective 1.

The Knight Acheron moved up to secure objective 2, while the Knight Atropos stayed on objective 1.


The Atropos fired at the last surviving Kill Team, hitting and wounding four times and wiping them out with another supercharged shot.
The Acheron fired its Flame Cannon at the Assassin, hitting him eight times and wounding 5. The Assassin failed two saves and was burned alive, as each wound did 3 damage. It fired its Twin Heavy Bolter at the Biker, hitting six times and wounding twice, but I made both my saves.
TURN 4- DEATHWATCH
This turn, I scored both my maelstrom points. I then chose Hold Objective 1 and Kill an enemy unit. I had little chance of achieving either.

The Biker moved behind the Bastion, hoping to hide from the enemy firepower. The rest of the army remained in hiding to try and seize the objectives.


The Drop Pod fired at the Knight Acheron, hitting twice but failing to wound.
MAELSTROM POINTS:
Imperial Knights- 5
Deathwatch- 4
Things were set for the final turns. If I could hold out, I could maybe pull a draw out of this game.
TURN 5- IMPERIAL KNIGHTS
In turn 5, Nick scored both his maelstrom points. This turn, he chose Hold Objective 1 and Destroy an enemy unit.

The Knight Acheron moved to get into range of the Drop Pod with its flame cannons, while the Atropos stayed in position. Both Knights were able to recover a wound thanks to their repair rolls.
The Acheron fired on the Drop Pod, hitting four times and wounding four times. I failed three of my 5+ saves, using a command point re-roll to try and keep it alive, but failed and the Drop Pod was destroyed.

The Knight Atropos fired on the Deathwatch Biker, hitting four times and wounding four times (I don't think the Atropos missed with a single shot all game), killing the Biker.
TURN 5- DEATHWATCH
This turn, I scored no maelstrom points and chose Hold Objective 2 and Destroy an enemy unit, neither of which I could realistically achieve.

The Vanguard Veterans finally leapt into action, moving to secure the objective held by the Knight Acheron. The Watch Master moved to grab the objective in the enemy deployment zone.

The Vanguard Veterans fired their Bolt Pistols at the Knight, actually managing to wound it once.
MAELSTROM POINTS:
Imperial Knights- 7
Deathwatch- 4
If the game ended now, I would win on the Eternal War mission. Nick rolled and the game continued.
TURN 6- IMPERIAL KNIGHTS
Nick once again scored both his maelstrom points. This turn, he chose Hold Objective 1 and Destroy an enemy unit.

The Atropos moved from holding its objective to try and target the Watch Master.


The Knight Acheron fired its flamer at the Vanguard Veterans, killing three of the squad. The Twin Heavy Bolters managed to do 4 wounds, but failed to get past the armour of the Veterans. The Knight Atropos fired at the Watch Master, wounding him once and causing three damage, taking him to half wounds in a single shot.
The Acheron assaulted the rest of the Vanguard Veterans, easily killing the rest of the squad with his Titanic feet.
TURN 6- DEATHWATCH
Yet again, I scored no maelstrom points. I chose to try and achieve Behind Enemy Lines and hold objective 2 for the final turn.

This is where the big decision came in. The Watch Captain could contest the objective held by the Knight this turn. With the Watch Master holding one objective, this meant I would win on the eternal war objectives. However, if the game went on to turn 7, I would most likely be tabled by the Knights, as they only had to kill 2 models. However, if I held off with the Watch Captain, I could contest the objective in turn 7 for definite, but if the game ended on turn 6, it would be a draw. If the game did go on to turn 7, it was likely Nick could get his Atropos onto another objective if he assaulted and killed the Watch Master in his turn.


I decided to risk it for the win. The Watch Captain moved to contest the objective held by the Knight, while the Watch Master moved to the other side of the ruins to hold the objective.
With that, my turn ended and it came down to a 50/50 roll of whether I would win the game. I rolled the die and it came up a 2, the game ended!
VICTORY POINTS:
Imperial Knights: Eternal War- 0, Maelstrom- 9, no tertiary objectives
Deathwatch: Eternal War- 3 (one objective), Maelstrom- 4, Big Game Hunter and Linebreaker.
A win for the Deathwatch, netting me 10 tournament points to Nick's 8 tournament points.
AFTER-BATTLE THOUGHTS
Technically a win for the Deathwatch, but it turns out that Nick and I had made a big error during the game.
After speaking with someone else after the game, I discovered that I was rolling to wound the Knight on a 5+ with my Bolter shots. As the Knights are T8, I should only have been wounding them on a 6+. Effectively, I was scoring double the number of wounds that I should have been with my Bolters. Neither Nick or myself noticed this error during the course of the game.
As a result, I think that things should have gone very differently. I might have been able to kill off one of the Knights, but I doubt I would have killed off the Knight Errant, had I been wounding on 6's as I should have been (I'm pretty sure the blow with the Power Sword that killed him rolled a 5 to wound). Nick had already left at this point, so I went and spoke to the tournament organiser and explained the situation. I have little doubt that if we had been playing correctly, that Nick would most likely have tabled me and won the game with full points. I felt bad to claim a win that I really did not deserve.
The TO said that he would speak with Nick the next morning and decide what they should do; either they reverse our scores to give Nick the win, or we call it a draw. Nick very graciously decided to take the draw the next morning, so my "win" went down to a draw.
A big thanks to Nick for being a great sport and for being so understanding of the error. I also have to apologies, as I think I was a bit of a dick during the game. When I saw that I was facing four Knights, I was severely disheartened, thinking that I was probably going to be tabled. I don't think I was a very fun guy to play against for this game, being pretty miserable throughout, especially as Nick just kept rolling those 6's early in the game.
Even with the error, there were other mistakes that I made. I think I should have gone after the Knight Acheron on turn 1 with the Meltagun squad and most of my firepower. The Acheron Flame Cannon was too potent a weapon to allow to fire for the full game, especially as Nick kept rolling 9+ shots for it for most of his turns. Had I been able to destroy this on turn 1, it may have helped some of my other units survive over the course of the game. I went after the Lancer, so that I could put my Veteran Squad and Watch Master in cover. The Lancer would have been more of a threat in combat, I think, forcing Nick to come after me or to ignore my squad and go for my main line. The Lancer only had 5 shots from shooting and was still hitting on a 3+, giving me better odds than against the Flame Cannon.
I also might have been better putting the Corvus Blackstar on the other flank, away from the flame weapon. This may have limited the damage that could have been done to it on turn 1 and may have even allowed it to survive the first turn to get into a better position on my turn 1. I simply did not realise how potent the Flame Cannon was at shooting. 2D6 shots hitting automatically at 18" is bad enough, but being S7 and doing 3 damage per shot made it the perfect gun for taking out most of my army. Even though it is only AP-2, I seemed incapable of making any 4+ saves when in cover or any of my 5+ armour saves throughout the game, allowing it to decimate much of my army.
So, at the end of day 1, I had one win, one draw and one loss for my Deathwatch. Hopefully I could score at least one win on day 2 to give me at least an average showing for the Deathwatch at the tournament.
Imperial Knights- 4
Deathwatch- 2
At the end of turn 3, I had managed to take out a second Knight. Now I would just have to see if I could survive till the end of the game. I doubted I had enough firepower left to take out a third Knight.
TURN 4- IMPERIAL KNIGHTS
In turn 4, Nick scored Objective 1. This turn, he chose Destroy an enemy unit and Hold Objective 1.

The Knight Acheron moved up to secure objective 2, while the Knight Atropos stayed on objective 1.


The Atropos fired at the last surviving Kill Team, hitting and wounding four times and wiping them out with another supercharged shot.
The Acheron fired its Flame Cannon at the Assassin, hitting him eight times and wounding 5. The Assassin failed two saves and was burned alive, as each wound did 3 damage. It fired its Twin Heavy Bolter at the Biker, hitting six times and wounding twice, but I made both my saves.
TURN 4- DEATHWATCH
This turn, I scored both my maelstrom points. I then chose Hold Objective 1 and Kill an enemy unit. I had little chance of achieving either.

The Biker moved behind the Bastion, hoping to hide from the enemy firepower. The rest of the army remained in hiding to try and seize the objectives.


The Drop Pod fired at the Knight Acheron, hitting twice but failing to wound.
MAELSTROM POINTS:
Imperial Knights- 5
Deathwatch- 4
Things were set for the final turns. If I could hold out, I could maybe pull a draw out of this game.
TURN 5- IMPERIAL KNIGHTS
In turn 5, Nick scored both his maelstrom points. This turn, he chose Hold Objective 1 and Destroy an enemy unit.

The Knight Acheron moved to get into range of the Drop Pod with its flame cannons, while the Atropos stayed in position. Both Knights were able to recover a wound thanks to their repair rolls.
The Acheron fired on the Drop Pod, hitting four times and wounding four times. I failed three of my 5+ saves, using a command point re-roll to try and keep it alive, but failed and the Drop Pod was destroyed.

The Knight Atropos fired on the Deathwatch Biker, hitting four times and wounding four times (I don't think the Atropos missed with a single shot all game), killing the Biker.
TURN 5- DEATHWATCH
This turn, I scored no maelstrom points and chose Hold Objective 2 and Destroy an enemy unit, neither of which I could realistically achieve.

The Vanguard Veterans finally leapt into action, moving to secure the objective held by the Knight Acheron. The Watch Master moved to grab the objective in the enemy deployment zone.

The Vanguard Veterans fired their Bolt Pistols at the Knight, actually managing to wound it once.
MAELSTROM POINTS:
Imperial Knights- 7
Deathwatch- 4
If the game ended now, I would win on the Eternal War mission. Nick rolled and the game continued.
TURN 6- IMPERIAL KNIGHTS
Nick once again scored both his maelstrom points. This turn, he chose Hold Objective 1 and Destroy an enemy unit.

The Atropos moved from holding its objective to try and target the Watch Master.

The Knight Acheron fired its flamer at the Vanguard Veterans, killing three of the squad. The Twin Heavy Bolters managed to do 4 wounds, but failed to get past the armour of the Veterans. The Knight Atropos fired at the Watch Master, wounding him once and causing three damage, taking him to half wounds in a single shot.
The Acheron assaulted the rest of the Vanguard Veterans, easily killing the rest of the squad with his Titanic feet.
TURN 6- DEATHWATCH
Yet again, I scored no maelstrom points. I chose to try and achieve Behind Enemy Lines and hold objective 2 for the final turn.

This is where the big decision came in. The Watch Captain could contest the objective held by the Knight this turn. With the Watch Master holding one objective, this meant I would win on the eternal war objectives. However, if the game went on to turn 7, I would most likely be tabled by the Knights, as they only had to kill 2 models. However, if I held off with the Watch Captain, I could contest the objective in turn 7 for definite, but if the game ended on turn 6, it would be a draw. If the game did go on to turn 7, it was likely Nick could get his Atropos onto another objective if he assaulted and killed the Watch Master in his turn.


I decided to risk it for the win. The Watch Captain moved to contest the objective held by the Knight, while the Watch Master moved to the other side of the ruins to hold the objective.
With that, my turn ended and it came down to a 50/50 roll of whether I would win the game. I rolled the die and it came up a 2, the game ended!
VICTORY POINTS:
Imperial Knights: Eternal War- 0, Maelstrom- 9, no tertiary objectives
Deathwatch: Eternal War- 3 (one objective), Maelstrom- 4, Big Game Hunter and Linebreaker.
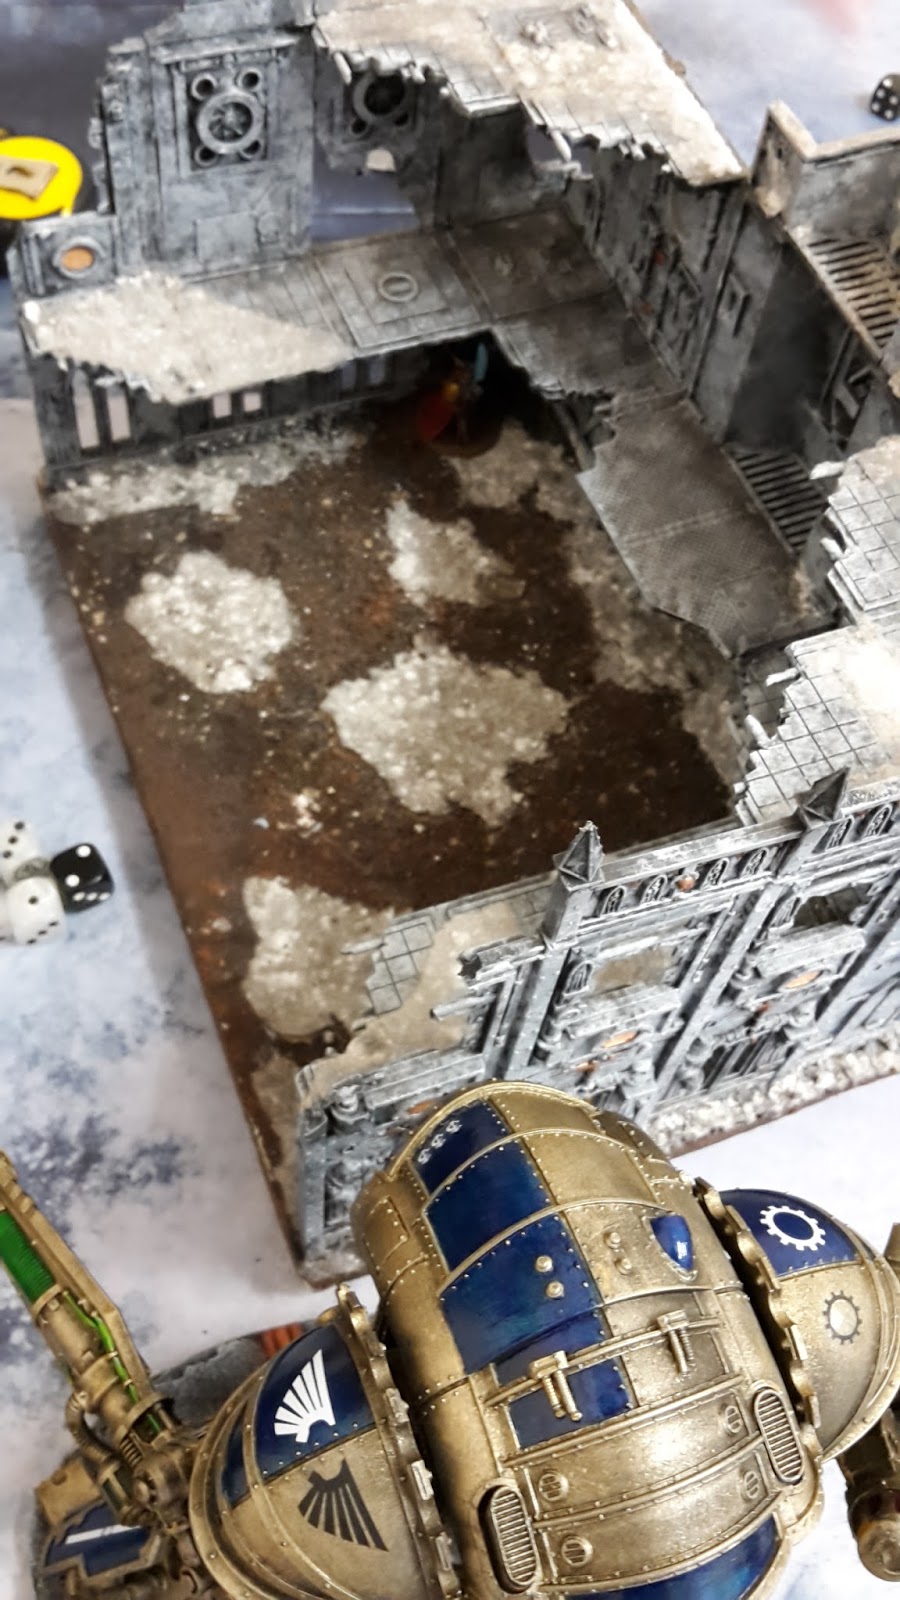
 |
| End of the game. |
A win for the Deathwatch, netting me 10 tournament points to Nick's 8 tournament points.
AFTER-BATTLE THOUGHTS
Technically a win for the Deathwatch, but it turns out that Nick and I had made a big error during the game.
After speaking with someone else after the game, I discovered that I was rolling to wound the Knight on a 5+ with my Bolter shots. As the Knights are T8, I should only have been wounding them on a 6+. Effectively, I was scoring double the number of wounds that I should have been with my Bolters. Neither Nick or myself noticed this error during the course of the game.
As a result, I think that things should have gone very differently. I might have been able to kill off one of the Knights, but I doubt I would have killed off the Knight Errant, had I been wounding on 6's as I should have been (I'm pretty sure the blow with the Power Sword that killed him rolled a 5 to wound). Nick had already left at this point, so I went and spoke to the tournament organiser and explained the situation. I have little doubt that if we had been playing correctly, that Nick would most likely have tabled me and won the game with full points. I felt bad to claim a win that I really did not deserve.
The TO said that he would speak with Nick the next morning and decide what they should do; either they reverse our scores to give Nick the win, or we call it a draw. Nick very graciously decided to take the draw the next morning, so my "win" went down to a draw.
A big thanks to Nick for being a great sport and for being so understanding of the error. I also have to apologies, as I think I was a bit of a dick during the game. When I saw that I was facing four Knights, I was severely disheartened, thinking that I was probably going to be tabled. I don't think I was a very fun guy to play against for this game, being pretty miserable throughout, especially as Nick just kept rolling those 6's early in the game.
Even with the error, there were other mistakes that I made. I think I should have gone after the Knight Acheron on turn 1 with the Meltagun squad and most of my firepower. The Acheron Flame Cannon was too potent a weapon to allow to fire for the full game, especially as Nick kept rolling 9+ shots for it for most of his turns. Had I been able to destroy this on turn 1, it may have helped some of my other units survive over the course of the game. I went after the Lancer, so that I could put my Veteran Squad and Watch Master in cover. The Lancer would have been more of a threat in combat, I think, forcing Nick to come after me or to ignore my squad and go for my main line. The Lancer only had 5 shots from shooting and was still hitting on a 3+, giving me better odds than against the Flame Cannon.
I also might have been better putting the Corvus Blackstar on the other flank, away from the flame weapon. This may have limited the damage that could have been done to it on turn 1 and may have even allowed it to survive the first turn to get into a better position on my turn 1. I simply did not realise how potent the Flame Cannon was at shooting. 2D6 shots hitting automatically at 18" is bad enough, but being S7 and doing 3 damage per shot made it the perfect gun for taking out most of my army. Even though it is only AP-2, I seemed incapable of making any 4+ saves when in cover or any of my 5+ armour saves throughout the game, allowing it to decimate much of my army.
So, at the end of day 1, I had one win, one draw and one loss for my Deathwatch. Hopefully I could score at least one win on day 2 to give me at least an average showing for the Deathwatch at the tournament.
Another great read Mike.
ReplyDeleteAs I was reading this two thoughts struck me....1. Bloody hell Death Watch must have strength 5 Bolters (had my worried there) and 2. I was really routing for the boys in black to do a number on the Knights!
Well played nonetheless, I can certainly relate to that feeling of hopelessness when confronted with such an army. My frustration often comes to the surface with such mis-matches, it is never meant against the player, it's just so frustrating when one spends all that time building and painting an army only to realise that the game is a non-entity before a dice is rolled.
Keep up the great work buddy!
I agree. I know it is only a game, but spending all that time and money to go to an event and get crushed without a hope is never fun.
DeleteWow, not a good matchup for you I think! You did really well to get as close to a win as you did, unfortunately I think actually massed fire probably hurts knights far more than elite shooting does, it's amazing how many saves I failed when I used mine against simple boltguns and the like.
ReplyDeleteYeah, massed fire does seem to be the way to go. High damage weapons are good, but there is always the chance that they make the invulnerable save.
DeleteHad we played it properly, it would have been a much worse game for me.
Michael, I think you should have concentrated Fire of whole army on one Knight each turn, thus reducing the return firepower by a quarter, third, half... only way I feel a 'normal' army can deal with Imp Knights.
ReplyDeleteThat was pretty much my plan for the game. Every unit that could fire at the Atropos did in turn 1. Only Kill Team 1 fired at the Errant, as they did not have range on the Atropos.
DeleteOn turn 2, all remaining units that could went for the Errant. After that, I simply didn't have enough firepower left!
Such is the way in these games! Good effort tho, and great Batrep with lots of nice pics. Glad you had the chance to apologise to your opponent for being a grumpy git ha ha, I feel bad when I've been a grump too.
DeleteWow what a brutal game. I think this was the first time I was actually rooting for the Deathwatch to win it, shame that it turned out you guys had made a mistake. You still played very well and took what you could. Killing one of those beasts in one turn and then another is no mean feat without dedicated anti-armor (surely a Genestealer Mining Drill would've helped here with it's mortal wounds ;)). I think losing the Corvus so early really hurt.
ReplyDeleteThe whole target priority thing is always going to be sucky if you face an army for the first time. In hindsight going for the Acheron would've probably been best as you said. Hope you won the last one!!!
Thanks for the batrep!
Yeah, the Acheron is just brutal. I haven't actually faced one personally, but I've seen enough BatReps with them that it would have been my public enemy #1.
ReplyDeleteI'm not actually surprised to see a Knight list so far down in the standings. They have a lot of weaknesses, particularly in the ITC Missions. Horde Armies can swarm them down surprisingly well, and since Objectives are mostly controlled by number of Models, they can get smashed in that regard even if they actually take relatively little damage.
I hadn't thought of that WestRider. Horde armies could do really well against Knights in this kind of format.
DeleteCheers, Chris. Had the Corvus not died, I probably would have headed for his deployment zone and tried to stay out of the way with my Kill Team inside.
I've faced that glance cannon, it is devastating. It's hideous that a weapon designed to be anti infantry has become such a potent vehicle killer. So many shots that auto hit doing 3 wounds apiece, I'll take that over melta that might miss any day.
ReplyDeleteGlance cannon, wow autocorrect that is a hell of a leap...
DeleteHaha! If only it would glance! Might have some of my army left.
Delete