
Welcome to my first battle report from a recent doubles tournament held at 6s2Hit in Edinburgh. Innes and I travelled through on a rather cold and windy Sunday morning with our armies to see how we would fare against the competition.

I had never been to the store before, but really enjoyed the experience. One half of the store has six 6x4 gaming tables, the other half has the café area where you can get hot food and drinks (I had an awesome coronation chicken Panini and chocolate brownie for lunch). They also have display cases with painted armies and the retail area, where you can pick stuff up for a variety of different game systems. They also had an awesome display on one of the walls with a bunch of different boxed sets from various editions of 40k and fantasy, as well as some other games. It was a really nice store, I will be keeping an eye out for any more events and recommend you take a look if you are ever in the Edinburgh area.


On to the tournament itself: Teams were comprised of 2 players, each with 1000 pts to spend on their army. Other than that, there were no restrictions. Armies could be bound, unbound or made up of formations, and Forgeworld units were allowed. The missions would be maelstrom, determined at each round by rolling in the book (the same mission for all games that turn). Each player would have their own warlord with warlord traits, but would need to choose a Supreme warlord for each game (who would give up Slay the Warlord when killed). Each player would also draw from their own maelstrom deck and could only score their own cards (e.g. you would only score Secure Objective 6 if your own units held it, not if your partner's units held the objective only). Impossible cards had to be kept and you could discard one card each turn.
With no restrictions in place other than the points limit, we did not know what to expect in all three games.
With no restrictions in place other than the points limit, we did not know what to expect in all three games.
My army consisted of:
Combined Arms Detachment
Kor'sarro Khan- Moondakken (with CS)
Librarian- Mastery level 1, Bike, Meltabombs, Hunter's Eye (with CS or L)
5 Command Squad- 4 Grav guns, Apothecary, Storm Shield (CS)
5 Bikers- 2 Grav guns, sergeant has meltabombs (B1)
5 Bikers- 2 Grav guns, sergeant has meltabombs (B2)
5 Scouts- Bolt pistols, combat weapons, Sergeant has Meltabombs (S)
Landspeeder Storm- Cerberus launcher, Heavy bolter (LS)
Drop Pod- Storm Bolter (DP)
Stormtalon- TL assault cannons, Skyhammer missile launcher (ST)
Innes' 1000 points army consisted of:
Dominus Maniple
Tech Priest Dominus- Raiment of the Technomartyr, Volkite Blaster, Macrostubber, Conversion Field (TD)
5 Skitarri Vanguard- 2 Plasma Calivers, Omnispex, Vanguard Alpha with Red Carbine. (V)
2 Onager Dunecrawlers- Neutron Laser and Cognis Heavy Stubber, Cognis Manipulator (D)
Oathsworn Detachment
Mechanicum Cerastus Knight Atropos- Occular Augmetics. (K)
My army was designed to be very fast for grabbing maelstrom objectives, plus armed to the teeth with grav weaponry for taking on any tough units such as Wraithknights, Riptides, etc. The only change to the Mechanicus army was reducing the Vanguard squad from 10 to 5 (to utilise the drop pod) and the addition of another Dunecrawler. Innes' army had the hard hitters with the Imperial Knight (armed with D weapons) and the Dunecrawlers.
For the first game, our supreme warlord was Khan. My Librarian got Hallucination and Psychic Shriek for his powers. Innes' Dominus got to make one weapon master-crafted as his warlord trait.
Our first opponents of the day were LJ and Beattie, who were commanding a Tau army and a Dark Eldar/Eldar army. Their forces consisted of:
Tau Farsight Enclaves CAD
Tau Commander- Blacksun Filter, Drone Controller, 2 x Missile Pods, Multi-target lock (C)
10 Kroot- sniper rounds (K)
Crisis Battlesuit- 2 Flamers (CS1)
Crisis Battlesuit- 2 Flamers (CS2)
Crisis Battlesuit- 2 Flamers (CS3)
Crisis Battlesuit- 2 Flamers (CS4)
4 Marker Drones (with C)
Y'vahra Battlesuit- Flechette dispersal pods, Ionic Discharge Cannon, Phased-plasma flamer (Yv)
Stormsurge- Advanced Targeting Systems, cluster rocket system, 4 destroyer missiles, Early warning system, airburst (S)
Dark Eldar CAD
Archon- Kabalite Armour, Close combat weapon, Splinter Pistol, Webway Portal (with WG)
5 Kabalite Warriors- splinter rifles (K1)
Raider- Dark Lance (R1)
5 Kabalite Warriors- splinter rifles (K2)
Raider- Dark Lance (R2)
3 Reaver Jetbikes- Blaster (RJ1)
3 Reaver Jetbikes- Blaster (RJ2)
Haemonculus Coven- Scalpel Squadron
5 Wracks (W1)
Venom- Splinter Cannon (V1)
5 Wracks (W2)
Venom- Splinter Cannon (V2)
Eldar Allies
Autarch- Banshee Mask, Firesabre, Fusion Gun, Shuriken Pistol, The Phoenix Gem, Warp Jump Generator (A)
5 Wraithguard- Wraitcannons (WG)
3 Windriders- Twin-linked Shuriken Catapults (W)
The Archon got +1 WS as his warlord trait, while the Tau Commander gave us -1 to our reserve rolls. I was really hoping to not face a Stormsurge so soon after just getting pummelled by one in our last game. Fortunately, it did not seem to have too much markerlight support, so I may actually get to Jink in this game. This game would also mark one of the first times I may be able to out-psychic power an Eldar army. The Wraithguard would be worrying, but were not armed with the D-scythes, unusually. Oh, and my old friend the Y'vahra (or Mr. Bike Killer, as I know him) was also on the board.
The Tau army even featured a Stormsurge that lit up!
The first mission was Tactical Escalation (drawing maelstrom cards equal to the turn number) with Hammer and Anvil set up. The objectives were set up as shown below. We were using mysterious objectives and these were:
Objective 1- Grav wave generator (-2 to charge)
Objective 2- Nothing of note
Objective 3- Skyfire Nexus
Objective 4- Nothing of note
Objective 5- Nothing of note
Objective 6- Nothing of note
(they were rolled when they were unveiled, but it is easier to record them now).

We won the roll for table edge and chose the east side of the board as it had some nice big line of sight blocking cover for the ground units and gave some decent protection to the Knight.
We rolled to see who would deploy. I rolled a 1 and was fortunate that our opponent did the same. Innes took the re-roll, but we still lost and would be deploying second.
The Y'vahra deployed at the front of the ruins in their deployment zone, with the Tau Commander, marker drones and Stormsurge behind them. The two Raiders deployed behind the ruins to the other flank, with the three units of Jetbikes deployed at the back of the board. The Kroot were to infiltrate, while the Crisis suits, Venoms (with Wracks) and Wraithguard/Archon would be in reserve.
We deployed the Knight in the middle of the big ruins on our left, with the command squad out of line of sight in front of them and the Landspeeder storm beside the Knight (to hinder deep striking units). One unit of bikers went on left of the ruins with another to the rear, making sure all my units were out of range of the Y'vahra or at least out of line of sight. The Dunecrawlers deployed in the ruins to the right. The Vanguard and Dominus went in the drop pod. My plan was to see what survived the first turn and try and score as many cards as possible with my mobility.


The Kroot infiltrated to the woods in front of the Dunecrawlers. I chose not to Scout with any of my bikers. I did not want to get in range of the Y'vahra too early.
We then managed to Seize the Initiative and got first turn!
TURN 1- WHITE SCARS/MECHANICUS
In turn 1, I drew Objective 1 and Innes drew Objective 3. The Kroot currently held objective 3 and objective 1 was deep in the Tau lines. We would be unlikely to score any this turn.

The drop pod carrying the Vanguard arrived, crashing to ground in front of the ruins sheltering the Tau Commander. The Vanguard spilled out, staying out of sight of the Stormsurge. The bikers, Knight and Dunecrawlers advanced towards the enemy lines, eager to do as much damage as possible before their opponents could respond.


In the psychic phase, the Librarian cast Hallucination on the Y'vahra, but I rolled a one on the table and it had no effect on the battlesuit.
The Command squad fired at the Raider in front of them, taking two hull points from it and immobilising it (thanks to the grav guns). The unit of bikers to their left fired at the same Raider, but were unable to harm it.
The Landspeeder storm fired at the Kroot. The Cerberus launcher caused no damage, but managed to blind the unit, while the heavy bolter killed one. The final unit of bikers also targeted the Kroot, but could not get past their cover saves.
The Vanguard squad targeted the Y'vahra. Their weaponry ignored its strong armour, wounding it twice, but its invulnerable save kept it from harm. The Dunecrawlers also targeted the battlesuit, wounding it 6 times with their Neutron lasers and Heavy Stubbers, but a combination of armour and cover saves kept it alive.
The Knight fired at the Tau Commander with the drones, killing two of the drones with its large blast cannon. The Commander passed his morale check and kept fighting.
We had managed to seize the first turn, but had not done a huge amount of damage to the enemy army. One of the Raiders had been immobilised and we had killed a couple of Kroot and (more importantly) some drones. The Y'vahra and Stormsurge were, however, still unscathed.
We scored no points for this turn and I discarded Secure Objective 1.
TURN 1- TAU/DARK ELDAR
In their first turn, the Tau drew Recon (reveal all mysterious objectives) and the Dark Eldar drew Take them Alive (destroy a unit in the assault phase).

The two Venoms arrived by Deep strike- one misshaping and going back into ongoing reserves, the other aiming for objective 6 (to reveal the mysterious objective), but scattering off it towards the ruins to the left. The Y'vahra used its boosted move to fly towards the Command Squad and Knight, getting into the side arc of the Knight in the process. The Stormsurge moved forward to see more targets, while the mobile Raider moved to get to the side arc of the Knight as well.
The Tau Commander moved the drones up the ruins towards the enemy lines, managing to roll a triple one for his 3 dangerous terrain checks! One more drone died in the ruins.


The Commander opened fire at the Landspeeder storm, but was unable to damage the Jinking speeder. The Kroot snap fired at the Vanguard and managed to wound the Alpha once. The Stormsurge targeted them also, but could not kill any of the warriors. The Reaver Jetbikes targeted the bikers in front of them, but were unable to wound them.
The Command squad became the target of much of the enemy firepower. The Raider and Kabalites in front of them fired at the White Scars, but could not wound the Jinking bikers. The Stormsurge fired its Cluster rockets at the squad, wounding them 3 times. I failed 2 saves (along with 2 FNP rolls) and two died. The Autarch opened fire on the squad, wounding the Librarian once.
The Knight then became the focus of the enemy firepower. The Stormsurge fired a Destroyer missile at the Knight, taking a hull point from the massive walker, its shield being unable to stop the blow. It then fired a large blast at the Knight, failing to wound it, but killing one of the bikers below it. The Raider in its flank also managed to take another hull point with its Dark Lance.
Finally, the Y'vahra fired at the Knight and Command Squad, hitting three of the squad. The plasma flamer hit Khan first and he managed to block two of the wounds. The Knight suffered no damage from the flamer. The Y'vahra then fired its haywire shots at the side of the Knight, taking a further 2 hull points from it.

The venom turbo-boosted to grab objective 6. The Y'vahra used its jetpack move to retreat to the ruins behind it.

At the end of the enemy first turn, we had not suffered too much, the Knight was down to 3 hull points, but was still mobile. Our opponents scored one point this round for Recon and discarded Take them Alive.
Victory Points:
White Scars/Mechanicus- 0
Tau/Dark Eldar- 1
TURN 2- WHITE SCARS/MECHANICUS
This turn, I drew Objective 3 and Big Game Hunter, while Innes drew Reclaim Lost Knowledge (grab an objective the enemy were controlling at the start of the turn) and had Objective 3 from last turn. We had a good chance of scoring all our cards this turn, all we would need to do was clear the Kroot from objective 3 and destroy a Raider.

On our right flank, the Landspeeder storm advanced, the scouts leaping out to target the Kroot. The Bike unit, Vanguard and Dunecrawlers also moved up to support them.


On the left flank, the Command squad entered the ruins to target the immobilised Raider, the last bike unit moved to engage the other Raider and the Knight moved up to support.
In the psychic phase, the Librarian cast psychic shriek on the Y'vahra, scoring 5 wounds on the battlesuit. The Y'vahra managed to save 2 of the wounds, leaving it on one.
In the shooting phase, the Dunecrawlers fired at the Tau Commander, killing him and the last drone instantly with their S10 attacks to get us First Blood and Slay the Warlord. The Command Squad fired at the Raider in front of them, easily wrecking it. The Kabalites disembarked as far from the Command Squad as possible. The other bikers on the left flank snap fired at the second Raider, glancing it once, but the damage was saved by the Jinking pilot.
On the right flank, the Vanguards and Scouts shot at the Kroot, wiping the unit out despite their cover saves, to claim the objective. The bikers turbo-boosted back towards objective 5 as they were not needed for the attack.

The Knight fired its main weapon at the Stormsurge. The roll came up a 6, meaning the shot was a vortex shot. It only managed to wound the Stormsurge once, but the template remained in play.
In the assault phase, the Command squad launched their bikes at the Kabalites from the wrecked Raider, managing to make the 9" charge. The squad took one wound to overwatch fire, but once again, the Apothecary saved the damage. The Hammer of Wrath attacks, then Khan's attacks were enough to finish off the unit. The other unit of bikers assaulted the second Raider, easily wrecking it with their grenades.

The Knight assaulted the Y'vahra. Things did not look good as its Hammer of Wrath and 4 attacks failed to take the final wound from the Tau battlesuit. However, its single S6 stomp attack managed to beat the 2+ armour save of the Y'vahra and it was destroyed.
At the end of our turn, we scored all 4 of our objectives, as well as First Blood and Slay the Warlord to give us a massive 6 points.
TURN 2- TAU/DARK ELDAR
This turn, the Dark Eldar drew Objective 6 (which they currently controlled) and Overwhelming Firepower (destroy an enemy unit in the shooting phase). The Tau got Patient Hunter and Psychological Warfare (force a failed morale check).

At the start of the turn, the vortex marker scattered only a few inches, remaining on the Stormsurge. Innes rolled on the Destroyer table and got a 6! The Stormsurge was completely annihilated. That was a hell of an unlucky blow for our opponents and a great result for us! This result was so good for us, I think we actually forgot about the vortex marker from then on.
The second Venom arrived, this time arriving on target in front of the scouts. The Wraithguard also arrived, deep striking beside the Knight. Three of the Crisis suits arrived from reserve, two going after the bikers in our deployment zone, the third going after the nearby Scouts.


The wracks on objective 6 disembarked from the Venom, their transport moving off to target the enemy. The Jetbikes moved up on both flanks to target the opposition in front of them.
On the left flank, the Reaver Jetbikes targeted the drop pod, but failed to hit it. The Crisis Suit, Wracks and Venom fired at the Scouts, killing 4 of the squad and leaving the sergeant alive. In our deployment zone, the two Crisis Suits fired their four flamers at the bikers. The firepower caused 5 wounds and I managed to fail 4 saves, leaving only one biker remaining. Fortunately, both the scouts and lone biker passed their morale checks.


On the right flank, the venom opened fire on the other unit of bikers. Again, I managed to fail two saves and the two grav gun bikers died. The Kabalites from the wrecked Raider fired at the bikers. Again, abysmal saving throws from me resulted in another 2 dead bikers. The Reaver Jetbikes targeted the last biker, wounding him twice. This time, I was able to save the shots and he survived, as well as passing his morale check.
The Windriders fired at the Command Squad, wounding them twice, but a combination of armour and FNP saves kept them from harm.
The Autarch fired his Fusion gun at the Knight, taking a hull point from it. The Wraithguard fired their Wraithcannons at the Knight, easily removing its last two hull points and blowing it up. The resulting explosion hit the command squad killing two of the bikers. Khan took a S10 wound. All eyes were on me as I took his Invulnerable save (we were only in turn 2 and it was already a running joke that I was incapable of making a save). Fortunately, I made the roll and he survived.
At the end of their turn, LJ and Beattie scored Objective 6 and Overwhelming Firepower. An interesting turn all round. We had lost the Knight and most of the bikers in the army, but our opponents had taken a huge blow in losing the Stormsurge and many of the Tau units. They still had 3 units of Jetbikes though for objective grabbing.
Victory Points:
White Scars/Mechanicus- 6
Tau/Dark Eldar- 3
TURN 3- WHITE SCARS/MECHANICUS
This turn, I drew Supremacy (hold at least 2 objective and twice as many as your opponent), Hold the Line (3 units in deployment zone and no enemy units) and Harness the Warp (cast a psychic power). Innes drew Objective 6, Hold the Line and Destroy, Record, Rejoice (destroy an enemy unit, I think). Hold the line would be very difficult to achieve this turn, but I could probably get Harness the Warp and maybe Supremacy.

The Stormtalon arrived, moving in to hover mode to target the Wracks and secure objective 6. Khan, the Librarian and Apothecary advanced on the Windriders, while the lone biker beside them moved to grab objective 2. The other biker moved to get objective 5 and take on the Crisis suit. The Dunecrawlers and Vanguard moved up on objective 3. The Landspeeder storm moved towards the crisis suit holding objective 5.


The Librarian cast psychic shriek on the Windriders, killing one of the unit. He then failed to cast Hallucination on the Reaver Jetbikes in the nearby ruins.
The Dunecrawlers fired at the Wraithguard, killing 5 of the unit and leaving one left. The lone biker on objective 2 fired at the nearby Kabalite warrior, hitting him twice, but failing to wound (on a 3+). The Command Squad fired at the Windriders, killing another of the Eldar warriors.
The Stormtalon fired at the Wracks, wiping out the squad with the combined firepower of its assault cannons and skyhammer missiles. Beside the flyer, the lone grav biker and Landspeeder storm fired at the crisis suit, but could not harm him.
In the assault phase, Khan's unit charged the lone windrider, their hammer of wrath attacks proving sufficient to finish him off. The lone biker also charged the lone kabalite warrior, but I was horrified when the biker was slain by the overwatch fire (my knack of failing saves struck again).
At the end of the turn, I scored Harness the Warp and Innes scored Destroy, Record, Rejoice. I discarded Hold the Line and Innes discarded Objective 6.
TURN 3- TAU/DARK ELDAR
This turn, the Dark Eldar drew Pain in all its Forms (destroy an enemy unit in shooting or assault phase), Objective 1 and Objective 3. The Tau drew Behind Enemy Lines, Objective 3 and Supremacy.

The venom on the right flank attempted to move through the ruins, but immobilised itself on them. The crisis suit moved up on the lone grav gun bikers, as the wracks moved towards the lone scout and the crisis suit moved to grab the nearby objective. The Autarch attempted to use his warp jump generator, but it malfunctioned and sucked him into the warp (he rolled a double 1 for movement).


The lone Kabalite warrior fired at the Command Squad, managing to wound twice with his two shots. I failed both saves (predictably), but managed to make two FNP rolls (the Apothecary was on fire in this game). The Reaver Jetbikes fired at the Command Squad, wounding Khan once.
The immobilised Venom fired at the lone grav biker, killing him, while the Crisis Suit fired at the Landspeeder storm, but failed to damage it.
The other venom fired at the Vanguard, but failed to wound them, while the nearby Reaver Jetbikers were finally able to glance the drop pod.
In the assault phase, the Wracks charged the lone scout, easily killing him to grab objective 3. On the left flank, the Reaver Jetbikes charged the Command Squad, losing one of their squad to overwatch fire. The hammer of wrath attacks wounded once, the Apothecary once again saving himself. The Librarian struck at the squad, wiping them out. This allowed me to consolidate onto objective 2 and deny them from scoring Supremacy this turn.

At the end of the turn, the Dark Eldar scored Pain in all its forms (scoring a 3 on the D3 roll), as well as objectives 1 and 3. The Tau also scored Behind Enemy Lines, giving them 6 points in total and taking them into the lead once again.
Victory Points:
White Scars/Mechanicus- 8
Tau/Dark Eldar- 9
TURN 4- WHITE SCARS/MECHANICUS
In turn 4, I drew Ascendency, Objective 6, Behind Enemy Lines and Supremacy. Innes drew Hungry for Glory, Objective 5, Domination and had Hold the Line.

The Librarian separated from the Command Squad to grab objective 2, while the Command Squad stayed in place to score Linebreaker. The Stormtalon turned towards the Crisis suit at objective 5.


The Librarian cast psychic shriek on the last Wraithguard warrior, but failed to roll high enough to wound him.
The Stormtalon fired at the Crisis suit, wounding it once with its assault cannon. The Landspeeder Storm fired at the suit too, but failed to wound. Khan fired at the lone Kabalite, slaying him. The Vanguard fired at the Wracks, killing three, while the Dunecrawler fired at the Wraithguard, killing the last member of the squad.
At the end of the turn, I scored all my maelstrom cards, getting 2 points for Ascendency. Innes scored no points for his cards this round.
TURN 4- TAU/DARK ELDAR
In the final turn, the Dark Eldar drew Demolitions (destroy a building), Objective 1, Objective 3 and Blood and Guts (destroy a unit in assault). The Tau drew Objective 5, Domination, Supremacy and The Lure.

The final crisis suit arrived, landing beside the Librarian, while the Jetbikes moved towards the Vanguard.


The Crisis suit fired at the Librarian, but the wound was saved. The venom fired at the Librarian, finally slaying the enemy psyker. The other crisis suit fired at the Landspeeder Storm, but failed to damage it. The Wracks fired at the Dominus, but all the wounds were saved.
The Reaver Jetbikes fired at the Vanguard, wounding one of the Mechanicus warriors. They then attempted to charge the unit, but two died to overwatch fire and they failed the charge.

At the end of the turn, the Tau scored supremacy for 3 points (he had 2 objectives, while we only held 1, the other 2 were contested) and Dark Eldar scored no points. With the game ended, we both scored Linebreaker.
Victory Points:
White Scars/Mechanicus- 14
Tau/Dark Eldar- 13
A win for the White Scars and Mechanicus army!
AFTER-BATTLE THOUGHTS
That was a very close and tough game that could have gone either way in final turn. Thanks to LJ and Beattie for a fantastic game that came right down to the final call.
Innes and I had some amazing luck and some awful luck all in the same game. Seizing the Initiative was extremely forturnate for us. We were careful with our set up to minimise the firepower of the Y'vahra and Stormsurge, but it still could have caused a lot of damage in the first turn and had us on the back foot.
The Stormsurge being lost to the second vortex hit was also a huge boost for us. In our practice game against the Stormsurge, it pretty much decimated our entire army throughout the game, so it was nice not having to worry about it here for too long.
My Apothecary and Librarian also performed brilliantly in this game. Normally, my apothecary does nothing until he is the last member of the squad alive. Then he finally remembers he has a Narthecium and won't die. This game, however, he was great and I made a ton of FNP rolls.
The Librarian also performed great. This is one of the few games where I saw his worth. Psychic Shriek is a great power and easy to cast. Coupled with the Hunter's Eye (for +1 BS), the chances of hitting with it are much better. I was also able to roll high enough most of the times I used it to cause a lot of damage.
I also had a lot of luck with the cards, particularly on turns 2 and 4, being able to score all of them and get a decent lead in the game. Innes had poorer luck with his cards. His army is quite slow on the board, so the secure objective cards were harder for him to achieve most turns.
We also had some poor luck in the game. My inability to make an armour save became a running joke for us and our opponents during the game. Innes even threatened to stop allowing me to take saves at one points, I was doing so badly.
I thought we were in real trouble after we failed to take out the Y'vahra, but Khan was able to soak up a lot of its firepower and most of the squad survived.
Thanks again to LJ and Beattie. The game was a blast and we had a good laugh during it, with the luck of both sides swinging wildly in the game. My lone biker being slain by the overwatch fire of the lone Kabalite was a particular highlight/lowlight (he hit and wounded with both shots on 6's!).
With a win in the first game, I was looking forward to the second game where we could hopefully do well again.
My army was designed to be very fast for grabbing maelstrom objectives, plus armed to the teeth with grav weaponry for taking on any tough units such as Wraithknights, Riptides, etc. The only change to the Mechanicus army was reducing the Vanguard squad from 10 to 5 (to utilise the drop pod) and the addition of another Dunecrawler. Innes' army had the hard hitters with the Imperial Knight (armed with D weapons) and the Dunecrawlers.
For the first game, our supreme warlord was Khan. My Librarian got Hallucination and Psychic Shriek for his powers. Innes' Dominus got to make one weapon master-crafted as his warlord trait.
Our first opponents of the day were LJ and Beattie, who were commanding a Tau army and a Dark Eldar/Eldar army. Their forces consisted of:
Tau Farsight Enclaves CAD
Tau Commander- Blacksun Filter, Drone Controller, 2 x Missile Pods, Multi-target lock (C)
10 Kroot- sniper rounds (K)
Crisis Battlesuit- 2 Flamers (CS1)
Crisis Battlesuit- 2 Flamers (CS2)
Crisis Battlesuit- 2 Flamers (CS3)
Crisis Battlesuit- 2 Flamers (CS4)
4 Marker Drones (with C)
Y'vahra Battlesuit- Flechette dispersal pods, Ionic Discharge Cannon, Phased-plasma flamer (Yv)
Stormsurge- Advanced Targeting Systems, cluster rocket system, 4 destroyer missiles, Early warning system, airburst (S)
Dark Eldar CAD
Archon- Kabalite Armour, Close combat weapon, Splinter Pistol, Webway Portal (with WG)
5 Kabalite Warriors- splinter rifles (K1)
Raider- Dark Lance (R1)
5 Kabalite Warriors- splinter rifles (K2)
Raider- Dark Lance (R2)
3 Reaver Jetbikes- Blaster (RJ1)
3 Reaver Jetbikes- Blaster (RJ2)
Haemonculus Coven- Scalpel Squadron
5 Wracks (W1)
Venom- Splinter Cannon (V1)
5 Wracks (W2)
Venom- Splinter Cannon (V2)
Eldar Allies
Autarch- Banshee Mask, Firesabre, Fusion Gun, Shuriken Pistol, The Phoenix Gem, Warp Jump Generator (A)
5 Wraithguard- Wraitcannons (WG)
3 Windriders- Twin-linked Shuriken Catapults (W)
The Archon got +1 WS as his warlord trait, while the Tau Commander gave us -1 to our reserve rolls. I was really hoping to not face a Stormsurge so soon after just getting pummelled by one in our last game. Fortunately, it did not seem to have too much markerlight support, so I may actually get to Jink in this game. This game would also mark one of the first times I may be able to out-psychic power an Eldar army. The Wraithguard would be worrying, but were not armed with the D-scythes, unusually. Oh, and my old friend the Y'vahra (or Mr. Bike Killer, as I know him) was also on the board.
The Tau army even featured a Stormsurge that lit up!
 |
| Hard to see in a photo, but it looked really nice. |
The first mission was Tactical Escalation (drawing maelstrom cards equal to the turn number) with Hammer and Anvil set up. The objectives were set up as shown below. We were using mysterious objectives and these were:
Objective 1- Grav wave generator (-2 to charge)
Objective 2- Nothing of note
Objective 3- Skyfire Nexus
Objective 4- Nothing of note
Objective 5- Nothing of note
Objective 6- Nothing of note
(they were rolled when they were unveiled, but it is easier to record them now).

We won the roll for table edge and chose the east side of the board as it had some nice big line of sight blocking cover for the ground units and gave some decent protection to the Knight.
We rolled to see who would deploy. I rolled a 1 and was fortunate that our opponent did the same. Innes took the re-roll, but we still lost and would be deploying second.
The Y'vahra deployed at the front of the ruins in their deployment zone, with the Tau Commander, marker drones and Stormsurge behind them. The two Raiders deployed behind the ruins to the other flank, with the three units of Jetbikes deployed at the back of the board. The Kroot were to infiltrate, while the Crisis suits, Venoms (with Wracks) and Wraithguard/Archon would be in reserve.
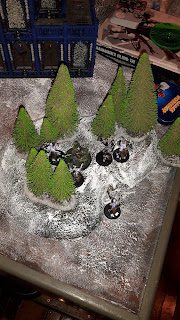
We deployed the Knight in the middle of the big ruins on our left, with the command squad out of line of sight in front of them and the Landspeeder storm beside the Knight (to hinder deep striking units). One unit of bikers went on left of the ruins with another to the rear, making sure all my units were out of range of the Y'vahra or at least out of line of sight. The Dunecrawlers deployed in the ruins to the right. The Vanguard and Dominus went in the drop pod. My plan was to see what survived the first turn and try and score as many cards as possible with my mobility.


 |
| The Command Squad hide out of line of sight. |
The Kroot infiltrated to the woods in front of the Dunecrawlers. I chose not to Scout with any of my bikers. I did not want to get in range of the Y'vahra too early.
We then managed to Seize the Initiative and got first turn!
TURN 1- WHITE SCARS/MECHANICUS
In turn 1, I drew Objective 1 and Innes drew Objective 3. The Kroot currently held objective 3 and objective 1 was deep in the Tau lines. We would be unlikely to score any this turn.

The drop pod carrying the Vanguard arrived, crashing to ground in front of the ruins sheltering the Tau Commander. The Vanguard spilled out, staying out of sight of the Stormsurge. The bikers, Knight and Dunecrawlers advanced towards the enemy lines, eager to do as much damage as possible before their opponents could respond.


In the psychic phase, the Librarian cast Hallucination on the Y'vahra, but I rolled a one on the table and it had no effect on the battlesuit.
The Command squad fired at the Raider in front of them, taking two hull points from it and immobilising it (thanks to the grav guns). The unit of bikers to their left fired at the same Raider, but were unable to harm it.
The Landspeeder storm fired at the Kroot. The Cerberus launcher caused no damage, but managed to blind the unit, while the heavy bolter killed one. The final unit of bikers also targeted the Kroot, but could not get past their cover saves.
The Vanguard squad targeted the Y'vahra. Their weaponry ignored its strong armour, wounding it twice, but its invulnerable save kept it from harm. The Dunecrawlers also targeted the battlesuit, wounding it 6 times with their Neutron lasers and Heavy Stubbers, but a combination of armour and cover saves kept it alive.
The Knight fired at the Tau Commander with the drones, killing two of the drones with its large blast cannon. The Commander passed his morale check and kept fighting.
We had managed to seize the first turn, but had not done a huge amount of damage to the enemy army. One of the Raiders had been immobilised and we had killed a couple of Kroot and (more importantly) some drones. The Y'vahra and Stormsurge were, however, still unscathed.
We scored no points for this turn and I discarded Secure Objective 1.
TURN 1- TAU/DARK ELDAR
In their first turn, the Tau drew Recon (reveal all mysterious objectives) and the Dark Eldar drew Take them Alive (destroy a unit in the assault phase).

The two Venoms arrived by Deep strike- one misshaping and going back into ongoing reserves, the other aiming for objective 6 (to reveal the mysterious objective), but scattering off it towards the ruins to the left. The Y'vahra used its boosted move to fly towards the Command Squad and Knight, getting into the side arc of the Knight in the process. The Stormsurge moved forward to see more targets, while the mobile Raider moved to get to the side arc of the Knight as well.
The Tau Commander moved the drones up the ruins towards the enemy lines, managing to roll a triple one for his 3 dangerous terrain checks! One more drone died in the ruins.


The Commander opened fire at the Landspeeder storm, but was unable to damage the Jinking speeder. The Kroot snap fired at the Vanguard and managed to wound the Alpha once. The Stormsurge targeted them also, but could not kill any of the warriors. The Reaver Jetbikes targeted the bikers in front of them, but were unable to wound them.
The Command squad became the target of much of the enemy firepower. The Raider and Kabalites in front of them fired at the White Scars, but could not wound the Jinking bikers. The Stormsurge fired its Cluster rockets at the squad, wounding them 3 times. I failed 2 saves (along with 2 FNP rolls) and two died. The Autarch opened fire on the squad, wounding the Librarian once.
The Knight then became the focus of the enemy firepower. The Stormsurge fired a Destroyer missile at the Knight, taking a hull point from the massive walker, its shield being unable to stop the blow. It then fired a large blast at the Knight, failing to wound it, but killing one of the bikers below it. The Raider in its flank also managed to take another hull point with its Dark Lance.
Finally, the Y'vahra fired at the Knight and Command Squad, hitting three of the squad. The plasma flamer hit Khan first and he managed to block two of the wounds. The Knight suffered no damage from the flamer. The Y'vahra then fired its haywire shots at the side of the Knight, taking a further 2 hull points from it.

The venom turbo-boosted to grab objective 6. The Y'vahra used its jetpack move to retreat to the ruins behind it.

At the end of the enemy first turn, we had not suffered too much, the Knight was down to 3 hull points, but was still mobile. Our opponents scored one point this round for Recon and discarded Take them Alive.
Victory Points:
White Scars/Mechanicus- 0
Tau/Dark Eldar- 1
TURN 2- WHITE SCARS/MECHANICUS
This turn, I drew Objective 3 and Big Game Hunter, while Innes drew Reclaim Lost Knowledge (grab an objective the enemy were controlling at the start of the turn) and had Objective 3 from last turn. We had a good chance of scoring all our cards this turn, all we would need to do was clear the Kroot from objective 3 and destroy a Raider.

On our right flank, the Landspeeder storm advanced, the scouts leaping out to target the Kroot. The Bike unit, Vanguard and Dunecrawlers also moved up to support them.


On the left flank, the Command squad entered the ruins to target the immobilised Raider, the last bike unit moved to engage the other Raider and the Knight moved up to support.
In the psychic phase, the Librarian cast psychic shriek on the Y'vahra, scoring 5 wounds on the battlesuit. The Y'vahra managed to save 2 of the wounds, leaving it on one.
In the shooting phase, the Dunecrawlers fired at the Tau Commander, killing him and the last drone instantly with their S10 attacks to get us First Blood and Slay the Warlord. The Command Squad fired at the Raider in front of them, easily wrecking it. The Kabalites disembarked as far from the Command Squad as possible. The other bikers on the left flank snap fired at the second Raider, glancing it once, but the damage was saved by the Jinking pilot.
On the right flank, the Vanguards and Scouts shot at the Kroot, wiping the unit out despite their cover saves, to claim the objective. The bikers turbo-boosted back towards objective 5 as they were not needed for the attack.

The Knight fired its main weapon at the Stormsurge. The roll came up a 6, meaning the shot was a vortex shot. It only managed to wound the Stormsurge once, but the template remained in play.
In the assault phase, the Command squad launched their bikes at the Kabalites from the wrecked Raider, managing to make the 9" charge. The squad took one wound to overwatch fire, but once again, the Apothecary saved the damage. The Hammer of Wrath attacks, then Khan's attacks were enough to finish off the unit. The other unit of bikers assaulted the second Raider, easily wrecking it with their grenades.

The Knight assaulted the Y'vahra. Things did not look good as its Hammer of Wrath and 4 attacks failed to take the final wound from the Tau battlesuit. However, its single S6 stomp attack managed to beat the 2+ armour save of the Y'vahra and it was destroyed.
At the end of our turn, we scored all 4 of our objectives, as well as First Blood and Slay the Warlord to give us a massive 6 points.
TURN 2- TAU/DARK ELDAR
This turn, the Dark Eldar drew Objective 6 (which they currently controlled) and Overwhelming Firepower (destroy an enemy unit in the shooting phase). The Tau got Patient Hunter and Psychological Warfare (force a failed morale check).

At the start of the turn, the vortex marker scattered only a few inches, remaining on the Stormsurge. Innes rolled on the Destroyer table and got a 6! The Stormsurge was completely annihilated. That was a hell of an unlucky blow for our opponents and a great result for us! This result was so good for us, I think we actually forgot about the vortex marker from then on.
The second Venom arrived, this time arriving on target in front of the scouts. The Wraithguard also arrived, deep striking beside the Knight. Three of the Crisis suits arrived from reserve, two going after the bikers in our deployment zone, the third going after the nearby Scouts.


The wracks on objective 6 disembarked from the Venom, their transport moving off to target the enemy. The Jetbikes moved up on both flanks to target the opposition in front of them.
On the left flank, the Reaver Jetbikes targeted the drop pod, but failed to hit it. The Crisis Suit, Wracks and Venom fired at the Scouts, killing 4 of the squad and leaving the sergeant alive. In our deployment zone, the two Crisis Suits fired their four flamers at the bikers. The firepower caused 5 wounds and I managed to fail 4 saves, leaving only one biker remaining. Fortunately, both the scouts and lone biker passed their morale checks.


On the right flank, the venom opened fire on the other unit of bikers. Again, I managed to fail two saves and the two grav gun bikers died. The Kabalites from the wrecked Raider fired at the bikers. Again, abysmal saving throws from me resulted in another 2 dead bikers. The Reaver Jetbikes targeted the last biker, wounding him twice. This time, I was able to save the shots and he survived, as well as passing his morale check.
The Windriders fired at the Command Squad, wounding them twice, but a combination of armour and FNP saves kept them from harm.
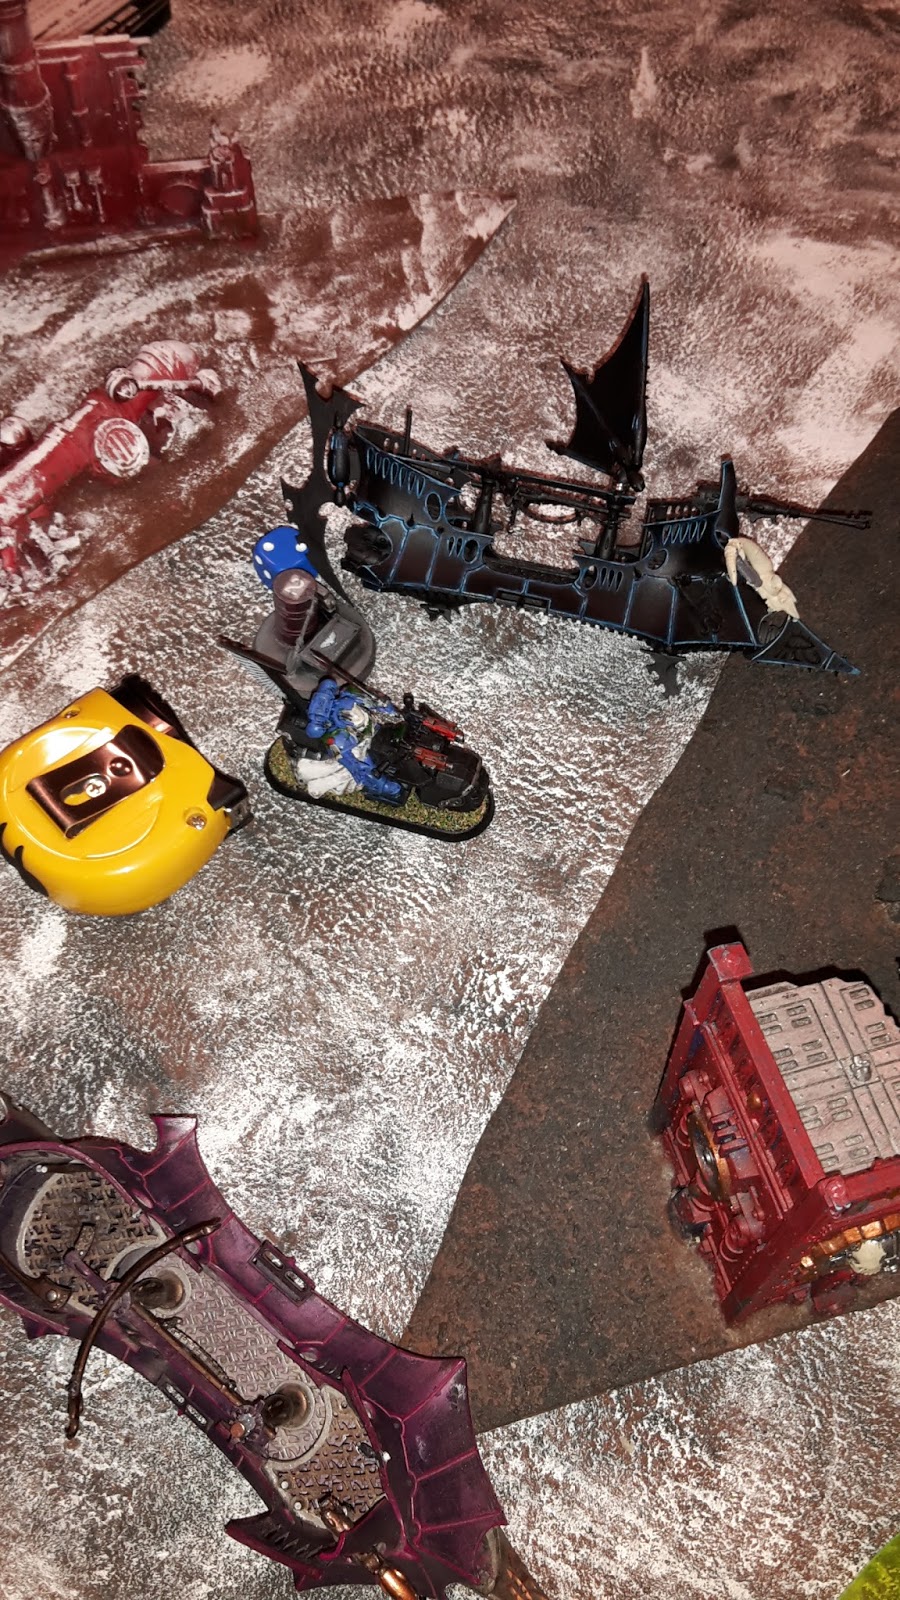
The Autarch fired his Fusion gun at the Knight, taking a hull point from it. The Wraithguard fired their Wraithcannons at the Knight, easily removing its last two hull points and blowing it up. The resulting explosion hit the command squad killing two of the bikers. Khan took a S10 wound. All eyes were on me as I took his Invulnerable save (we were only in turn 2 and it was already a running joke that I was incapable of making a save). Fortunately, I made the roll and he survived.
 |
| The Knight is destroyed, taking a toll on the Command Squad. |
At the end of their turn, LJ and Beattie scored Objective 6 and Overwhelming Firepower. An interesting turn all round. We had lost the Knight and most of the bikers in the army, but our opponents had taken a huge blow in losing the Stormsurge and many of the Tau units. They still had 3 units of Jetbikes though for objective grabbing.
Victory Points:
White Scars/Mechanicus- 6
Tau/Dark Eldar- 3
TURN 3- WHITE SCARS/MECHANICUS
This turn, I drew Supremacy (hold at least 2 objective and twice as many as your opponent), Hold the Line (3 units in deployment zone and no enemy units) and Harness the Warp (cast a psychic power). Innes drew Objective 6, Hold the Line and Destroy, Record, Rejoice (destroy an enemy unit, I think). Hold the line would be very difficult to achieve this turn, but I could probably get Harness the Warp and maybe Supremacy.

The Stormtalon arrived, moving in to hover mode to target the Wracks and secure objective 6. Khan, the Librarian and Apothecary advanced on the Windriders, while the lone biker beside them moved to grab objective 2. The other biker moved to get objective 5 and take on the Crisis suit. The Dunecrawlers and Vanguard moved up on objective 3. The Landspeeder storm moved towards the crisis suit holding objective 5.


The Librarian cast psychic shriek on the Windriders, killing one of the unit. He then failed to cast Hallucination on the Reaver Jetbikes in the nearby ruins.
The Dunecrawlers fired at the Wraithguard, killing 5 of the unit and leaving one left. The lone biker on objective 2 fired at the nearby Kabalite warrior, hitting him twice, but failing to wound (on a 3+). The Command Squad fired at the Windriders, killing another of the Eldar warriors.
The Stormtalon fired at the Wracks, wiping out the squad with the combined firepower of its assault cannons and skyhammer missiles. Beside the flyer, the lone grav biker and Landspeeder storm fired at the crisis suit, but could not harm him.
In the assault phase, Khan's unit charged the lone windrider, their hammer of wrath attacks proving sufficient to finish him off. The lone biker also charged the lone kabalite warrior, but I was horrified when the biker was slain by the overwatch fire (my knack of failing saves struck again).
At the end of the turn, I scored Harness the Warp and Innes scored Destroy, Record, Rejoice. I discarded Hold the Line and Innes discarded Objective 6.
TURN 3- TAU/DARK ELDAR
This turn, the Dark Eldar drew Pain in all its Forms (destroy an enemy unit in shooting or assault phase), Objective 1 and Objective 3. The Tau drew Behind Enemy Lines, Objective 3 and Supremacy.

The venom on the right flank attempted to move through the ruins, but immobilised itself on them. The crisis suit moved up on the lone grav gun bikers, as the wracks moved towards the lone scout and the crisis suit moved to grab the nearby objective. The Autarch attempted to use his warp jump generator, but it malfunctioned and sucked him into the warp (he rolled a double 1 for movement).


The lone Kabalite warrior fired at the Command Squad, managing to wound twice with his two shots. I failed both saves (predictably), but managed to make two FNP rolls (the Apothecary was on fire in this game). The Reaver Jetbikes fired at the Command Squad, wounding Khan once.
The immobilised Venom fired at the lone grav biker, killing him, while the Crisis Suit fired at the Landspeeder storm, but failed to damage it.
The other venom fired at the Vanguard, but failed to wound them, while the nearby Reaver Jetbikers were finally able to glance the drop pod.
In the assault phase, the Wracks charged the lone scout, easily killing him to grab objective 3. On the left flank, the Reaver Jetbikes charged the Command Squad, losing one of their squad to overwatch fire. The hammer of wrath attacks wounded once, the Apothecary once again saving himself. The Librarian struck at the squad, wiping them out. This allowed me to consolidate onto objective 2 and deny them from scoring Supremacy this turn.

At the end of the turn, the Dark Eldar scored Pain in all its forms (scoring a 3 on the D3 roll), as well as objectives 1 and 3. The Tau also scored Behind Enemy Lines, giving them 6 points in total and taking them into the lead once again.
Victory Points:
White Scars/Mechanicus- 8
Tau/Dark Eldar- 9
TURN 4- WHITE SCARS/MECHANICUS
In turn 4, I drew Ascendency, Objective 6, Behind Enemy Lines and Supremacy. Innes drew Hungry for Glory, Objective 5, Domination and had Hold the Line.

The Librarian separated from the Command Squad to grab objective 2, while the Command Squad stayed in place to score Linebreaker. The Stormtalon turned towards the Crisis suit at objective 5.


The Librarian cast psychic shriek on the last Wraithguard warrior, but failed to roll high enough to wound him.
The Stormtalon fired at the Crisis suit, wounding it once with its assault cannon. The Landspeeder Storm fired at the suit too, but failed to wound. Khan fired at the lone Kabalite, slaying him. The Vanguard fired at the Wracks, killing three, while the Dunecrawler fired at the Wraithguard, killing the last member of the squad.
At the end of the turn, I scored all my maelstrom cards, getting 2 points for Ascendency. Innes scored no points for his cards this round.
TURN 4- TAU/DARK ELDAR
In the final turn, the Dark Eldar drew Demolitions (destroy a building), Objective 1, Objective 3 and Blood and Guts (destroy a unit in assault). The Tau drew Objective 5, Domination, Supremacy and The Lure.

The final crisis suit arrived, landing beside the Librarian, while the Jetbikes moved towards the Vanguard.


The Crisis suit fired at the Librarian, but the wound was saved. The venom fired at the Librarian, finally slaying the enemy psyker. The other crisis suit fired at the Landspeeder Storm, but failed to damage it. The Wracks fired at the Dominus, but all the wounds were saved.
The Reaver Jetbikes fired at the Vanguard, wounding one of the Mechanicus warriors. They then attempted to charge the unit, but two died to overwatch fire and they failed the charge.

At the end of the turn, the Tau scored supremacy for 3 points (he had 2 objectives, while we only held 1, the other 2 were contested) and Dark Eldar scored no points. With the game ended, we both scored Linebreaker.
 |
| End of the game. |
Victory Points:
White Scars/Mechanicus- 14
Tau/Dark Eldar- 13
A win for the White Scars and Mechanicus army!
AFTER-BATTLE THOUGHTS
That was a very close and tough game that could have gone either way in final turn. Thanks to LJ and Beattie for a fantastic game that came right down to the final call.
Innes and I had some amazing luck and some awful luck all in the same game. Seizing the Initiative was extremely forturnate for us. We were careful with our set up to minimise the firepower of the Y'vahra and Stormsurge, but it still could have caused a lot of damage in the first turn and had us on the back foot.
The Stormsurge being lost to the second vortex hit was also a huge boost for us. In our practice game against the Stormsurge, it pretty much decimated our entire army throughout the game, so it was nice not having to worry about it here for too long.
My Apothecary and Librarian also performed brilliantly in this game. Normally, my apothecary does nothing until he is the last member of the squad alive. Then he finally remembers he has a Narthecium and won't die. This game, however, he was great and I made a ton of FNP rolls.
The Librarian also performed great. This is one of the few games where I saw his worth. Psychic Shriek is a great power and easy to cast. Coupled with the Hunter's Eye (for +1 BS), the chances of hitting with it are much better. I was also able to roll high enough most of the times I used it to cause a lot of damage.
I also had a lot of luck with the cards, particularly on turns 2 and 4, being able to score all of them and get a decent lead in the game. Innes had poorer luck with his cards. His army is quite slow on the board, so the secure objective cards were harder for him to achieve most turns.
We also had some poor luck in the game. My inability to make an armour save became a running joke for us and our opponents during the game. Innes even threatened to stop allowing me to take saves at one points, I was doing so badly.
I thought we were in real trouble after we failed to take out the Y'vahra, but Khan was able to soak up a lot of its firepower and most of the squad survived.
Thanks again to LJ and Beattie. The game was a blast and we had a good laugh during it, with the luck of both sides swinging wildly in the game. My lone biker being slain by the overwatch fire of the lone Kabalite was a particular highlight/lowlight (he hit and wounded with both shots on 6's!).
With a win in the first game, I was looking forward to the second game where we could hopefully do well again.
Escalation can be a nail-biter anyhow with the possibility for big swings in the late Game, and this format just doubles that. Well done on not getting overconfident after that Turn 2 and keeping with it!
ReplyDeleteCheers! Yeah, you always have to be careful with maelstrom, one good round of cards for your opponent can swing it the other way very easily.
DeleteCool battle report, I was waiting for that one! When you did so little damage after seizing I already had a bad feeling - Tau can wreck an army in one shooting phase if you're unlucky, but thankfully you managed to tough it out! Congratulations on your first win!
ReplyDeleteGood point by WestRider by the way, not letting up or getting over confident even with a bit of a lead was/is really important. Something I have to remind myself of, too.
Cheers Chris!
DeleteLove it! Nice work :)
ReplyDeleteCorrect me if I'm wrong, but how did you take two hull points from something? Doesn't the 2nd 6 cascade into a 3rd hull point?
Cheers Luke.
DeleteYeah, I was thinking about that myself when I was writing it up. Either I took one hull point with a grav gun and another with a bolter, or I took two hull points with the grav guns forgetting that the second immobilised result would stack and would have wrecked the raider.