
This week's battle report was my first set game in the Medusa IV map-based campaign that I am running. Shaun's Tau decided to use their newly captured spaceport to launch an assault on my own spaceport in the centre of the map. Having faced Shaun last time, I knew this was going to be a tough game for my Guard.
 |
| The Battle begins. |
My army consisted of:
Company Commander- Medic, Regimental Standard, Vox caster, Officer of the Fleet, Carapace Armour (CC)
Primaris Psyker- Level 2 (with CC)
Primaris Psyker- Level 2 (with PC3)
Priest (P1)
Platoon Command Squad- Vox, 2 plasma guns (PC1)
Infantry squad- Missile Launcher, vox (I1-1)
Infantry squad- Missile Launcher, vox (I1-2)
Infantry squad- Missile Launcher, vox (I1-3)
Heavy Weapons Team- Lascannons (LT)
Platoon Command Squad- Vox (PC2)
Infantry Squad- Vox, Autocannon (I2-1)
Infantry Squad- Vox, Autocannon (I2-2)
Platoon Command Squad- vox caster (PC3)
Platoon Command Squad- vox caster (PC3)
Veteran Squad- Demolitions, 3 Meltaguns (V1)
Chimera- Extra Armour, Dozer Blade, Multilaser, Heavy bolter (C)
Vendetta- 3 TL Lascannons (V2)
Wyvern (W1)
Wyvern (W2)
Leman Russ Punisher- Punisher cannon, heavy bolter, heavy bolter sponsons (P2)
Warlord Trait- Grand Strategist (3 Outflanking Units)
Psyker 1- Prescience, Scrier's Gaze, Perfect Timing
Psyker 2- Prescience, Precognition, Foreboding
I started with the ever useful company command squad. I love the orders that this unit can give, which would hopefully help me take down any Riptides or vehicles the enemy may have when used correctly. I took the Officer of the Fleet as I knew I would be taking a Vendetta and wanted to ensure its quick arrival. When I rolled my warlord trait, it worked out even better as I could now use 3 outflanking units, so hopefully he would help with these too.
NOTE: When writing up, I discovered that I had included an extra platoon command in my army when I deployed it that was not on my list, so I had 3 instead of 2. I never noticed this error until later, apologies to Shaun for the mistake.
NOTE: When writing up, I discovered that I had included an extra platoon command in my army when I deployed it that was not on my list, so I had 3 instead of 2. I never noticed this error until later, apologies to Shaun for the mistake.
I backed them up with two psykers and a priest. Tau have little in the way of psychic protection, so I thought I should be able to get the powers off relatively easy. They were mostly for casting prescience to get re-rolls to hit, but I might have got lucky with the other powers. Not so much when I rolled. I was hoping to get Forewarning or Misfortune, but I never seem to roll these. I ended up with some pretty useless ones; Overwatch at full BS against Tau! Great! I'm sure that will come in handy. Ignores cover may be useful, but I am more likely to get this from orders and Precognition is pretty useless on a Guard Psyker.
I took two platoons, each armed with heavy weapons to deal with the Fire Warriors or anything larger. The veterans were chosen as a Riptide hunting unit, they could hopefully cause some damage with their meltaguns and meltabombs.
I took two Wyverns to deal with any troops in the enemy army and the massed firepower of the Punisher is always useful. I finished the list with a Vendetta, hoping that the three lascannons could deal with most of the big threats.
Shaun's army consisted of:
Tau Commander- Command and control node, Crisis Battlesuit, Flamer, Multispectrum sensor suite, Neuroweb system jammer, Puretide engram neurochip, shield generator, Stimulant Injector, XV8-02 Crisis "Iridium" Battlesuit (with CS)
Ethereal (with FW2)
2 Crisis Suits- 2 x Missile Pods (CS)
12 Fire Warriors (FW1)
12 Fire Warriors (FW2)
Barracuda (B)
3 Tetras (T)
XV109 Y'vahra Battlsuit- Phase-plasma Flamer (R)
Hammerhead- Longstrike (H)
FARSIGHT ENCLAVES
Cadre Fireblade (with FW1)
3 Crisis Team- Burst Cannon, Flamer, Cyclic Ion Blaster (CT)
Shaun: "As this was a campaign game I decided to theme my army around a fast attack/drop army to go with the idea of dropping into the space sport to capture it. I decided to take the XV-109, as out of the riptide variety, it is the fast attack choice so I thought it would suit the theme. As the mission turned out to be capture the relic, my plan was to advance my fire warriors upto the relic and then fall back with it, while crisis suits deep strike behind enemy lines."
As this was a battle for my Spaceport, I decided to use the Imperial Firebase to represent this. This is one of the most recent additions to the 40k card terrain that I have. This would be my first time playing on the new FAT mats at the club. These look really nice and add a lot to the battlefield. No doubt you will be seeing a lot more of these in my battle reports.
I won the roll off for table edge and chose the side with two buildings in the deployment zone to hide my wyverns (though there was no shortage of buildings on the table).
Shaun won the roll for deployment and chose to go first. He set up one unit of Fire Warriors in the centre, ready to move up to the pad. The second unit went in a set of ruins to the left of his deployment zone. The Y-vahra and Hammer head deployed at the back of the deployment zone with the Tetras to the left.
I deployed my infantry squads forward, ready to grab the Relic. They were backed up by the command squads, with the Wyverns at the back behind cover. The Leman Russ Punisher deployed to the left, to engage the Fire Warriors. I didn't notice the unpainted Hammerhead at the back in the grey ruins, so deployed my Punisher in the open. I kept the Veterans and two units of infantry with Autocannons in reserve to outflank.


I failed to seize and the Tau got the first turn.
TURN 1- TAU
The Tau turn began with the Fire Warriors in the open attempting to move in to the trench to their right, but a poor difficult terrain roll meant that they would not make it. The Tetras moved towards the centre of the board and the Riptide moved towards the landing pad.
In the shooting phase, the Tetras fired at the Punisher, their markerlights stripping any chance of a cover save for the vehicle. The Hammerhead (containing Longstrike) fired at the Russ, glancing the vehicle. Shaun used his re-roll for Tank Hunter, but only ended up with another glance. The Punisher survived, which was bad news for the Fire Warriors in front of it.
The Fire Warriors aimed at the platoon command in front of them, the unit went to ground and all three wounds were saved by cover.
The turn ended with the Riptide jumping 11" to the side of the platform, out of sight of the Lascannon squad. The guard got away with a very mild turn of shooting there.
TURN 1- ASTRA MILITARUM
The Officer of the Fleet started the turn trying to intercept the Tau reserves, but he failed to communicate with the jets circling properly (I failed my Leadership test). The Infantry squads advanced towards the Relic, backed up by the company and platoon commands. On the left flank, the Punisher advanced on the fire warriors.


In the psychic phase, the power of the warp surged, granting 4 dice to the psykers. Each psyker attempted to cast Prescience on nearby units, but despite rolling 4 dice each, they both failed to manifest enough power to cast the psychic power.
The Punisher opened fire on the Fire Warriors, slaying 7 of the squad with its armaments. The Lascannon team added their firepower (they were the only unit in range and sight), but cover saved the squad. The Wyvern attempted to finish off the squad, the shells landing true and causing 11 wounds. Amazingly, Shaun made nine 4+ saves, then a 6+ feel no pain, resulting in the death of only one fire warrior! The Fire Warriors passed their morale check and held firm.
The other Wyvern opened fire on the second Fire Warrior unit. Despite getting a re-roll, the shell scatter 9" off target and only one died in the resulting blasts.
The Company command ordered the nearby platoon command to Bring Down the Riptide with their plasma guns. One of the platoon command hit the Monstrous Creature, then rolled a 2 to wound. On the re-roll from Monster Hunter, I then managed to roll a 1 to wound, so the Riptide escaped unscathed.
That was a pretty poor turn for both the Tau and Guard. I had hoped to cause a severe dent in the enemy army before they could arrive, but I was unable to cause much damage from my massed firepower.
TURN 2- TAU
The Barracuda arrived, along with the Commander's squad. They landed beside the Wyvern on the their right flank, ready to deal with the enemy tanks. The Fire Warriors with the Ethereal retreated, eager to get their leader to safety, while the Riptide advanced on the Guard infantry hoping to climb the landing pad.
The Tetras fired at the Punisher, their Markerlights once again removing the cover save of the vehicle. Longstride fired at the Punisher once again, hitting the Leman Russ, but failing to damage it, even with his Tank Hunter re-rolls. It fell to the Commander and his squad to finish the job, easily destroying the enemy tank.
 The Fire Warriors fired at the Priest's squad, killing 6 of their number, but the survivors held firm under the guidance of the Priest. The Riptide fired at the squad, but one of its flamers failed the Gets Hot! role, so only one could damage them. Two members of each squad were slain by the Tau battlesuit.
The Barracuda fired its large blast at the Wyvern on the left, but it scattered away, killing one of the Company Command squad.
The Commander used his Jetpack move to move his unit towards the Wyvern.
TURN 2- ASTRA MILITARUM
With a scream of jet engines, the Vendetta arrived, moving to target the Riptide harassing the ground forces. The two units of infantry also arrived, one outflanking to deal with the Tau Commander, while the other moved to face the Fire Warriors in the ruins.

The Company Commander shouted for his forces to advance, several units moving up to the landing pad to grab the Relic.

One of the psykers channelled the awesome powers of the warp, casting Prescience on the newly arrived infantry squad. The power was too much for him though and he lost control, wiping out his unit in the process (I managed to peril on my casting, rolling a 1 on the table and failing my Leadership test, causing the whole unit to be wiped out).
The Autocannon squad were ordered to open fire on the Tau Commander (first rank fire, second rank fire). Along with their prescience bonus, they were able to cause 11 wounds on the unit. However, the Tau armour proved too tough and only a single member of the squad fell. The Lascannon squad fired on the Tau, causing one wound on the Commander himself. The Wyvern then opened fire, killing one of the crisis suits. The onslaught was too much for the Commander and he ordered the unit to fall back (Shaun failed his morale on a double 6).

The Vendetta fired at the Riptide, the three Lascannon shots hitting and wounding. The cheers of the crew were silenced as the Creature appeared to suffer no damage (Shaun managed to make two 5+ invulnerable saves, then saved the final wound with a 5+ feel no pain). The Company Commander once again ordered the Platoon command to bring the Riptide down (granting Monster Hunter re-rolls). The squad fired three plasma shots, but I managed to roll two 1's and a 3 to hit, so no hits. To make matters worse, one of the squad died due to Gets Hot! The Commander ordered the nearby infantry squad to bring the Riptide down too, the lasguns in the squad causing 4 wounds, this time one wound made it through. The Company Command added their firepower, causing another wound on the Riptide.
The second Wyvern fired at the Fire Warriors in front of it. Again, despite re-rolls, the shot scattered 11" onto the second fire warrior squad, killing 3. The carnage was too much and the squad failed their morale check (on a double 6, again!) and fell back.
The second Autocannon squad fired at the Fire Warriors in the ruins, but could only kill two of the squad.
Another poor turn for the Guard. Despite everything I threw at them, the Tau Commander's squad and the Riptide would not fail their saves when I could even hit them with my shots.
TURN 3- TAU
Both the Tau Commander and Ethereal rallied their squads to bring them back to the fight. The other Crisis suit unit attempted to help their comrades in the fight, but the density of guard units around the Landing pad made the attempt too dangerous and they had to circle for another pass (Shaun managed to Deep Strike mishap by scattering onto one of my units, but fortunately, the unit went back in reserve).
The Barracuda moved up to target the Vendetta, while the damaged Riptide retreated behind the landing pad. The Tetras moved up to target the Wyvern on the right.
In the shooting phase, the Fire Warriors targeted the Autocannon squad to their left. With an extra shot each, the unit was easily wiped out.
The Tetras fired their Markerlights at the Wyvern, using their ability to boost the BS of the Commander's unit who would have been snap firing since they rallied. The Commander's unit fired at the Wyvern, their fusion blaster immobilising it. The Hammerhead fired at the Wyvern, shaking the vehicle and leaving it on one hull point.
The Barracuda fired at the Vendetta, but the Jinking pilots prevented any damage being caused. The Riptide fired at the squad on the landing pad with its flamers. Fortunately, the added protection of the platform helped to save the squad and only three died. The Riptide attempted to charge the unit, but failed to make the distance.
TURN 3- ASTRA MILITARUM
Reeling from the last turn, the Guard attempted to counter the threats facing their forces. The Veteran squad arrived, the Chimera moving toward the Riptide to deal with the threat. The other units converged on the Riptide and Tau Commander. The Vendetta moved to engage the commander on top of the ruins.


The remaining psyker cast Prescience on the full strength infantry squad in front of him.
The Company Commander ordered the infantry squad to fire on the Riptide, causing 5 wounds, but none made it past the Riptide's save.
The Chimera fired at the Riptide, but was unable to cause any damage. Two of the Veterans fired their meltaguns at the Riptide. Both wounded, but one was saved by a Feel No Pain roll and the Riptide was left on one wound. The squad on the platform fired at it, but were unable to harm the enemy battlesuit. The plasma gun in the platoon command fired at the Riptide, eager to finish it off, but failed to hit.
The Vendetta fired at the Commander's unit, but failed to cause any damage.

The Autocannon infantry squad fired at the Tau Commander. Shaun then revealed the Commander had an awesome piced of wargear that made one enemy unit within 12" have the Gets Hot! rule. The cost of this awesome upgrade? Two measly points. I fired at the Commander, failing to cause any wounds and lost 4 guardsmen thanks to the Gets Hot! rolls.
The Lascannon team fired at the Tau Commander in front of them. Two shots struck true, the commander failing his 4+ invulnerable saves, but making his FNP saves to block both wounds (this is getting ridiculous!).
The wyvern on the right fired at the Fire Warriors in the ruins, finally getting a shot on target and causing 20 wounds. Seven of the Fire Warriors died as their armour failed them.
Turn 3 ended with a mixed bag for the guard. I currently held the objective, but with the Riptide and Commander still around, and another unit of suits in reserve, it would be difficult to hold it. Shaun would simply not stop making Feel no Pain rolls!
TURN 4- TAU
As the Barracuda left the airspace, the Crisis Suits finally arrived. They landed behind the Guard units moving towards the spaceport.

The Riptide leapt 24" over the landing pad, moving over the company command squad. The Tau Commander left the safety of the ruins, moving towards the damaged Wyvern.

In the shooting phase, the Tau Commander and his unit targeted the Wyvern, finally wrecking the Guard tank. The two units of Fire Warriors fired at the infantry squad on the landing pad and at the Chimera, but could cause no damage to either unit.
The Hammerhead fired at the Chimera, easily wrecking it. The Tetras fired at the squad on the landing pad, killing two of their number.
The newly arrived crisis suits fired at the company command squad, killing two of the squad and wounding the commander. The Riptide fired its flamers at the command squad, easily wiping them out.
The commander used his jetpack move to retreat from the Guard squads, while the Riptide moved into cover from the Lascannon squad.
TURN 4- ASTRA MILITARUM
The Vendetta turned towards the Tau deployment zone and gunned its engines, moving in to range to engage the Hammerhead. The remaining infantry units advanced on the landing pad; the Veterans on one side and the infantry squad on another. The Platoon command moved to engage the Riptide.

The Vendetta fired at the Hammerhead, penetrating the tank once and forcing it to snap fire next turn. The plasma gun in the Platoon command fired at the Riptide, hitting once, but failing to wound (on a roll of a 1). The Lascannon squad fired at the Riptide, causing one wound which was saved by cover.
The other platoon command fired at the Crisis suits, killing one of the squad with their lasguns. The Autocannon squad fired at them too, causing another wound on the unit. The squad on the platform turned their guns on the crisis suits and managed to finish off another one. The Wyvern fired at the survivor, causing 3 wounds, but was unable to get past the armour. The lone suit passed his morale check and fought on.
Another tough turn for the guard, that Riptide just would not die!
TURN 5- TAU
The Barracuda came back on the board, moving up to target the veterans. The last crisis suit then moved up to the landing pad, while the Tau commander led the last of his unit towards the Wyvern.


In the shooting phase, the Commander's unit fired on the Wyvern, causing one glancing hit and penetrating hit on the tank, causing it to snap fire next turn. The Riptide fired on the platoon command that had been chasing it, wiping them out.
The Crisis suit fired on the squad on the landing pad, killing two of their number. The Tetras fired on the veterans, the marker lights taking their cover saves and killing one member. The Barracuda fired at the Veterans, killing 6 of them. The Veterans passed their morale check and held.
Both units of fire warriors shot at the front infantry squad, killing one of the unit, the cover saves helping the unit to survive.
The Hammerhead then snap fired at the Vendetta (hitting on a 6). The tank commander managed to hit the flyer. Despite Jinking, the tank scored a penetrating hit on a 6. The damage roll came up another 6, blowing the Vendetta out of the sky!
TURN 5- ASTRA MILITARUM
The Veterans moved up to help secure the Relic as the backfield infantry squad moved to engage the Tau Commander and platoon command moved up on the lone crisis suit.
The front infantry squad fired at the Fire Warriors, killing two of the unit and leaving one survivor. The Lascannon squad took aim at the Riptide. All three hit and wounded, with the cover saving two of the wounds. Shaun could not make his Feel no Pain roll and the Riptide finally succumbed! The Platoon command fired at the crisis suit, killing the last member of the squad.

If the game ended at this point, I would win as I had the Relic and Linebreaker for 4 points, whereas Shaun had 3 points for First Blood, Linebreaker and Slay the Warlord. I rolled the die to see if the game ended and in a continuation of my luck for the game, we were to play another turn.
TURN 6- TAU
Seeing the end in sight, the Tetras moved up to the landing pad to target the squads currently holding the Relic.


The Tau Commander fired at the Wyvern, finally wrecking the enemy tank. The Tetras targeted the Veterans, killing the rest of the squad. The Barracuda fired at the infantry squad on the platform, wiping them and the priest out.
The Hammerhead fired at the platoon command, wiping them out with its large blast. The Tau had succeeded in removing the units holding the Relic and had won the game, all that remained was to see if I could narrow the lead.
TURN 6- ASTRA MILITARUM
I moved up with the remnants of the backfield Autocannon squad to engage the Tau commander. In the shooting phase, they caused on damage.
In the assault phase, I charged at the Commander's unit, but 4 guardsmen were cut down by overwatch fire. The lone surviving heavy weapons squad managed to cause 2 wounds, both of which were saved. The last of the squad was then cut down in combat and the Tau warlord survived.
VICTORY POINTS:
Tau- 3 VP
Astra Militarum- 1VP
A victory for the Tau. Shaun rolled for capturing the Spaceport (requiring 8+ on 2D6) and manged to roll a 9 and capture the tile from the Guard.
AFTER BATTLE THOUGHTS:
Mike
That was a really tough game and one of the worst games I have played for a while (nothing to do with Shaun who was a great opponent, I must stress). Nothing seemed to go right in that game despite my best efforts.
I don't think I made too many mistakes in the game (though there were a few I will point out later), but the dice just weren't with me in the game and were performing admirably for Shaun.
That bloody Riptide! No matter what I threw at it, that thing would just not die! Over the course of the game, I must have fired 8 plasma gun shots, 9 Lascannon shots, 2 Meltagun shots and 60+ lasgun shots at it and it took 5 turns to bring down. This version isn't even as tough as a regular Riptide with one less toughness (meaning Lasguns could hurt it) and fewer wounds, so I dread to think how I would have dealt with a regular Riptide. Shaun just kept making invulnerable and Feel No Pain saves to keep it alive (in fact, 3 of its four wounds were removed by lasguns rather than the heavy weapons I took to deal with it). That meant his flamers could wipe out whatever unit it chose to target each turn and caused havoc behind my lines.
The Tau Commander and his unit proved equally durable. I struggled to get past the 2+ armour save and when I did, his invulnerable save and FNP saved all but one wound over the course of the game. Add in the fact that the commander provides amazing buffs to the unit and I wanted to deal with him quickly, but it did not work out. Providing the unit with Ignores Cover or Tank Hunter was brutal on the battlefield and 2 pts to make my Lasguns Gets Hot! is utterly ridiculous.
Another bit of amazing luck for Shaun and poor luck for me was the triple 6 from the Hammerhead to blow up the Vendetta. I could not believe when that happened.
I think I was also unlucky with the Wyvern on the right, effectively missing the Fire Warriors for two turns in a row despite having re-rolls to hit. One error I made was attacking the Fire Warriors with the Outflanking infantry unit. I was hoping that the Wyvern would hit them and whittle the unit down enough for the infantry squad to finish them off, but the way my luck was going, I could not count on it to work. They might have been better suited going after the Tau Commander with the second infantry unit.
If I had to choose the army again, I would probably lose the two psykers. Their choice of powers was pretty poor and they did not really achieve much over the course of the game. One psyker ended up going supernova and wiping out his command unit (though they shouldn't have been in the game in the first place). This would have allowed me a couple of more infantry units to maybe help in grabbing the objectives.
Shaun had some pretty poor luck in this game too. Failing both his morale checks on double 6's in the same turn was quite amusing (for me, at least). Other than that, his Feel no Pain rolls and Invulnerable saves were on fire.
Overall, a pretty poor game for me, but I don't think it was down to too many errors (though if you disagree, please let me know below. Always happen for constructive criticism), sometimes the dice are just not kind to you and there is nothing you can do about it. Saying that though, had the game ended on turn 5, I would have won, so it couldn't have been so bad.
On a side note, I really like the addition of the new mats to the club. They do add some nice detail to the games. I will try to incorporate the mat details into my turn maps as I think it improves them. I like the look of the roads in the turn maps, as it makes it feel like the armies are fighting over an actual battleground, rather than some blank boards with buildings added.
Shaun:
"Once deployment was done, I realised my plan to move up my firewarriors was too strong a task against so many guardsmen and after the first turn of shooting I had no choice but to retreat and rethink my plan. So the plan came down to concentrating my firepower on the units around the Relic. I thought of this more of a humorous game. Michael seemed to be really down on us his luck and really struggled to kill my XV-109 down to some lucky saves or bad luck shooting. Although it seemed to Michael that things were going really bad, I at the same time was thinking the same about my odds as by the end of the game I did not have much remaining and had the game not gone on for a sixth turn, I would have lost."
Thanks to Shaun for an interesting game, I'm sure I will be playing the Tau again as he attempts to capture more Guard territory.
Tau Commander- Command and control node, Crisis Battlesuit, Flamer, Multispectrum sensor suite, Neuroweb system jammer, Puretide engram neurochip, shield generator, Stimulant Injector, XV8-02 Crisis "Iridium" Battlesuit (with CS)
Ethereal (with FW2)
2 Crisis Suits- 2 x Missile Pods (CS)
12 Fire Warriors (FW1)
12 Fire Warriors (FW2)
Barracuda (B)
3 Tetras (T)
XV109 Y'vahra Battlsuit- Phase-plasma Flamer (R)
Hammerhead- Longstrike (H)
FARSIGHT ENCLAVES
Cadre Fireblade (with FW1)
3 Crisis Team- Burst Cannon, Flamer, Cyclic Ion Blaster (CT)
Shaun: "As this was a campaign game I decided to theme my army around a fast attack/drop army to go with the idea of dropping into the space sport to capture it. I decided to take the XV-109, as out of the riptide variety, it is the fast attack choice so I thought it would suit the theme. As the mission turned out to be capture the relic, my plan was to advance my fire warriors upto the relic and then fall back with it, while crisis suits deep strike behind enemy lines."
As this was a battle for my Spaceport, I decided to use the Imperial Firebase to represent this. This is one of the most recent additions to the 40k card terrain that I have. This would be my first time playing on the new FAT mats at the club. These look really nice and add a lot to the battlefield. No doubt you will be seeing a lot more of these in my battle reports.
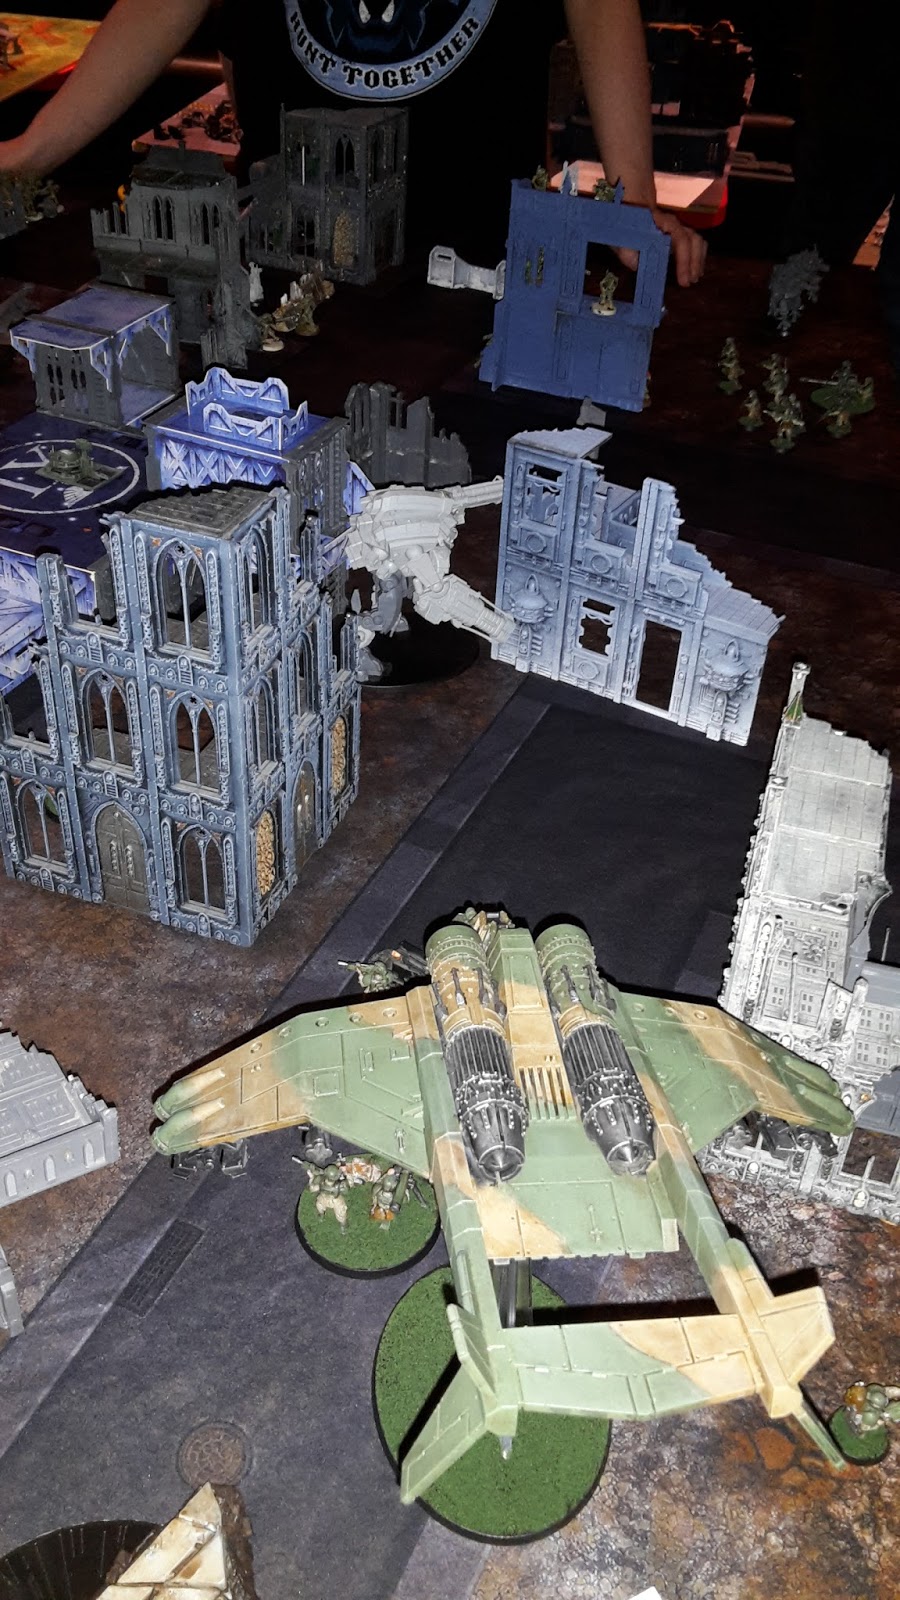
 |
| The Spaceport holding the Relic. |
I won the roll off for table edge and chose the side with two buildings in the deployment zone to hide my wyverns (though there was no shortage of buildings on the table).
Shaun won the roll for deployment and chose to go first. He set up one unit of Fire Warriors in the centre, ready to move up to the pad. The second unit went in a set of ruins to the left of his deployment zone. The Y-vahra and Hammer head deployed at the back of the deployment zone with the Tetras to the left.
I deployed my infantry squads forward, ready to grab the Relic. They were backed up by the command squads, with the Wyverns at the back behind cover. The Leman Russ Punisher deployed to the left, to engage the Fire Warriors. I didn't notice the unpainted Hammerhead at the back in the grey ruins, so deployed my Punisher in the open. I kept the Veterans and two units of infantry with Autocannons in reserve to outflank.
 |
| Deployment. The Shield in the centre represents the Relic. |
 |
| The Riptide hides from the Guard Firepower. |
 |
| Fire Warriors cover the Landing pad. |

 |
| The Guard deploy forward, eager to grab the Relic. |


I failed to seize and the Tau got the first turn.
TURN 1- TAU
 |
| Turn 1- Tau |
The Tau turn began with the Fire Warriors in the open attempting to move in to the trench to their right, but a poor difficult terrain roll meant that they would not make it. The Tetras moved towards the centre of the board and the Riptide moved towards the landing pad.
 |
| The Fire Warriors fail to reach cover. |
 |
| The Riptide advances on the spaceport. |
In the shooting phase, the Tetras fired at the Punisher, their markerlights stripping any chance of a cover save for the vehicle. The Hammerhead (containing Longstrike) fired at the Russ, glancing the vehicle. Shaun used his re-roll for Tank Hunter, but only ended up with another glance. The Punisher survived, which was bad news for the Fire Warriors in front of it.
The Fire Warriors aimed at the platoon command in front of them, the unit went to ground and all three wounds were saved by cover.
The turn ended with the Riptide jumping 11" to the side of the platform, out of sight of the Lascannon squad. The guard got away with a very mild turn of shooting there.
TURN 1- ASTRA MILITARUM
 |
| Turn 1- Astra Militarum |
The Officer of the Fleet started the turn trying to intercept the Tau reserves, but he failed to communicate with the jets circling properly (I failed my Leadership test). The Infantry squads advanced towards the Relic, backed up by the company and platoon commands. On the left flank, the Punisher advanced on the fire warriors.


 |
| The Guard advance. |
In the psychic phase, the power of the warp surged, granting 4 dice to the psykers. Each psyker attempted to cast Prescience on nearby units, but despite rolling 4 dice each, they both failed to manifest enough power to cast the psychic power.
The Punisher opened fire on the Fire Warriors, slaying 7 of the squad with its armaments. The Lascannon team added their firepower (they were the only unit in range and sight), but cover saved the squad. The Wyvern attempted to finish off the squad, the shells landing true and causing 11 wounds. Amazingly, Shaun made nine 4+ saves, then a 6+ feel no pain, resulting in the death of only one fire warrior! The Fire Warriors passed their morale check and held firm.
The other Wyvern opened fire on the second Fire Warrior unit. Despite getting a re-roll, the shell scatter 9" off target and only one died in the resulting blasts.
The Company command ordered the nearby platoon command to Bring Down the Riptide with their plasma guns. One of the platoon command hit the Monstrous Creature, then rolled a 2 to wound. On the re-roll from Monster Hunter, I then managed to roll a 1 to wound, so the Riptide escaped unscathed.
That was a pretty poor turn for both the Tau and Guard. I had hoped to cause a severe dent in the enemy army before they could arrive, but I was unable to cause much damage from my massed firepower.
TURN 2- TAU
 |
| Turn 2- Tau |
The Barracuda arrived, along with the Commander's squad. They landed beside the Wyvern on the their right flank, ready to deal with the enemy tanks. The Fire Warriors with the Ethereal retreated, eager to get their leader to safety, while the Riptide advanced on the Guard infantry hoping to climb the landing pad.
 |
| The Tau Commander arrives beside the Wyvern. |
The Tetras fired at the Punisher, their Markerlights once again removing the cover save of the vehicle. Longstride fired at the Punisher once again, hitting the Leman Russ, but failing to damage it, even with his Tank Hunter re-rolls. It fell to the Commander and his squad to finish the job, easily destroying the enemy tank.
 |
| The Punisher is destroyed. |

The Barracuda fired its large blast at the Wyvern on the left, but it scattered away, killing one of the Company Command squad.
The Commander used his Jetpack move to move his unit towards the Wyvern.
TURN 2- ASTRA MILITARUM
 |
| Turn 2- Astra Militarum |
With a scream of jet engines, the Vendetta arrived, moving to target the Riptide harassing the ground forces. The two units of infantry also arrived, one outflanking to deal with the Tau Commander, while the other moved to face the Fire Warriors in the ruins.
 |
| The Vendetta moves on to target the Riptide. |
 |
| The Reserves arrive. |

The Company Commander shouted for his forces to advance, several units moving up to the landing pad to grab the Relic.

One of the psykers channelled the awesome powers of the warp, casting Prescience on the newly arrived infantry squad. The power was too much for him though and he lost control, wiping out his unit in the process (I managed to peril on my casting, rolling a 1 on the table and failing my Leadership test, causing the whole unit to be wiped out).
The Autocannon squad were ordered to open fire on the Tau Commander (first rank fire, second rank fire). Along with their prescience bonus, they were able to cause 11 wounds on the unit. However, the Tau armour proved too tough and only a single member of the squad fell. The Lascannon squad fired on the Tau, causing one wound on the Commander himself. The Wyvern then opened fire, killing one of the crisis suits. The onslaught was too much for the Commander and he ordered the unit to fall back (Shaun failed his morale on a double 6).

The Vendetta fired at the Riptide, the three Lascannon shots hitting and wounding. The cheers of the crew were silenced as the Creature appeared to suffer no damage (Shaun managed to make two 5+ invulnerable saves, then saved the final wound with a 5+ feel no pain). The Company Commander once again ordered the Platoon command to bring the Riptide down (granting Monster Hunter re-rolls). The squad fired three plasma shots, but I managed to roll two 1's and a 3 to hit, so no hits. To make matters worse, one of the squad died due to Gets Hot! The Commander ordered the nearby infantry squad to bring the Riptide down too, the lasguns in the squad causing 4 wounds, this time one wound made it through. The Company Command added their firepower, causing another wound on the Riptide.
The second Wyvern fired at the Fire Warriors in front of it. Again, despite re-rolls, the shot scattered 11" onto the second fire warrior squad, killing 3. The carnage was too much and the squad failed their morale check (on a double 6, again!) and fell back.
The second Autocannon squad fired at the Fire Warriors in the ruins, but could only kill two of the squad.
Another poor turn for the Guard. Despite everything I threw at them, the Tau Commander's squad and the Riptide would not fail their saves when I could even hit them with my shots.
TURN 3- TAU
 |
| Turn 3- Tau |
Both the Tau Commander and Ethereal rallied their squads to bring them back to the fight. The other Crisis suit unit attempted to help their comrades in the fight, but the density of guard units around the Landing pad made the attempt too dangerous and they had to circle for another pass (Shaun managed to Deep Strike mishap by scattering onto one of my units, but fortunately, the unit went back in reserve).
The Barracuda moved up to target the Vendetta, while the damaged Riptide retreated behind the landing pad. The Tetras moved up to target the Wyvern on the right.
In the shooting phase, the Fire Warriors targeted the Autocannon squad to their left. With an extra shot each, the unit was easily wiped out.
The Tetras fired their Markerlights at the Wyvern, using their ability to boost the BS of the Commander's unit who would have been snap firing since they rallied. The Commander's unit fired at the Wyvern, their fusion blaster immobilising it. The Hammerhead fired at the Wyvern, shaking the vehicle and leaving it on one hull point.
The Barracuda fired at the Vendetta, but the Jinking pilots prevented any damage being caused. The Riptide fired at the squad on the landing pad with its flamers. Fortunately, the added protection of the platform helped to save the squad and only three died. The Riptide attempted to charge the unit, but failed to make the distance.
TURN 3- ASTRA MILITARUM
 |
| Turn 3- Astra Militarum |
Reeling from the last turn, the Guard attempted to counter the threats facing their forces. The Veteran squad arrived, the Chimera moving toward the Riptide to deal with the threat. The other units converged on the Riptide and Tau Commander. The Vendetta moved to engage the commander on top of the ruins.


The remaining psyker cast Prescience on the full strength infantry squad in front of him.
The Company Commander ordered the infantry squad to fire on the Riptide, causing 5 wounds, but none made it past the Riptide's save.
The Chimera fired at the Riptide, but was unable to cause any damage. Two of the Veterans fired their meltaguns at the Riptide. Both wounded, but one was saved by a Feel No Pain roll and the Riptide was left on one wound. The squad on the platform fired at it, but were unable to harm the enemy battlesuit. The plasma gun in the platoon command fired at the Riptide, eager to finish it off, but failed to hit.
The Vendetta fired at the Commander's unit, but failed to cause any damage.

The Autocannon infantry squad fired at the Tau Commander. Shaun then revealed the Commander had an awesome piced of wargear that made one enemy unit within 12" have the Gets Hot! rule. The cost of this awesome upgrade? Two measly points. I fired at the Commander, failing to cause any wounds and lost 4 guardsmen thanks to the Gets Hot! rolls.
The Lascannon team fired at the Tau Commander in front of them. Two shots struck true, the commander failing his 4+ invulnerable saves, but making his FNP saves to block both wounds (this is getting ridiculous!).
The wyvern on the right fired at the Fire Warriors in the ruins, finally getting a shot on target and causing 20 wounds. Seven of the Fire Warriors died as their armour failed them.
 |
| The Wyvern finally finds its target. |
Turn 3 ended with a mixed bag for the guard. I currently held the objective, but with the Riptide and Commander still around, and another unit of suits in reserve, it would be difficult to hold it. Shaun would simply not stop making Feel no Pain rolls!
TURN 4- TAU
 |
| Turn 4- Tau |
As the Barracuda left the airspace, the Crisis Suits finally arrived. They landed behind the Guard units moving towards the spaceport.

The Riptide leapt 24" over the landing pad, moving over the company command squad. The Tau Commander left the safety of the ruins, moving towards the damaged Wyvern.

In the shooting phase, the Tau Commander and his unit targeted the Wyvern, finally wrecking the Guard tank. The two units of Fire Warriors fired at the infantry squad on the landing pad and at the Chimera, but could cause no damage to either unit.
The Hammerhead fired at the Chimera, easily wrecking it. The Tetras fired at the squad on the landing pad, killing two of their number.
 |
| The Veterans spill out of the wrecked Chimera. |
The newly arrived crisis suits fired at the company command squad, killing two of the squad and wounding the commander. The Riptide fired its flamers at the command squad, easily wiping them out.
The commander used his jetpack move to retreat from the Guard squads, while the Riptide moved into cover from the Lascannon squad.
TURN 4- ASTRA MILITARUM
 |
| Turn 4- Astra Militarum |
The Vendetta turned towards the Tau deployment zone and gunned its engines, moving in to range to engage the Hammerhead. The remaining infantry units advanced on the landing pad; the Veterans on one side and the infantry squad on another. The Platoon command moved to engage the Riptide.

 |
| The Platoon Comand moves to target the Riptide. |
The Vendetta fired at the Hammerhead, penetrating the tank once and forcing it to snap fire next turn. The plasma gun in the Platoon command fired at the Riptide, hitting once, but failing to wound (on a roll of a 1). The Lascannon squad fired at the Riptide, causing one wound which was saved by cover.
The other platoon command fired at the Crisis suits, killing one of the squad with their lasguns. The Autocannon squad fired at them too, causing another wound on the unit. The squad on the platform turned their guns on the crisis suits and managed to finish off another one. The Wyvern fired at the survivor, causing 3 wounds, but was unable to get past the armour. The lone suit passed his morale check and fought on.
Another tough turn for the guard, that Riptide just would not die!
TURN 5- TAU
 |
| Turn 5- Tau |
The Barracuda came back on the board, moving up to target the veterans. The last crisis suit then moved up to the landing pad, while the Tau commander led the last of his unit towards the Wyvern.


In the shooting phase, the Commander's unit fired on the Wyvern, causing one glancing hit and penetrating hit on the tank, causing it to snap fire next turn. The Riptide fired on the platoon command that had been chasing it, wiping them out.
The Crisis suit fired on the squad on the landing pad, killing two of their number. The Tetras fired on the veterans, the marker lights taking their cover saves and killing one member. The Barracuda fired at the Veterans, killing 6 of them. The Veterans passed their morale check and held.
Both units of fire warriors shot at the front infantry squad, killing one of the unit, the cover saves helping the unit to survive.
The Hammerhead then snap fired at the Vendetta (hitting on a 6). The tank commander managed to hit the flyer. Despite Jinking, the tank scored a penetrating hit on a 6. The damage roll came up another 6, blowing the Vendetta out of the sky!
TURN 5- ASTRA MILITARUM
 |
| Turn 5- Astra Militarum |
The Veterans moved up to help secure the Relic as the backfield infantry squad moved to engage the Tau Commander and platoon command moved up on the lone crisis suit.
 |
| The survivors desperately cling to the Relic. |
The front infantry squad fired at the Fire Warriors, killing two of the unit and leaving one survivor. The Lascannon squad took aim at the Riptide. All three hit and wounded, with the cover saving two of the wounds. Shaun could not make his Feel no Pain roll and the Riptide finally succumbed! The Platoon command fired at the crisis suit, killing the last member of the squad.

If the game ended at this point, I would win as I had the Relic and Linebreaker for 4 points, whereas Shaun had 3 points for First Blood, Linebreaker and Slay the Warlord. I rolled the die to see if the game ended and in a continuation of my luck for the game, we were to play another turn.
TURN 6- TAU
 |
| Turn 6- Tau |
Seeing the end in sight, the Tetras moved up to the landing pad to target the squads currently holding the Relic.
 |
| The Tetras advance on the landing pad. |


The Tau Commander fired at the Wyvern, finally wrecking the enemy tank. The Tetras targeted the Veterans, killing the rest of the squad. The Barracuda fired at the infantry squad on the platform, wiping them and the priest out.
The Hammerhead fired at the platoon command, wiping them out with its large blast. The Tau had succeeded in removing the units holding the Relic and had won the game, all that remained was to see if I could narrow the lead.
TURN 6- ASTRA MILITARUM
 |
| Turn 6- Astra Militarum |
I moved up with the remnants of the backfield Autocannon squad to engage the Tau commander. In the shooting phase, they caused on damage.
In the assault phase, I charged at the Commander's unit, but 4 guardsmen were cut down by overwatch fire. The lone surviving heavy weapons squad managed to cause 2 wounds, both of which were saved. The last of the squad was then cut down in combat and the Tau warlord survived.
VICTORY POINTS:
Tau- 3 VP
Astra Militarum- 1VP
A victory for the Tau. Shaun rolled for capturing the Spaceport (requiring 8+ on 2D6) and manged to roll a 9 and capture the tile from the Guard.
AFTER BATTLE THOUGHTS:
Mike
That was a really tough game and one of the worst games I have played for a while (nothing to do with Shaun who was a great opponent, I must stress). Nothing seemed to go right in that game despite my best efforts.
I don't think I made too many mistakes in the game (though there were a few I will point out later), but the dice just weren't with me in the game and were performing admirably for Shaun.
That bloody Riptide! No matter what I threw at it, that thing would just not die! Over the course of the game, I must have fired 8 plasma gun shots, 9 Lascannon shots, 2 Meltagun shots and 60+ lasgun shots at it and it took 5 turns to bring down. This version isn't even as tough as a regular Riptide with one less toughness (meaning Lasguns could hurt it) and fewer wounds, so I dread to think how I would have dealt with a regular Riptide. Shaun just kept making invulnerable and Feel No Pain saves to keep it alive (in fact, 3 of its four wounds were removed by lasguns rather than the heavy weapons I took to deal with it). That meant his flamers could wipe out whatever unit it chose to target each turn and caused havoc behind my lines.
The Tau Commander and his unit proved equally durable. I struggled to get past the 2+ armour save and when I did, his invulnerable save and FNP saved all but one wound over the course of the game. Add in the fact that the commander provides amazing buffs to the unit and I wanted to deal with him quickly, but it did not work out. Providing the unit with Ignores Cover or Tank Hunter was brutal on the battlefield and 2 pts to make my Lasguns Gets Hot! is utterly ridiculous.
Another bit of amazing luck for Shaun and poor luck for me was the triple 6 from the Hammerhead to blow up the Vendetta. I could not believe when that happened.
I think I was also unlucky with the Wyvern on the right, effectively missing the Fire Warriors for two turns in a row despite having re-rolls to hit. One error I made was attacking the Fire Warriors with the Outflanking infantry unit. I was hoping that the Wyvern would hit them and whittle the unit down enough for the infantry squad to finish them off, but the way my luck was going, I could not count on it to work. They might have been better suited going after the Tau Commander with the second infantry unit.
If I had to choose the army again, I would probably lose the two psykers. Their choice of powers was pretty poor and they did not really achieve much over the course of the game. One psyker ended up going supernova and wiping out his command unit (though they shouldn't have been in the game in the first place). This would have allowed me a couple of more infantry units to maybe help in grabbing the objectives.
Shaun had some pretty poor luck in this game too. Failing both his morale checks on double 6's in the same turn was quite amusing (for me, at least). Other than that, his Feel no Pain rolls and Invulnerable saves were on fire.
Overall, a pretty poor game for me, but I don't think it was down to too many errors (though if you disagree, please let me know below. Always happen for constructive criticism), sometimes the dice are just not kind to you and there is nothing you can do about it. Saying that though, had the game ended on turn 5, I would have won, so it couldn't have been so bad.
On a side note, I really like the addition of the new mats to the club. They do add some nice detail to the games. I will try to incorporate the mat details into my turn maps as I think it improves them. I like the look of the roads in the turn maps, as it makes it feel like the armies are fighting over an actual battleground, rather than some blank boards with buildings added.
Shaun:
"Once deployment was done, I realised my plan to move up my firewarriors was too strong a task against so many guardsmen and after the first turn of shooting I had no choice but to retreat and rethink my plan. So the plan came down to concentrating my firepower on the units around the Relic. I thought of this more of a humorous game. Michael seemed to be really down on us his luck and really struggled to kill my XV-109 down to some lucky saves or bad luck shooting. Although it seemed to Michael that things were going really bad, I at the same time was thinking the same about my odds as by the end of the game I did not have much remaining and had the game not gone on for a sixth turn, I would have lost."
Thanks to Shaun for an interesting game, I'm sure I will be playing the Tau again as he attempts to capture more Guard territory.
You were unlucky there with you dice, the dice gods weren't on your side today.
ReplyDeleteAs for tactics, the only think I would have done differently would have been to blob up 1 platoon with the priest and gone straight for the relic. A 31 man fearless squad can kick out a lot of fire power and is hard to remove.
I thought about doing that, but I figured that separate units would mean that only one unit could be targeted each turn and destroyed. If there were one big unit, I imagine a lot of focus would have been put on them in the shooting phase (or even assaulted by the Riptide) and they would have been wiped out.
DeleteIt would be a risk, but in assault you'd get a lot of overwatch and with the priest you'd get rerolls to hit and possibly to wound in the first round which can cause a lot of wounds.
DeleteThe reason that Gets Hot upgrade is only 2 Points is that, against most Armies, being within 12" of an enemy Unit during their Turn is a death sentence for Tau, so it's generally a de facto One Use Only item. Non-blobbed Guard are one of the few exceptions :P
ReplyDeleteAlso, Lasguns can still hurt a regular Riptide. They're only T6, which is still within the capabilities of S3 weapons. It's actually exactly the same for them as against T5, because there are two "bands" of 6+ on the to Wound chart.
DeleteYeah, its still a good upgrade for 2 pts. I guess against marines, you would just forgo shooting and try and take them out in assault. With the guard, you probably want more shots.
DeleteI thought regular Riptides were T7, but I guess not (works out quite well for my plasma talon wielding Black Knights!).