
The final game of the North East Open tournament would see my White Scars face off against Tom's force of Imperial Knights and Adeptus Mechanicus.
Tom had a stunning army that was nominated for best army, and it is easy to see why. We would be playing ITC mission 5 (Precious cargo) with Hammer and Anvil deployment.

My army consisted of:
Battalion Detachment
Captain on Bike- Twin Bolter, Thunder Hammer, Storm Shield, Master of Snares, Wrath of the Heavens
Librarian- Jump Pack, Force Stave, Mantle of the Stormseer, Ride the Winds, Storm-wreathed
5 Intercessors- Bolt Rifles, Bolt Pistols
5 Intercessors- Bolt Rifles, Bolt Pistols
5 Intercessors- Bolt Rifles, Bolt Pistols
5 Intercessors- Bolt Rifles, Bolt Pistols
3 Eliminators- Bolt Sniper Rifles, Camo Cloaks
3 Devastator Centurions- Grav-cannons and grav-amps, Hurricane Bolters
3 Devastator Centurions- Grav-cannons and grav-amps, Hurricane Bolters
Battalion Detachment
Captain- Jump Pack, Master Crafted Thunder Hammer, Storm Shield, Chapter Master, Imperium's Sword
Lieutenant- Jump Pack, Power Axe, MC Bolter
5 Scouts- Bolters
5 Scouts- Bolters
5 Scouts- Bolt Pistol, Combat Knives
3 Inceptors- Assault Bolters
3 Inceptors- Assault Bolters
Battalion Detachment
Chaplain- Jump Pack, Crozius Arcanum, Bolt Pistol, Litany of Hate
Khan on Bike- Khan's Spear
3 Inceptors- Assault Bolters
3 Inceptors- Assault Bolters
Battalion Detachment
Chaplain- Jump Pack, Crozius Arcanum, Bolt Pistol, Litany of Hate
Khan on Bike- Khan's Spear
5 Infiltrators- Marksman Bolt Carbines, Smoke Grenades
5 Infiltrators- Marksman Bolt Carbines, Smoke Grenades
5 Tactical Marines- Bolters
5 Infiltrators- Marksman Bolt Carbines, Smoke Grenades
5 Tactical Marines- Bolters
Thunderfire Cannon- Techmarine Gunner with Flamer, Plasma Cutter, 2 Servo-arms
Tom's army consisted of:
Super-Heavy Detachment (Imperial Knights, House Taranis)
Knight Crusader- Heavy Stubber, Endless Fury (Heirloom), Ironstorm Missile Pod, Thermal Cannon, Avenger Gatling Cannon, Heavy Flamer, Warlord, Cunning Commander.
Knight Crusader- Heavy Stubber, Ironstorm Missile Pod, Thermal Cannon, Avenger Gatling Cannon, Heavy Flamer.
Knight Crusader- Heavy Stubber, Ironstorm Missile Pod, Thermal Cannon, Avenger Gatling Cannon, Heavy Flamer.
Battalion Detachment (Adeptus Mechanicus, Graia)
Tech-Priest Enginseer
Tech-Priest Enginseer
5 Skitarii Rangers- Galvanic Rifles
5 Skitarii Rangers- Galvanic Rifles
5 Skitarii Rangers- Galvanic Rifles
Spearhead Detachment (Adeptus Mechanicus, StygiesVIII)
Daedalosus
Skorpius Disintegrator- Belleros Energy Cannon, 3 Cognis Heavy Stubbers
Skorpius Disintegrator- Belleros Energy Cannon, 3 Cognis Heavy Stubbers
Skorpius Disintegrator- Belleros Energy Cannon, 3 Cognis Heavy Stubbers
Ah Knights, my old nemesis. They had brought along some Adeptus Mechanicus lackeys to build up their numbers and add a few more vehicles to the army. I'm was not that worried about Imperial Knights in ITC missions, but the new missions had added a few extra rules to help out the giant machines, so this could be a tough game.
Tom gave one of the Knights the 2+ armour save relic, while he gave another the 5+ invulnerable save in combat relic.
I won the roll off and chose to be the Defender. I figured that I could hide much of my army for the first turn to deny Tom a decent shooting phase. This would also allow me to jump on the objectives at the end of my turn to score hold more without having to survive a turn of the Knights' firepower. I would wait till turn 3 until my army was powered up, and go out and take on the Knights. I also got Hammer and Anvil deployment.
For secondaries, I chose Big Game Hunter, Behind Enemy Lines and Engineers (two Intercessor units). Tom chose King of the Hill, the Reaper and Marked for Death (the Centurions, two Inceptor squads and the Captain on Bike).
We set up the objectives as shown below. We actually omitted the new central objective during the game. We got confused between the new and old mission set up.

Tom deployed his army first. He put a unit of Rangers on each flank, with a Tech Priest to support them. The third unit of Rangers and the Daedalosus went in the centre, supported by two of the Skorpius Disintegrators. The other Disintegrator went on his left flank. He put two of the Knights on the right, with one on the left flank.
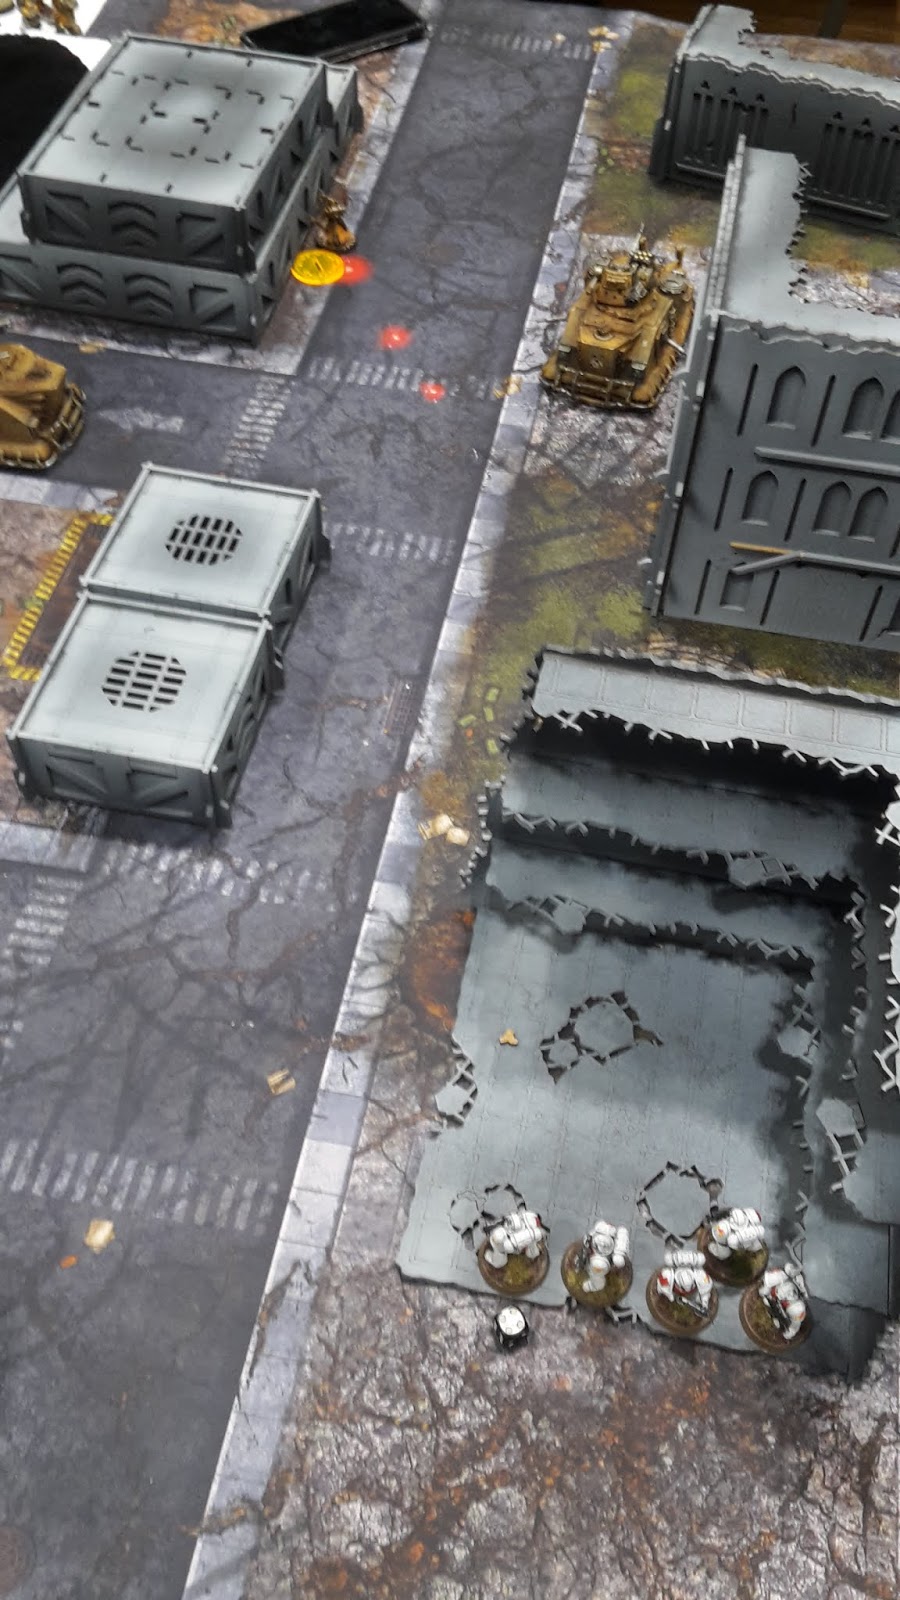
I then deployed my army. I put a unit of Intercessors on the left flank, the Engineers unit to hold the objective. I put the bulk of my army in the central ruin; the Thunderfire Cannon, Tactical Squad, a unit of Scouts and all my characters. On the right flank, I put a unit of Scouts and the Infiltrators. I put a unit of Scouts and the Eliminators in the centre ruins, ready to move up on the enemy unit. I spent 4CP to put the two units of Intercessors, the Centurions and the Infiltrators in reserve. I also put both units of Inceptors.


Tom took the first turn, and there was no seize the initiative.
TURN 1- IMPERIAL KNIGHTS
The Mechanicus canticles were re-roll 1's to hit in the shooting phase. I got the Litany of Hate off on the Chaplain.

The Rangers in the centre moved up to the front of the ruins, the two Disintegrators joining them. The Knights moved up towards the enemy lines, but were unable to get line of sight to any of the enemy units.


The Knights and Disintegrators fired their Ionstorm Rocket pods at the Scouts in the centre, killing all but one. The final vehicle managed to do a single wound with one CP re-roll. I failed my save, using a CP re-roll to fail it again and the Scouts died.
Had I made the save, I would have denied Tom a kill annoyingly.
At the end of his turn, Tom scored hold 1, kill 1 and King of the Hill (1/4) for 3 points.
TURN 1- WHITE SCARS

The Eliminators moved down from the ruins to target the enemy forces. The Scouts on the right moved to grab an objective.


In the shooting phase, the Eliminators fired at the Tech-Priest on the left, wounding him once. I spent 2CP to fire the Thunderfire Cannon twice, killing one unit of Rangers and killing three of another squad. The Infiltrators fired their smoke grenades to obscure them from the enemy fire.
In the charge phase, the Eliminators assaulted the Rangers in the centre of the battlefield. The Eliminators did four wounds on the squad, but they made all their armour saves. I was able to consolidate into the two Skorpius tanks to stop them from firing in the next turn.
At the end of my turn, I scored hold 1 and kill 1.
VICTORY POINTS:
Imperial Knights- 3
White Scars- 2
A decent start for the White Scars. I had evened out on kills and objectives, so the game was still close.
TURN 2- IMPERIAL KNIGHTS
In the second turn, I moved to the Tactical Doctrine. The Mechanicus got re-rolls of 1's to hit in combat, while the Chaplain used the Litany of Hate.

The Disintegrators fell back from combat, along with the Rangers in combat with the Eliminators. One Knight moved up the right flank, while another moved up on the Eliminators. The third Imperial Knight held back for now.


One Knight fired on the Infiltrators and Scouts on the left flank, killing the Scouts only. The Knight on the right flank managed to target the Infiltrators, killing four of the squad. The third Knight fired a the Eliminators with its main guns, while the Rockets fired at the lone Infiltrator. Both units were wiped out.
In the charge phase, the Imperial Knight on the right managed a charge on the Intercessors. The Knight did 8 wounds, but only managed to fell three of the squad. The White Scars were unable to harm the mighty war machine in reply.

At the end of his turn, Tom scored hold 1, kill 1 and King of the Hill (2/4). We would save the Reaper points till the end when it was easier to work out.
TURN 2- WHITE SCARS

The Knight on the left would need to be dealt with now! The White Scars characters advanced on the Imperial Knight, as the Intercessors fell back from combat. The Scouts in the centre advanced on the objective to the right.


The White Scars reserves came in. The Centurions landed on the right flank behind the Skorpius Disintegrator, while the Intercessors and Infiltrators landed on the left flank.
In the psychic phase, the Librarian cast Storm-wreathed, needing a CP re-roll to do so. He then cast smite, doing two mortal wounds on the Imperial Knight.


I played Gravitic Amplification on the Centurions. They fired at the Skorpius, only managing 3 wounds and taking 5 damage from it. The Bolters of the squad targeted the Tech-Priest, killing him.
The Intercessors fired at the Rangers, killing two of them. The Infiltrators fired at the last Ranger, killing him. The Thunderfire Cannon fired at the Ranger squad in the centre, wounding them 7 times. Tom failed four saves, but then made two 6+ saves to keep one of the squad alive.
In the charge phase, the Chapter Master, Biker Captain and Khan charged the Knight. The Centurions charged the Skorpius Disintegrator.
The Chapter Master struck at the Imperial Knight, getting three wounds through its armour, after Tom played rotate Ion Shields on it. The Knight saved three of the damage to take 9 wounds. The Biker Captain then struck, doing three wounds on the Knight. The Khan then attacked, doing 5 damage to the Knight and leaving it on 5 wounds.

The Centurions did four wounds on the enemy tank, but failed to get past its armour. The Imperial Knight attacked the Chapter Master, doing 3 wounds, but he made all his Storm Shield saves.
At the end of my turn, I scored hold 1, kill 1, hold more, the objective bonus point, Engineers (1/4) and Behind Enemy Lines (2/4) and Big Game Hunter (1/4). Tom scored kill more.
VICTORY POINTS:
Imperial Knights- 7
White Scars- 10
The White Scars had taken the lead in turn 2, but had yet to take down one of the Knights. They would need to fall soon, or I was in big trouble. Unfortunately, I needed to go after them in turn 2. I would have rather waited till turn 3 to power up my characters, but I couldn't allow the Knight to rampage in my deployment zone for a turn.
TURN 3- IMPERIAL KNIGHTS
In the third turn, I moved to the Assault Doctrine, and the Chaplain failed his litany roll.

Tom used a stratagem on the damaged Knight to allow it to act on its full profile. The Master of Snares ability stopped the Knight from falling back from combat. This was key, as it stopped the firepower of the Knight Crusader from decimating my backline.
The other Knight moved from the centre of the battlefield, while the third Knight moved back towards the Devastator Centurions. The Disintegrators and Daedalosus moved back towards the White Scars reinforcements.

The two Skorpius Disintegrators fired on the Intercessors, killing four of them. The Knights fired at the Intercessors, Scouts and Infiltrators, wiping out the Infiltrators and three Scouts in a hail of fire.
The Knight Crusader charged the Devastator Centurions. The might war machine struck at the Centurions, doing four wounds on them. I failed one wound, and the Centurion took 2 damage. The other Knight struck at the Biker Captain. He did four wounds, the Captain failed one save and the White Scar took 2 damage.
The Chapter Master struck back, destroying the Knight Crusader with his Thunder Hammer. Tom used the stratagem to blow up the Knight, passing the roll. It did a 9" explosion.
The resulting devastation took out the Lieutenant and Intercessors, while doing 3 wounds on the Librarian, four wounds on the Khan, 4 wounds on the Chapter Master and one on the Biker Captain. Ouch!
The Devastator Centurions attacked the Skorpius, doing 3 wounds on it.
At the end of his turn, Tom scored hold 1 and kill 1. I scored a point for Big Game Hunter (2/4).
TURN 3- WHITE SCARS

The lone Intercessor moved up on the Tech-Priest, while the Centurions fell back from combat. The White Scars characters moved up on the Knight Crusader in the middle of the battlefield. I used the stratagem on the Devastator Centurions to allow them to fall back and shoot. At the end of the phase, the Inceptors arrived deep in the enemy lines. The Intercessors arrived on the left flank, near the objective.


The Librarian cast Storm-wreathed on the Chapter Master. I didn't want to risk another psychic power in case I had a peril and killed himself.
The Centurions fired at the damaged Skorpius, wounding it twice. The Bolters did 11 wounds on the other vehicle, but Tom only failed a single save.
The Inceptors fired at the Tech-Priest, killing him. The second squad fired at the Skorpius, causing five wounds. The Thunderfire Cannon targeted the lone Ranger, killing him.
In the charge phase, the White Scars characters assaulted the Knight Crusader, the psychic power blocking the overwatch fire. The Centurions charged the Skorpius, while the Inceptors tried to charge the other Skorpius, failing to make the distance and losing one of the squad to overwatch fire.
In the fight phase, Tom used the Rotate Ion Shields stratagem on the Knight, which had an invulnerable save in combat, thanks to the relic.


The Chapter Master did 5 hits, but only a single wound on a 3+! The wound got through though and did 5 damage on the Knight. The Biker Captain attacked, doing three wounds, but all were saved. The Khan did four wounds, two of which got through to do 5 damage. The Chaplain did no wounds, while the Librarian was able to do four wounds to leave it on 11 wounds remaining.
The Centurions did 12 hits in combat, and not a single wound on a 5+! This turn was not going my way.
The Knight struck back, splitting his attacks between the Chaplain and Khan, failing to kill either.
At the end of my turn, I scored hold 1, kill 1, the objective bonus, hold more, Behind Enemy Lines (for 2 points, 4/4), Engineers (2/4) and Big Game Hunter (3/4). No one scored kill more, as we were both on 3 kills.
VICTORY POINTS:
Imperial Knights- 9
White Scars- 19
At the end of turn 3, things were looking good for the White Scars. I was quite far ahead on points, but had only taken care of one of the Knights. The other was damaged, but not enough to that it was still not a significant threat to my army.
TURN 4- IMPERIAL KNIGHTS
The Mechanicus canticles allowed them to re-roll 1's to hit in the shooting phase, while the Chaplain failed his Litany.

My master of snares ability passed with a CP re-roll. This was crucial, as the enemy army would have been able to decimate my characters with their firepower if the Knight fell back.
The Skorpius fell back from combat with the Centurions, while the Knight moved up and around to target the Inceptors.


The Daedalosus fired his pistol at the lone Intercessor, killing him. The Knight Crusader fired at the Scouts, Inceptors and Centurions, killing one Scout and one Centurion. The Inceptors were wiped out. The Skorpius Disintegrators fired at the second Inceptor squad, wiping them out.
The Knight charged the Centurions, taking two wounds on overwatch. The Crusader attacked, killing one more Centurion. The second Knight Crusader attacked the Chaplain, killing him.
The Chapter Master attacked the Knight, doing 12 wounds, of which the machine took 10, leaving it on one wound remaining. The Biker Captain attacked, but failed to do any damage. The Khan struck at the Knight, killing the machine. Tom used the stratagem once more, blowing it up. He got an 11" explosion with a CP re-roll.

The resulting explosion took out all the characters surrounding the Knight! A mighty blow for the White Scars.
At the end of his turn, Tom scored Marked for Death (for 3 points, 3/4), hold 1, kill 1, and maxed out the Reaper (for 4 points, 4/4) to give him 18 points. I scored Big Game Hunter (4/4).
TURN 4- WHITE SCARS

There were few forces left for the White Scars to muster. The Intercessors moved up on the objective in the ruins. The Centurions fell back from combat with the Knight, while I used the stratagem once more to allow them to fire.


They targeted the damaged Skorpius, destroying it. The vehicle exploded, wounding the last Centurion twice and one on the Knight.
At the end of my turn, I scored hold 1, kill 1, Engineers (3/4) and hold more. Tom scored kill more.
VICTORY POINTS:
Imperial Knights- 19
White Scars- 24
TURN 5- IMPERIAL KNIGHTS

The Daedalosus moved up to secure an objective, while the Knight moved up on the Centurions. The remaining vehicles moved up on the White Scars forces.


The Disintegrators fired at the Intercessors with their weapons that didn't need line of sight, killing one of the squad. Another fired at the Scout, killing him. The Knight killed the last of the Centurions, while his rocket pod killed one more Intercessor.

At the end of his turn, Tom scored hold 1, kill 1 and marked for death (4/4).
TURN 5- WHITE SCARS

The Techmarine advanced on the objective on the right, while the Tactical Squad advanced up the centre. My plan was to keep the Techmarine on the objective from being targeted by the enemy forces, as the Tactical Squad would shield him from the Knight's firepower.
At the end of my turn, I scored hold 1 and Engineers (4/4). Tom scored kill more.
VICTORY POINTS:
Imperial Knights- 23
White Scars- 26
At the end of turn 5, things were very close. There was only a couple of points in it, and very few forces left on the table.
TURN 6- IMPERIAL KNIGHTS

The Disintegrators moved up towards the enemy forces. They fired on the Tactical Squad, killing the Intercessors and two of the Tactical Squad.


At the end of his turn, Tom scored hold 1 and kill 1.
TURN 6- WHITE SCARS

The Tactical Squad tried to advance to grab the objective, but failed to make the distance to get into range to score it.

At the end of my turn, I scored hold 1. Tom scored hold more and kill more.
VICTORY POINTS:
Imperial Knights- 27
White Scars- 27

Unbelievably, a draw! That was a really close game.
AFTER-BATTLE THOUGHTS
Thanks to Tom for a very close game, I really thought he would grab the win in the end. Had the Intercessors survived the final volley, I could have stolen the win.
Overall, I think my plan was the right one. By taking the second turn, I was able to go out and put a squad on the objectives to either draw on number of objectives held, or to get hold more. Had I taken the first turn, any unit I put out on an objective would have been easily blown away by the Knights.
I was unlucky to lose the Scout squad in the centre on my first turn, failing a 4+ save with a CP re-roll. Had this squad survived, I would have denied Tom a kill, as well as scoring kill more myself to give me a good lead, and may have won me the game.
My luck did return when the Knight charged the Intercessors on turn 2, as I just assumed they would be wiped out. As it was, he was only able to kill a few of the squad, allowing me to fall back and get the objective, as well as the Engineers point.
My original plan was to hold back till turn 3 to go out and go after the Knights. However, after Tom made a long charge with his Knight on turn 2, I had to react to try and kill it. I couldn't afford to give it another turn of shooting, as it would have decimated my backline and lost me the game.
Annoyingly, had we remembered to place the central objective, I think Tom would have won this game. He could have just parked one of the Knights on the objective on turn 1 to score hold more for several turns of the game to give him the lead. I would not have had any units to send after the central objective to go and secure it.
The Noble Sacrifice stratagem was a big killer in this game. The ability to explode a Knight on a 4+ and do D6 mortal wounds to nearby units is an incredible ability in the right circumstances. In this instance, the right circumstances were when the Knight is surrounded by all of my characters that could possibly harm them.
For only 4CP (5 if you include the CP re-roll), Tom was able to deal 30 mortal wounds to the characters surrounded the two Knights in combat and wipe out my ability to deal with the final Knight on the battlefield. If I could spent 4CP to deal 30 mortal wounds to a Knight, you can bet that is what I would do!
Overall, I managed three wins, a loss and a draw at the North East Open tournament. This was a great event, and the White Scars performed very well.
Tom's army consisted of:
Super-Heavy Detachment (Imperial Knights, House Taranis)
Knight Crusader- Heavy Stubber, Endless Fury (Heirloom), Ironstorm Missile Pod, Thermal Cannon, Avenger Gatling Cannon, Heavy Flamer, Warlord, Cunning Commander.
Knight Crusader- Heavy Stubber, Ironstorm Missile Pod, Thermal Cannon, Avenger Gatling Cannon, Heavy Flamer.
Knight Crusader- Heavy Stubber, Ironstorm Missile Pod, Thermal Cannon, Avenger Gatling Cannon, Heavy Flamer.
Battalion Detachment (Adeptus Mechanicus, Graia)
Tech-Priest Enginseer
Tech-Priest Enginseer
5 Skitarii Rangers- Galvanic Rifles
5 Skitarii Rangers- Galvanic Rifles
5 Skitarii Rangers- Galvanic Rifles
Spearhead Detachment (Adeptus Mechanicus, StygiesVIII)
Daedalosus
Skorpius Disintegrator- Belleros Energy Cannon, 3 Cognis Heavy Stubbers
Skorpius Disintegrator- Belleros Energy Cannon, 3 Cognis Heavy Stubbers
Skorpius Disintegrator- Belleros Energy Cannon, 3 Cognis Heavy Stubbers
Ah Knights, my old nemesis. They had brought along some Adeptus Mechanicus lackeys to build up their numbers and add a few more vehicles to the army. I'm was not that worried about Imperial Knights in ITC missions, but the new missions had added a few extra rules to help out the giant machines, so this could be a tough game.
Tom gave one of the Knights the 2+ armour save relic, while he gave another the 5+ invulnerable save in combat relic.
I won the roll off and chose to be the Defender. I figured that I could hide much of my army for the first turn to deny Tom a decent shooting phase. This would also allow me to jump on the objectives at the end of my turn to score hold more without having to survive a turn of the Knights' firepower. I would wait till turn 3 until my army was powered up, and go out and take on the Knights. I also got Hammer and Anvil deployment.
For secondaries, I chose Big Game Hunter, Behind Enemy Lines and Engineers (two Intercessor units). Tom chose King of the Hill, the Reaper and Marked for Death (the Centurions, two Inceptor squads and the Captain on Bike).
We set up the objectives as shown below. We actually omitted the new central objective during the game. We got confused between the new and old mission set up.

Tom deployed his army first. He put a unit of Rangers on each flank, with a Tech Priest to support them. The third unit of Rangers and the Daedalosus went in the centre, supported by two of the Skorpius Disintegrators. The other Disintegrator went on his left flank. He put two of the Knights on the right, with one on the left flank.
I then deployed my army. I put a unit of Intercessors on the left flank, the Engineers unit to hold the objective. I put the bulk of my army in the central ruin; the Thunderfire Cannon, Tactical Squad, a unit of Scouts and all my characters. On the right flank, I put a unit of Scouts and the Infiltrators. I put a unit of Scouts and the Eliminators in the centre ruins, ready to move up on the enemy unit. I spent 4CP to put the two units of Intercessors, the Centurions and the Infiltrators in reserve. I also put both units of Inceptors.


Tom took the first turn, and there was no seize the initiative.
TURN 1- IMPERIAL KNIGHTS
The Mechanicus canticles were re-roll 1's to hit in the shooting phase. I got the Litany of Hate off on the Chaplain.

The Rangers in the centre moved up to the front of the ruins, the two Disintegrators joining them. The Knights moved up towards the enemy lines, but were unable to get line of sight to any of the enemy units.


The Knights and Disintegrators fired their Ionstorm Rocket pods at the Scouts in the centre, killing all but one. The final vehicle managed to do a single wound with one CP re-roll. I failed my save, using a CP re-roll to fail it again and the Scouts died.
Had I made the save, I would have denied Tom a kill annoyingly.
At the end of his turn, Tom scored hold 1, kill 1 and King of the Hill (1/4) for 3 points.
TURN 1- WHITE SCARS

The Eliminators moved down from the ruins to target the enemy forces. The Scouts on the right moved to grab an objective.


In the shooting phase, the Eliminators fired at the Tech-Priest on the left, wounding him once. I spent 2CP to fire the Thunderfire Cannon twice, killing one unit of Rangers and killing three of another squad. The Infiltrators fired their smoke grenades to obscure them from the enemy fire.
In the charge phase, the Eliminators assaulted the Rangers in the centre of the battlefield. The Eliminators did four wounds on the squad, but they made all their armour saves. I was able to consolidate into the two Skorpius tanks to stop them from firing in the next turn.
At the end of my turn, I scored hold 1 and kill 1.
VICTORY POINTS:
Imperial Knights- 3
White Scars- 2
A decent start for the White Scars. I had evened out on kills and objectives, so the game was still close.
TURN 2- IMPERIAL KNIGHTS
In the second turn, I moved to the Tactical Doctrine. The Mechanicus got re-rolls of 1's to hit in combat, while the Chaplain used the Litany of Hate.

The Disintegrators fell back from combat, along with the Rangers in combat with the Eliminators. One Knight moved up the right flank, while another moved up on the Eliminators. The third Imperial Knight held back for now.


One Knight fired on the Infiltrators and Scouts on the left flank, killing the Scouts only. The Knight on the right flank managed to target the Infiltrators, killing four of the squad. The third Knight fired a the Eliminators with its main guns, while the Rockets fired at the lone Infiltrator. Both units were wiped out.
In the charge phase, the Imperial Knight on the right managed a charge on the Intercessors. The Knight did 8 wounds, but only managed to fell three of the squad. The White Scars were unable to harm the mighty war machine in reply.

At the end of his turn, Tom scored hold 1, kill 1 and King of the Hill (2/4). We would save the Reaper points till the end when it was easier to work out.
TURN 2- WHITE SCARS

The Knight on the left would need to be dealt with now! The White Scars characters advanced on the Imperial Knight, as the Intercessors fell back from combat. The Scouts in the centre advanced on the objective to the right.


The White Scars reserves came in. The Centurions landed on the right flank behind the Skorpius Disintegrator, while the Intercessors and Infiltrators landed on the left flank.
In the psychic phase, the Librarian cast Storm-wreathed, needing a CP re-roll to do so. He then cast smite, doing two mortal wounds on the Imperial Knight.


I played Gravitic Amplification on the Centurions. They fired at the Skorpius, only managing 3 wounds and taking 5 damage from it. The Bolters of the squad targeted the Tech-Priest, killing him.
The Intercessors fired at the Rangers, killing two of them. The Infiltrators fired at the last Ranger, killing him. The Thunderfire Cannon fired at the Ranger squad in the centre, wounding them 7 times. Tom failed four saves, but then made two 6+ saves to keep one of the squad alive.
In the charge phase, the Chapter Master, Biker Captain and Khan charged the Knight. The Centurions charged the Skorpius Disintegrator.
The Chapter Master struck at the Imperial Knight, getting three wounds through its armour, after Tom played rotate Ion Shields on it. The Knight saved three of the damage to take 9 wounds. The Biker Captain then struck, doing three wounds on the Knight. The Khan then attacked, doing 5 damage to the Knight and leaving it on 5 wounds.

The Centurions did four wounds on the enemy tank, but failed to get past its armour. The Imperial Knight attacked the Chapter Master, doing 3 wounds, but he made all his Storm Shield saves.
At the end of my turn, I scored hold 1, kill 1, hold more, the objective bonus point, Engineers (1/4) and Behind Enemy Lines (2/4) and Big Game Hunter (1/4). Tom scored kill more.
VICTORY POINTS:
Imperial Knights- 7
White Scars- 10
The White Scars had taken the lead in turn 2, but had yet to take down one of the Knights. They would need to fall soon, or I was in big trouble. Unfortunately, I needed to go after them in turn 2. I would have rather waited till turn 3 to power up my characters, but I couldn't allow the Knight to rampage in my deployment zone for a turn.
TURN 3- IMPERIAL KNIGHTS
In the third turn, I moved to the Assault Doctrine, and the Chaplain failed his litany roll.

Tom used a stratagem on the damaged Knight to allow it to act on its full profile. The Master of Snares ability stopped the Knight from falling back from combat. This was key, as it stopped the firepower of the Knight Crusader from decimating my backline.
The other Knight moved from the centre of the battlefield, while the third Knight moved back towards the Devastator Centurions. The Disintegrators and Daedalosus moved back towards the White Scars reinforcements.

The two Skorpius Disintegrators fired on the Intercessors, killing four of them. The Knights fired at the Intercessors, Scouts and Infiltrators, wiping out the Infiltrators and three Scouts in a hail of fire.
The Knight Crusader charged the Devastator Centurions. The might war machine struck at the Centurions, doing four wounds on them. I failed one wound, and the Centurion took 2 damage. The other Knight struck at the Biker Captain. He did four wounds, the Captain failed one save and the White Scar took 2 damage.
The Chapter Master struck back, destroying the Knight Crusader with his Thunder Hammer. Tom used the stratagem to blow up the Knight, passing the roll. It did a 9" explosion.
The resulting devastation took out the Lieutenant and Intercessors, while doing 3 wounds on the Librarian, four wounds on the Khan, 4 wounds on the Chapter Master and one on the Biker Captain. Ouch!
The Devastator Centurions attacked the Skorpius, doing 3 wounds on it.
At the end of his turn, Tom scored hold 1 and kill 1. I scored a point for Big Game Hunter (2/4).
TURN 3- WHITE SCARS

The lone Intercessor moved up on the Tech-Priest, while the Centurions fell back from combat. The White Scars characters moved up on the Knight Crusader in the middle of the battlefield. I used the stratagem on the Devastator Centurions to allow them to fall back and shoot. At the end of the phase, the Inceptors arrived deep in the enemy lines. The Intercessors arrived on the left flank, near the objective.


The Librarian cast Storm-wreathed on the Chapter Master. I didn't want to risk another psychic power in case I had a peril and killed himself.
The Centurions fired at the damaged Skorpius, wounding it twice. The Bolters did 11 wounds on the other vehicle, but Tom only failed a single save.
The Inceptors fired at the Tech-Priest, killing him. The second squad fired at the Skorpius, causing five wounds. The Thunderfire Cannon targeted the lone Ranger, killing him.
In the charge phase, the White Scars characters assaulted the Knight Crusader, the psychic power blocking the overwatch fire. The Centurions charged the Skorpius, while the Inceptors tried to charge the other Skorpius, failing to make the distance and losing one of the squad to overwatch fire.
In the fight phase, Tom used the Rotate Ion Shields stratagem on the Knight, which had an invulnerable save in combat, thanks to the relic.


The Chapter Master did 5 hits, but only a single wound on a 3+! The wound got through though and did 5 damage on the Knight. The Biker Captain attacked, doing three wounds, but all were saved. The Khan did four wounds, two of which got through to do 5 damage. The Chaplain did no wounds, while the Librarian was able to do four wounds to leave it on 11 wounds remaining.
The Centurions did 12 hits in combat, and not a single wound on a 5+! This turn was not going my way.
The Knight struck back, splitting his attacks between the Chaplain and Khan, failing to kill either.
At the end of my turn, I scored hold 1, kill 1, the objective bonus, hold more, Behind Enemy Lines (for 2 points, 4/4), Engineers (2/4) and Big Game Hunter (3/4). No one scored kill more, as we were both on 3 kills.
VICTORY POINTS:
Imperial Knights- 9
White Scars- 19
At the end of turn 3, things were looking good for the White Scars. I was quite far ahead on points, but had only taken care of one of the Knights. The other was damaged, but not enough to that it was still not a significant threat to my army.
TURN 4- IMPERIAL KNIGHTS
The Mechanicus canticles allowed them to re-roll 1's to hit in the shooting phase, while the Chaplain failed his Litany.

My master of snares ability passed with a CP re-roll. This was crucial, as the enemy army would have been able to decimate my characters with their firepower if the Knight fell back.
The Skorpius fell back from combat with the Centurions, while the Knight moved up and around to target the Inceptors.


The Daedalosus fired his pistol at the lone Intercessor, killing him. The Knight Crusader fired at the Scouts, Inceptors and Centurions, killing one Scout and one Centurion. The Inceptors were wiped out. The Skorpius Disintegrators fired at the second Inceptor squad, wiping them out.
The Knight charged the Centurions, taking two wounds on overwatch. The Crusader attacked, killing one more Centurion. The second Knight Crusader attacked the Chaplain, killing him.
The Chapter Master attacked the Knight, doing 12 wounds, of which the machine took 10, leaving it on one wound remaining. The Biker Captain attacked, but failed to do any damage. The Khan struck at the Knight, killing the machine. Tom used the stratagem once more, blowing it up. He got an 11" explosion with a CP re-roll.

The resulting explosion took out all the characters surrounding the Knight! A mighty blow for the White Scars.
At the end of his turn, Tom scored Marked for Death (for 3 points, 3/4), hold 1, kill 1, and maxed out the Reaper (for 4 points, 4/4) to give him 18 points. I scored Big Game Hunter (4/4).
TURN 4- WHITE SCARS

There were few forces left for the White Scars to muster. The Intercessors moved up on the objective in the ruins. The Centurions fell back from combat with the Knight, while I used the stratagem once more to allow them to fire.


They targeted the damaged Skorpius, destroying it. The vehicle exploded, wounding the last Centurion twice and one on the Knight.
At the end of my turn, I scored hold 1, kill 1, Engineers (3/4) and hold more. Tom scored kill more.
VICTORY POINTS:
Imperial Knights- 19
White Scars- 24
TURN 5- IMPERIAL KNIGHTS

The Daedalosus moved up to secure an objective, while the Knight moved up on the Centurions. The remaining vehicles moved up on the White Scars forces.


The Disintegrators fired at the Intercessors with their weapons that didn't need line of sight, killing one of the squad. Another fired at the Scout, killing him. The Knight killed the last of the Centurions, while his rocket pod killed one more Intercessor.

At the end of his turn, Tom scored hold 1, kill 1 and marked for death (4/4).
TURN 5- WHITE SCARS

The Techmarine advanced on the objective on the right, while the Tactical Squad advanced up the centre. My plan was to keep the Techmarine on the objective from being targeted by the enemy forces, as the Tactical Squad would shield him from the Knight's firepower.
At the end of my turn, I scored hold 1 and Engineers (4/4). Tom scored kill more.
VICTORY POINTS:
Imperial Knights- 23
White Scars- 26
At the end of turn 5, things were very close. There was only a couple of points in it, and very few forces left on the table.
TURN 6- IMPERIAL KNIGHTS

The Disintegrators moved up towards the enemy forces. They fired on the Tactical Squad, killing the Intercessors and two of the Tactical Squad.


At the end of his turn, Tom scored hold 1 and kill 1.
TURN 6- WHITE SCARS

The Tactical Squad tried to advance to grab the objective, but failed to make the distance to get into range to score it.
At the end of my turn, I scored hold 1. Tom scored hold more and kill more.
VICTORY POINTS:
Imperial Knights- 27
White Scars- 27

Unbelievably, a draw! That was a really close game.
AFTER-BATTLE THOUGHTS
Thanks to Tom for a very close game, I really thought he would grab the win in the end. Had the Intercessors survived the final volley, I could have stolen the win.
Overall, I think my plan was the right one. By taking the second turn, I was able to go out and put a squad on the objectives to either draw on number of objectives held, or to get hold more. Had I taken the first turn, any unit I put out on an objective would have been easily blown away by the Knights.
I was unlucky to lose the Scout squad in the centre on my first turn, failing a 4+ save with a CP re-roll. Had this squad survived, I would have denied Tom a kill, as well as scoring kill more myself to give me a good lead, and may have won me the game.
My luck did return when the Knight charged the Intercessors on turn 2, as I just assumed they would be wiped out. As it was, he was only able to kill a few of the squad, allowing me to fall back and get the objective, as well as the Engineers point.
My original plan was to hold back till turn 3 to go out and go after the Knights. However, after Tom made a long charge with his Knight on turn 2, I had to react to try and kill it. I couldn't afford to give it another turn of shooting, as it would have decimated my backline and lost me the game.
Annoyingly, had we remembered to place the central objective, I think Tom would have won this game. He could have just parked one of the Knights on the objective on turn 1 to score hold more for several turns of the game to give him the lead. I would not have had any units to send after the central objective to go and secure it.
The Noble Sacrifice stratagem was a big killer in this game. The ability to explode a Knight on a 4+ and do D6 mortal wounds to nearby units is an incredible ability in the right circumstances. In this instance, the right circumstances were when the Knight is surrounded by all of my characters that could possibly harm them.
For only 4CP (5 if you include the CP re-roll), Tom was able to deal 30 mortal wounds to the characters surrounded the two Knights in combat and wipe out my ability to deal with the final Knight on the battlefield. If I could spent 4CP to deal 30 mortal wounds to a Knight, you can bet that is what I would do!
Overall, I managed three wins, a loss and a draw at the North East Open tournament. This was a great event, and the White Scars performed very well.
Didn't he try to resurrect any knights wth raven?
ReplyDeleteI'm not sure what you mean?
Deletethere's a strat for resurrecting knight in taranis 3cps if it didn't explode
DeleteGot you. No idea why he didn't use it.
DeleteWell done against your Nemesis.
ReplyDeleteCheers, Siph! Was hoping to sneak the win, but think I did well to hold on after those explosions.
DeleteExcellent battle! Managing a draw always seems like quite a feat in 40K to me, the odds are always against it.
ReplyDeleteThanks! Yeah, it could easily have gone either way in this one.
DeleteSounds like it was an excellent tournament, good to go out on a high as well, seeing as it's anybody's guess when the next one will be.
ReplyDeleteYeah, it was a great event. I was planning on taking a break from events for a bit, but the current situation has kind of forced it.
Delete