
Game 2 of the Greetings From the Warp tournament saw my White Scars Space Marines taking on Ken and his Grey Knights army.
The mission for game 2 was the Kill Confirmed Maelstrom of War mission with Hammer and Anvil deployment. This was the mission I was most worried about of the three. My army does well at maelstrom games, but my MSU style army can give up a lot of kill points.

My army consisted of:
Brigade Detachment
Captain on Bike- Thunder Hammer, The Shield Eternal, Twin Boltgun, Iron Resolve Warlord Trait (C1)
Captain with Jump Pack- Lightning Claw, Combi-Melta (C2)
Librarian with Jump Pack- Force Stave, Boltgun, Null Zone, Psychic Fortress (L2)
Lieutenant with Jump Pack- Power Axe, Master-Crafted Boltgun, Bolt Pistol (L1)
5 Scouts- Boltguns (S1)
5 Scouts- Boltguns, Sergeant has Bolt Pistol and Combat Knife (S2)
5 Scouts- Bolt Pistols and Combat Knives (S3)
5 Tactical Marines- Bolters, Heavy Bolter (TS1)
5 Tactical Marines- Bolters, Heavy Bolter (TS2)
5 Tactical Marines- Bolters, Missile Launcher (TS3)
Company Ancient- Standard of the Emperor Ascendant, Chainsword (A)
5 Vanguard Veterans- Jump Packs, 5 Pairs of Lightning Claws (VV1)
5 Vanguard Veterans- Jump Packs, 2 Chainswords each (VV2)
5 Assault Marines- Jump Packs, 2 Plasma Pistols, Bolt Pistols, Chainswords, Sergeant with Plasma Pistol (AS1)
5 Assault Marines- Jump Packs, 2 Plasma Pistols, Bolt Pistols, Chainswords, Sergeant with Power Fist and Meltabombs (AS2)
5 Assault Marines- Jump Packs, 2 Plasma Pistols, Bolt Pistols, Chainswords, Sergeant with Power Sword (AS3)
6 Scout Bikers- Twin Boltguns, Astartes Shotguns, Combat Knives (SB)
Thunderfire Cannon. Techmarine Gunner (T) with 2 Servo-arms, Plasma Cutter, Flamer, Bolt Pistol (TC)
5 Devastator Marines- 2 Heavy Bolters, Plasma Cannon, Bolters (D1)
5 Devastator Marines- 3 Missile Launchers, Bolters (D2)
The Biker Captain was my warlord.
Ken's army consisted of:
Battalion Detachment
Kaldor Draigo (D)
Grandmaster in Dreadknight- Gatling Psilencer, Heavy Psycannon, Greathammer, Personal Teleporter (G)
5 Strike Squad- Storm Bolters, Psylencer (SS1)
5 Strike Squad- Storm Bolters, Psylencer (SS2)
5 Strike Squad- Storm Bolters, Psylencer (SS3)
Outrider Detachment
Brother Captain- Hammer, Psycannon (BC)
5 Inceptor Squad- Justicar with Hammer, Psilencer (I)
5 Inceptor Squad- Justicar with Hammer, Psilencer (I2)
10 Inceptor Squad- 2 Psilencers (I3)
Stormraven Gunship- Twin Lascannon, Twin Multi-melta, 2 Hurricane Bolters, 2 Stormstrike Missiles (SR)
Apothecary (A)


I had yet to face the Grey Knights since the codex was released. My experiences with the in the index were not great, struggling against the army with my Deathwatch. The Stormraven is still a tough unit to take down. Hopefully, I would have some good firepower to take it out quickly.
We set up the objectives as shown below:

The Hammer and Anvil deployment could be good for me, allowing me to set up several screening ranks and use my long range firepower to full effect.

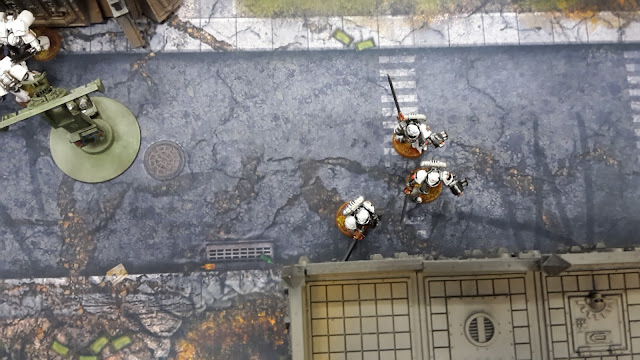
I deployed the Thunderfire Cannon at the back of my deployment zone, with two Tactical Squads nearby to block out areas of the board from deep strikers. The Devastators, Ancient, Lieutenant and Captain went in the ruins to the right. A Tactical Squad went in the ruins to the left, with a Scout Bike squad in the centre. I put the three Scout units towards the centre of the board to force his units back. I put the Librarian, Jump Pack Captain and all my Jump units in reserve.
Ken deployed Draigo, the Brother Captain and two Strike Squads to the right of his deployment zone. The Stormraven, 10-man Inceptor squad and another Strike Squad went to his left. He put the Apothecary and two Inceptor Squads in the Stormraven, while the Grandmaster went into reserve.


We rolled off for first turn. I rolled a 1, meaning Ken didn't have to roll, as he got +1 for deploying first. I failed to seize the initiative and Ken took the first turn.
TURN 1- GREY KNIGHTS
In his first turn, Ken drew Secure Objective 2, Secure Objective 4 and Domination.

The Stormraven launched itself deep into the White Scars lines, while the rest of the Grey Knights moved up on the enemy Scouts. The Grandmaster landed on the missile silo.


In the psychic phase, the Grandmaster cast Sanctuary on himself. He then cast Astral Aim on himself. A Strike Squad then cast Smite, killing one of the Devastators. He was able to shoot back thanks to the Ancient, but caused no damage. Draigo used Purge Soul to wipe out the central Scout unit to score First Blood.
In the shooting phase, the backline Grey Knights targeted the Scout units. The Grandmaster fired at the Scouts hidden behind the ruins (thanks to Astral Aim), killing the entire unit. He also targeted the Scout Bikers and was able to kill them as well.


On the right flank, the Strike Squad and Inceptors fired, killing four of the nearby Scouts and two of the Tactical Marines in the ruins.
Finally, the Stormraven split its fire. It's Multi-melta destroyed the Thunderfire Cannon outright. It also killed the last Scout and one of the Tactical Squad.
At the end of his turn, Ken scored four Kill Points and First Blood. He discarded Domination.
TURN 1- WHITE SCARS
In my first turn, I drew Blood and Guts (kill an enemy unit in assault), Supremacy (hold 3 objectives) and Defend Objective 5.

The Biker Captain moved up on a Strike Squad, using the Born in the Saddle stratagem to advance. He was closely followed by the Scout Bikers. On the left flank, a Tactical Squad moved up on the objective.
The Librarian led the Vanguard Veterans onto the field, landing next to the objective.


The Librarian attempted to cast Smite, but failed in the attempt. He then cast Psychic Fortress, but the power was blocked by the Strike Squad.
The Scout Bikers and Captain fired at the Strike Squad, killing three with their combined firepower. The Techmarine fired at the Stormraven, wounding it once with his Plasma Cutter.
The two Devastator Squads targeted the Grandmaster, but only managed to put a couple of wounds on him thanks to his boosted invulnerable save.
The rest of the White Scars fired at the Stormraven, but to little avail.
In the charge phase, the Captain assaulted the Strike Squad in front of him. The Vanguard Veterans attempted to assault the other Strike Squad, but lost 2 of the Veterans to the overwatch fire. They failed the charge.


The Biker Captain crashed into the Strike Squad, easily cutting down the last two members.
At the end of my turn I scored one kill point, Blood and Guts and Supremacy for 2 points. I discarded Defend Objective 5.
VICTORY POINTS:
Grey Knights- 5
White Scars- 4
Not a great first turn for me. I had lost a number of units before my first turn, and my firepower had been seriously lacking in my turn. I failed to do much damage to the Grandmaster or Stormraven and had only managed to kill a single squad.
TURN 2- GREY KNIGHTS
In his second turn, Ken drew Kingslayer (kill the enemy warlord) to go with Secure Objective 2 and Secure Objective 4.

The Inceptors and Apothecary disembarked from the Stormraven, the Grey Knights flyer then moving off towards the Devastator squads. Draigo and the Brother Captain moved up on the White Scars warlord.
On the left flank, the Inceptors and Strike Squad moved up. On the right, the Strike squad moved towards the Vanguard Veterans.


In the psychic phase, the Grey Knights unleashed their might. Draigo cast Hammerhand on himself. He tried to cast Smite, but the White Scars Librarian blocked the power. The Brother Captain cast Smite, putting a mortal wound on the Biker Captain. The Strike Squad cast Smite, killing a Vanguard Veteran, after using a command point to stop a perils roll. The Apothecary cast Sanctuary on himself, then cast Smite, wounding the Techmarine once. The Inceptors cast Smite, killing one of the nearby Tactical Squad.
We were using the beta rules, but Ken was able to roll exactly the amount he needed on each Smite test during his phase. Fortunately, he could only cause a single mortal wound, otherwise my units would have been devastated.
In the shooting phase, the Strike Squad on the left fired at the two remaining Vanguard Veterans, killing them both. In the White Scars deployment zone, the Inceptors fired at the Tactical Squad beside the objective, wounding them 10 times. I failed 5 of my 3+ saves and the squad perished. The other squad fired at the Techmarine, wounding him twice and killing him.


The 10-man Inceptor Squad fired at the Tactical Squad in the ruins, killing the squad. The Stormraven fired at the Scout Bikers, easily wiping them out.
The Grandmaster split his fire between the two Devastator Squads. The Missile Launcher squad were wounded 8 times and failed 5 saves for the unit to perish. The other squad were spared any casualties.
The nearby Ancient allowed three of the slain Devastators to fire. They loosed three Frag Missiles at the nearby Inceptor squad and were able to kill three of the Grey Knights.


In the charge phase, the two Inceptors charged the Tactical Squad, being wounding four times in overwatch, but making all their saves. Draigo and the Captain charged the White Scars warlord. The Inceptors in the backfield charged the Librarian.
Draigo attacked the Biker Captain, wounding him 5 times. I failed two invulnerable saves and the Captain took 4 wounds. The Brother Captain struck and wounded twice, but the Storm Shield of the Biker Captain blocked both attacks.

The Inceptors struck at the Librarian, killing him. The other squad attacked the Tactical Squad, killing one of the White Scars.
The White Scars Captain struck at the Brother Captain, hitting and getting one wound on him, the Captain taking 3 damage from the Thunder Hammer. I spent three command points on Honour the Chapter and the Captain struck again. He wounded the Brother Captain twice, but failed to get past his invulnerable save.


At the end of his turn, Ken scored 7 kill points and Secure Objective 4, giving him a commanding lead.
TURN 2- WHITE SCARS
In my second turn, I drew Mission Critical Objective (objective 5), Defend Objective 3 and No Prisoners (kill an enemy unit).

The White Scars lines mostly remained in place. A unit of Assault Marines arrived from reserve, landing besides the objective. The Tactical Squad fell back from combat with the Inceptors.
The Assault Squad fired at the nearby Inceptors, killing two of the squad with their Plasma Pistols. The Devastators fired on the Inceptor squad that was in combat, killing the last two members with their Heavy Bolters.

In the fight phase, the Biker Captain struck at the Brother Captain, killing him with his Thunder Hammer attacks. Draigo attacked the Captain, wounding him 5 times and killing him. I spent two command points on the Stratagem to allow the Captain to attack when slain. He wounded Draigo twice, but failed to get past his invulnerable save once more (Ken really wasn't failing many of them).
At the end of my very quick turn, I scored Mission Critical Objective, No Prisoners and two kill points. I discarded Defend Objective 3. Ken scored Kingslayer (3 points), Slay the Warlord and a kill point.
VICTORY POINTS:
Grey Knights- 18
White Scars- 8
Unfortunately, I think the game was pretty over at this point. Most of my army was gone, Ken had a strong lead and I had only killed three of the Grey Knights units.
TURN 3- GREY KNIGHTS
In his third turn, Ken had Secure Objective 2, Secure Objective 3 and Secure Objective 5.

Draigo and the Stormraven moved up on the Assault Squad holding the objective on one side, while the remaining Inceptors moved up from the other side. On the other side, the Strike Squad moved up on the objective, as the Inceptors moved up.


In the White Scars deployment zone, the Inceptors and Apothecary moved up on the Tactical Squad.
In the psychic phase, the Grandmaster cast Smite, killing one of the Devastators. The Inceptor and Apothecary cast Smite, killing two of the Tactical Squad in front of them. Despite the beta rules, I don't think Ken had failed a single Smite attack the whole game.
In the shooting phase, the Inceptors fired at the Tactical Squad, wounding them 10 times. I only failed two saves, but it was enough to finish off the squad.


The Grandmaster fired at the Devastators, wiping them out, after using two command points on a Grey Knights stratagem to increase the strength of his attacks. The Ancient allowed the squad to fire again, killing one of the Inceptors near the Apothecary.
The Stormraven fired at the Assault Squad, wiping them out.

At the end of his turn, Ken scored Secure Objective 3 and 3 kill points.
TURN 3- WHITE SCARS
In my third turn, I drew Secure Objective 3, Secure Objective 6 and Area Denial.

The Lieutenant left the ruins, landing beside the objective and next to the Inceptors. The White Scars reserves arrived, the Captain leading two Assault Marine squads on one side of the Inceptors, with the Vanguard Veterans on the other side.

The Captain fired his Combi-melta at the Apothecary, killing him. The Assault Squads fired at the Inceptors, killing all but one of the squad.
In the charge phase, the Lieutenant and Vanguard Veterans charged the last Inceptor, the Lieutenant killing him in combat.


At the end of my turn, I score Area Denial, Secure Objective 6 and 2 kill points. I discarded Secure Objective 3.
VICTORY POINTS:
Grey Knights- 22
White Scars- 12
TURN 4- GREY KNIGHTS
In his fourth turn, Ken drew Defend Objective 3, Secure Objective 2 and Secure Objective 5.

The 10-man Inceptor squad used their teleporters and moved to the enemy deployment zone. The Grandmaster moved up on the Assault Marines.

In the psychic phase, Draigo used Gate of Infinity to transport himself to join the Inceptor. Draigo then cast Purge Soul on the Vanguard Veterans, killing one of the squad. The Grey Knights then cast Smite twice, killing two more of the Veterans. He then cast Astral Aim on the Stormraven.
The Inceptors opened fire on the remaining Vanguard Veterans, easily finishing off the squad. The Grandmaster split his fire between the two Assault Squads, killing one in one unit and three in another.
The Stormraven fired at the Ancient, killing him with the Multi-melta.
In the charge phase, the Inceptors assaulted the Lieutenant, using a command point re-roll to make the distance. The Grandmaster assaulted the Assault Marines, taking two wounds from an overcharged Plasma Pistol in overwatch. The Captain performed a heroic intervention.
In the fight phase, the Grandmaster slew four of the Assault Marines, wiping out the squad. The Inceptors brought down the Lieutenant with their massed attacks.

The Captain struck at the Grandmaster, wounding him twice (leaving him on 7).
At the end of his turn, Ken scored Secure Objective 5 and 3 kill points.
TURN 4- WHITE SCARS
In my turn 4, I drew Secure Objective 2, Secure Objective 3 and Defend Objective 4.

The Assault Marines moved over to the ruins to secure the objective, while the Captain fell back from combat.

The two Assault Marines fired their Plasma Pistols at the Grandmaster, hitting once but failing to wound. The Captain fired his Meltagun at the Grandmaster, hitting and wounding, but failing to get past his invulnerable save.
At the end of my turn, I scored Secure Objective 2 and discarded Defend Objective 3. Ken scored Defend Objective 3.
VICTORY POINTS:
Grey Knights- 28
White Scars- 13
TURN 5- GREY KNIGHTS
In his fifth (and likely final turn), Ken drew Secure Objective 1, Secure Objective 2 and Secure Objective 5.

The Grandmaster moved up on the Captain, while the rest of the Grey Knights took a deserved rest. The Grandmaster fired on the Assault Marines, killing them.

He then charged the White Scars Captain, hitting and wounding him three times. I failed all three saves and the Captain perished. I used my final two command points to strike with the Captain, leaving the Grandmaster with a glancing wound.

At the end of his turn, Ken scored Secure Objective 5, Linebreaker and two kill points.
VICTORY POINTS:
Grey Knights- 31
White Scars- 13

A convincing win for the Grey Knights.
AFTER-BATTLE THOUGHTS
Well done to Ken for such a deserving win. He actually went on to win the tournament overall, so I don't feel so bad about such a crushing defeat.
It was annoying, as I actually thought I had a shot at this game before we started. Ken did have a strong first turn, but it was not something that I could not have come back from.
There were a few errors that I made that may have contributed to my loss:
Deployment- I think I spread my forces too far out to block deep striking units. I should have deployed deeper in my zone, ignoring the cover and putting my units at the back of the board. This may have allowed me to use the longer range of my guns to do some damage to the slower moving units in the Grey Knights army. This may also have saved the Thunderfire Cannon, as it might have stopped the Multi-melta from getting into Melta range.
This would still have been a tough game. The Stormraven, teleporting Inceptors and Gate of Infinity would still have allowed Ken to close my ranks quickly, but it may have bought me an extra turn. The Scouts could have set up on my deployment zone line, blocking the deep strikers and teleporters for the first turn.
Target Priority- After taking a hammering from the Dreadknight on the first turn, I focused much of my Devastators firepower on it on my first turn. With a boosted 3+ invulnerable save, this was foolish. I should have gone after the Stormraven to try and destroy or weaken it. With its potent firepower, it was eliminating two or three units a turn.
I was also foolish going after the Strike Squad with my Biker Captain. I was focusing on scoring Blood and Guts, so pretty much sacrificed him for a point. As it was, Ken was able to kill him and score Kingslayer, Slay the Warlord and a Kill Point. Giving up 5 points for 1 is not the way to win games!
Reserves- After a poor first turn, I was seriously concerned about getting tabled. As it was, I held much of my reserves forces back to try and go for later objectives. I think this was a mistake. I should have brought them all down on the Grey Knights right flank, going after the Inceptors and Stike squad with all my Plasma Pistols and assault power. I could have made a good dent on them or wiped them out with all my units. This may have taken a fair amount of his firepower off the table.
Bringing them in on the other flank and piecemeal meant that Ken had plenty of firepower to take them out in stages as I fed the units to him.
To be honest, after turn 2, the game was pretty much over. I had lost a number of my units and Ken had built up quite a lead in points. I kept playing on, wanting to maximise my maelstrom points for the tournament.
I'm not a huge fan of the Kill Confirmed maelstrom mission. I dislike Kill Points as a game mechanic, simply due to the inherent imbalance in the armies you can face. In this game, Ken had the potential to score 22 kill points, while I could score a maximum of 11 kill points. He had the potential to score double the number of points that I could.
As a result, he did not need to even focus on the maelstrom mission in order to win. As it was, he was able to score a number of maelstrom points and get a nice, big score at the end, but this seemed to be more of a side issue than actively going for the points. Ken just needed to focus on killing my army to win the game. Not to take anything away from Ken's victory, I was supremely outplayed, but think I might have stood more of a chance or made it a closer game if it was maelstrom points alone.
I would actually have been better off facing his army in the first or second mission, as I scored more maelstrom points in this game (8 to 5 if you are keeping score), but was just crushed thanks to the number of kill points my army gives up.
This obviously goes into factoring the army list during the design stage. I knew my army would give up a lot of kill points and suffer in this mission. However, building the army to restrict the number of kill points would have made me suffer in the other maelstrom missions, I think. It's a tricky one for a Space Marine army. You want to take a large number of units to access the command points, but doing so will really hamper you in games where kill points are taken into effect.
I think this army would really suffer in ETC-style missions, where kill points are a big factor as well. It is good for taking objectives and maelstrom games, but does suffer for individual unit durability.
If you are interested, the timings for the game were:
1.15 pm- Deployment
1.30 pm- GK Turn 1
2.00 pm- WS Turn 1
2.15 pm- GK Turn 2
2.50 pm- WS Turn 2
2.57 pm- GK Turn 3
3.05 pm- WS Turn 3
3.13 pm- GK Turn 4
I stopped keeping track after that, as it was clear the game would end soon.
So with one win and one loss, I was hoping to secure a second win in my third game to come out ahead during the day.
The Biker Captain was my warlord.
Ken's army consisted of:
Battalion Detachment
Kaldor Draigo (D)
Grandmaster in Dreadknight- Gatling Psilencer, Heavy Psycannon, Greathammer, Personal Teleporter (G)
5 Strike Squad- Storm Bolters, Psylencer (SS1)
5 Strike Squad- Storm Bolters, Psylencer (SS2)
5 Strike Squad- Storm Bolters, Psylencer (SS3)
Outrider Detachment
Brother Captain- Hammer, Psycannon (BC)
5 Inceptor Squad- Justicar with Hammer, Psilencer (I)
5 Inceptor Squad- Justicar with Hammer, Psilencer (I2)
10 Inceptor Squad- 2 Psilencers (I3)
Stormraven Gunship- Twin Lascannon, Twin Multi-melta, 2 Hurricane Bolters, 2 Stormstrike Missiles (SR)
Apothecary (A)


I had yet to face the Grey Knights since the codex was released. My experiences with the in the index were not great, struggling against the army with my Deathwatch. The Stormraven is still a tough unit to take down. Hopefully, I would have some good firepower to take it out quickly.
We set up the objectives as shown below:

The Hammer and Anvil deployment could be good for me, allowing me to set up several screening ranks and use my long range firepower to full effect.

I deployed the Thunderfire Cannon at the back of my deployment zone, with two Tactical Squads nearby to block out areas of the board from deep strikers. The Devastators, Ancient, Lieutenant and Captain went in the ruins to the right. A Tactical Squad went in the ruins to the left, with a Scout Bike squad in the centre. I put the three Scout units towards the centre of the board to force his units back. I put the Librarian, Jump Pack Captain and all my Jump units in reserve.
Ken deployed Draigo, the Brother Captain and two Strike Squads to the right of his deployment zone. The Stormraven, 10-man Inceptor squad and another Strike Squad went to his left. He put the Apothecary and two Inceptor Squads in the Stormraven, while the Grandmaster went into reserve.


We rolled off for first turn. I rolled a 1, meaning Ken didn't have to roll, as he got +1 for deploying first. I failed to seize the initiative and Ken took the first turn.
TURN 1- GREY KNIGHTS
In his first turn, Ken drew Secure Objective 2, Secure Objective 4 and Domination.

The Stormraven launched itself deep into the White Scars lines, while the rest of the Grey Knights moved up on the enemy Scouts. The Grandmaster landed on the missile silo.


In the psychic phase, the Grandmaster cast Sanctuary on himself. He then cast Astral Aim on himself. A Strike Squad then cast Smite, killing one of the Devastators. He was able to shoot back thanks to the Ancient, but caused no damage. Draigo used Purge Soul to wipe out the central Scout unit to score First Blood.
In the shooting phase, the backline Grey Knights targeted the Scout units. The Grandmaster fired at the Scouts hidden behind the ruins (thanks to Astral Aim), killing the entire unit. He also targeted the Scout Bikers and was able to kill them as well.


On the right flank, the Strike Squad and Inceptors fired, killing four of the nearby Scouts and two of the Tactical Marines in the ruins.
Finally, the Stormraven split its fire. It's Multi-melta destroyed the Thunderfire Cannon outright. It also killed the last Scout and one of the Tactical Squad.
At the end of his turn, Ken scored four Kill Points and First Blood. He discarded Domination.
TURN 1- WHITE SCARS
In my first turn, I drew Blood and Guts (kill an enemy unit in assault), Supremacy (hold 3 objectives) and Defend Objective 5.

The Biker Captain moved up on a Strike Squad, using the Born in the Saddle stratagem to advance. He was closely followed by the Scout Bikers. On the left flank, a Tactical Squad moved up on the objective.
The Librarian led the Vanguard Veterans onto the field, landing next to the objective.


The Librarian attempted to cast Smite, but failed in the attempt. He then cast Psychic Fortress, but the power was blocked by the Strike Squad.
The Scout Bikers and Captain fired at the Strike Squad, killing three with their combined firepower. The Techmarine fired at the Stormraven, wounding it once with his Plasma Cutter.
The two Devastator Squads targeted the Grandmaster, but only managed to put a couple of wounds on him thanks to his boosted invulnerable save.
The rest of the White Scars fired at the Stormraven, but to little avail.
In the charge phase, the Captain assaulted the Strike Squad in front of him. The Vanguard Veterans attempted to assault the other Strike Squad, but lost 2 of the Veterans to the overwatch fire. They failed the charge.


The Biker Captain crashed into the Strike Squad, easily cutting down the last two members.
At the end of my turn I scored one kill point, Blood and Guts and Supremacy for 2 points. I discarded Defend Objective 5.
VICTORY POINTS:
Grey Knights- 5
White Scars- 4
Not a great first turn for me. I had lost a number of units before my first turn, and my firepower had been seriously lacking in my turn. I failed to do much damage to the Grandmaster or Stormraven and had only managed to kill a single squad.
TURN 2- GREY KNIGHTS
In his second turn, Ken drew Kingslayer (kill the enemy warlord) to go with Secure Objective 2 and Secure Objective 4.

The Inceptors and Apothecary disembarked from the Stormraven, the Grey Knights flyer then moving off towards the Devastator squads. Draigo and the Brother Captain moved up on the White Scars warlord.
On the left flank, the Inceptors and Strike Squad moved up. On the right, the Strike squad moved towards the Vanguard Veterans.


In the psychic phase, the Grey Knights unleashed their might. Draigo cast Hammerhand on himself. He tried to cast Smite, but the White Scars Librarian blocked the power. The Brother Captain cast Smite, putting a mortal wound on the Biker Captain. The Strike Squad cast Smite, killing a Vanguard Veteran, after using a command point to stop a perils roll. The Apothecary cast Sanctuary on himself, then cast Smite, wounding the Techmarine once. The Inceptors cast Smite, killing one of the nearby Tactical Squad.
We were using the beta rules, but Ken was able to roll exactly the amount he needed on each Smite test during his phase. Fortunately, he could only cause a single mortal wound, otherwise my units would have been devastated.
In the shooting phase, the Strike Squad on the left fired at the two remaining Vanguard Veterans, killing them both. In the White Scars deployment zone, the Inceptors fired at the Tactical Squad beside the objective, wounding them 10 times. I failed 5 of my 3+ saves and the squad perished. The other squad fired at the Techmarine, wounding him twice and killing him.


The 10-man Inceptor Squad fired at the Tactical Squad in the ruins, killing the squad. The Stormraven fired at the Scout Bikers, easily wiping them out.
The Grandmaster split his fire between the two Devastator Squads. The Missile Launcher squad were wounded 8 times and failed 5 saves for the unit to perish. The other squad were spared any casualties.
The nearby Ancient allowed three of the slain Devastators to fire. They loosed three Frag Missiles at the nearby Inceptor squad and were able to kill three of the Grey Knights.


In the charge phase, the two Inceptors charged the Tactical Squad, being wounding four times in overwatch, but making all their saves. Draigo and the Captain charged the White Scars warlord. The Inceptors in the backfield charged the Librarian.
Draigo attacked the Biker Captain, wounding him 5 times. I failed two invulnerable saves and the Captain took 4 wounds. The Brother Captain struck and wounded twice, but the Storm Shield of the Biker Captain blocked both attacks.

The Inceptors struck at the Librarian, killing him. The other squad attacked the Tactical Squad, killing one of the White Scars.
The White Scars Captain struck at the Brother Captain, hitting and getting one wound on him, the Captain taking 3 damage from the Thunder Hammer. I spent three command points on Honour the Chapter and the Captain struck again. He wounded the Brother Captain twice, but failed to get past his invulnerable save.


At the end of his turn, Ken scored 7 kill points and Secure Objective 4, giving him a commanding lead.
TURN 2- WHITE SCARS
In my second turn, I drew Mission Critical Objective (objective 5), Defend Objective 3 and No Prisoners (kill an enemy unit).

The White Scars lines mostly remained in place. A unit of Assault Marines arrived from reserve, landing besides the objective. The Tactical Squad fell back from combat with the Inceptors.
The Assault Squad fired at the nearby Inceptors, killing two of the squad with their Plasma Pistols. The Devastators fired on the Inceptor squad that was in combat, killing the last two members with their Heavy Bolters.

In the fight phase, the Biker Captain struck at the Brother Captain, killing him with his Thunder Hammer attacks. Draigo attacked the Captain, wounding him 5 times and killing him. I spent two command points on the Stratagem to allow the Captain to attack when slain. He wounded Draigo twice, but failed to get past his invulnerable save once more (Ken really wasn't failing many of them).
At the end of my very quick turn, I scored Mission Critical Objective, No Prisoners and two kill points. I discarded Defend Objective 3. Ken scored Kingslayer (3 points), Slay the Warlord and a kill point.
VICTORY POINTS:
Grey Knights- 18
White Scars- 8
Unfortunately, I think the game was pretty over at this point. Most of my army was gone, Ken had a strong lead and I had only killed three of the Grey Knights units.
TURN 3- GREY KNIGHTS
In his third turn, Ken had Secure Objective 2, Secure Objective 3 and Secure Objective 5.

Draigo and the Stormraven moved up on the Assault Squad holding the objective on one side, while the remaining Inceptors moved up from the other side. On the other side, the Strike Squad moved up on the objective, as the Inceptors moved up.


In the White Scars deployment zone, the Inceptors and Apothecary moved up on the Tactical Squad.
In the psychic phase, the Grandmaster cast Smite, killing one of the Devastators. The Inceptor and Apothecary cast Smite, killing two of the Tactical Squad in front of them. Despite the beta rules, I don't think Ken had failed a single Smite attack the whole game.
In the shooting phase, the Inceptors fired at the Tactical Squad, wounding them 10 times. I only failed two saves, but it was enough to finish off the squad.


The Grandmaster fired at the Devastators, wiping them out, after using two command points on a Grey Knights stratagem to increase the strength of his attacks. The Ancient allowed the squad to fire again, killing one of the Inceptors near the Apothecary.
The Stormraven fired at the Assault Squad, wiping them out.

At the end of his turn, Ken scored Secure Objective 3 and 3 kill points.
TURN 3- WHITE SCARS
In my third turn, I drew Secure Objective 3, Secure Objective 6 and Area Denial.

The Lieutenant left the ruins, landing beside the objective and next to the Inceptors. The White Scars reserves arrived, the Captain leading two Assault Marine squads on one side of the Inceptors, with the Vanguard Veterans on the other side.

The Captain fired his Combi-melta at the Apothecary, killing him. The Assault Squads fired at the Inceptors, killing all but one of the squad.
In the charge phase, the Lieutenant and Vanguard Veterans charged the last Inceptor, the Lieutenant killing him in combat.


At the end of my turn, I score Area Denial, Secure Objective 6 and 2 kill points. I discarded Secure Objective 3.
VICTORY POINTS:
Grey Knights- 22
White Scars- 12
TURN 4- GREY KNIGHTS
In his fourth turn, Ken drew Defend Objective 3, Secure Objective 2 and Secure Objective 5.

The 10-man Inceptor squad used their teleporters and moved to the enemy deployment zone. The Grandmaster moved up on the Assault Marines.

In the psychic phase, Draigo used Gate of Infinity to transport himself to join the Inceptor. Draigo then cast Purge Soul on the Vanguard Veterans, killing one of the squad. The Grey Knights then cast Smite twice, killing two more of the Veterans. He then cast Astral Aim on the Stormraven.
The Inceptors opened fire on the remaining Vanguard Veterans, easily finishing off the squad. The Grandmaster split his fire between the two Assault Squads, killing one in one unit and three in another.
The Stormraven fired at the Ancient, killing him with the Multi-melta.
In the charge phase, the Inceptors assaulted the Lieutenant, using a command point re-roll to make the distance. The Grandmaster assaulted the Assault Marines, taking two wounds from an overcharged Plasma Pistol in overwatch. The Captain performed a heroic intervention.
In the fight phase, the Grandmaster slew four of the Assault Marines, wiping out the squad. The Inceptors brought down the Lieutenant with their massed attacks.

The Captain struck at the Grandmaster, wounding him twice (leaving him on 7).
At the end of his turn, Ken scored Secure Objective 5 and 3 kill points.
TURN 4- WHITE SCARS
In my turn 4, I drew Secure Objective 2, Secure Objective 3 and Defend Objective 4.

The Assault Marines moved over to the ruins to secure the objective, while the Captain fell back from combat.

The two Assault Marines fired their Plasma Pistols at the Grandmaster, hitting once but failing to wound. The Captain fired his Meltagun at the Grandmaster, hitting and wounding, but failing to get past his invulnerable save.
At the end of my turn, I scored Secure Objective 2 and discarded Defend Objective 3. Ken scored Defend Objective 3.
VICTORY POINTS:
Grey Knights- 28
White Scars- 13
TURN 5- GREY KNIGHTS
In his fifth (and likely final turn), Ken drew Secure Objective 1, Secure Objective 2 and Secure Objective 5.

The Grandmaster moved up on the Captain, while the rest of the Grey Knights took a deserved rest. The Grandmaster fired on the Assault Marines, killing them.

He then charged the White Scars Captain, hitting and wounding him three times. I failed all three saves and the Captain perished. I used my final two command points to strike with the Captain, leaving the Grandmaster with a glancing wound.

At the end of his turn, Ken scored Secure Objective 5, Linebreaker and two kill points.
VICTORY POINTS:
Grey Knights- 31
White Scars- 13

A convincing win for the Grey Knights.
AFTER-BATTLE THOUGHTS
Well done to Ken for such a deserving win. He actually went on to win the tournament overall, so I don't feel so bad about such a crushing defeat.
It was annoying, as I actually thought I had a shot at this game before we started. Ken did have a strong first turn, but it was not something that I could not have come back from.
There were a few errors that I made that may have contributed to my loss:
Deployment- I think I spread my forces too far out to block deep striking units. I should have deployed deeper in my zone, ignoring the cover and putting my units at the back of the board. This may have allowed me to use the longer range of my guns to do some damage to the slower moving units in the Grey Knights army. This may also have saved the Thunderfire Cannon, as it might have stopped the Multi-melta from getting into Melta range.
This would still have been a tough game. The Stormraven, teleporting Inceptors and Gate of Infinity would still have allowed Ken to close my ranks quickly, but it may have bought me an extra turn. The Scouts could have set up on my deployment zone line, blocking the deep strikers and teleporters for the first turn.
Target Priority- After taking a hammering from the Dreadknight on the first turn, I focused much of my Devastators firepower on it on my first turn. With a boosted 3+ invulnerable save, this was foolish. I should have gone after the Stormraven to try and destroy or weaken it. With its potent firepower, it was eliminating two or three units a turn.
I was also foolish going after the Strike Squad with my Biker Captain. I was focusing on scoring Blood and Guts, so pretty much sacrificed him for a point. As it was, Ken was able to kill him and score Kingslayer, Slay the Warlord and a Kill Point. Giving up 5 points for 1 is not the way to win games!
Reserves- After a poor first turn, I was seriously concerned about getting tabled. As it was, I held much of my reserves forces back to try and go for later objectives. I think this was a mistake. I should have brought them all down on the Grey Knights right flank, going after the Inceptors and Stike squad with all my Plasma Pistols and assault power. I could have made a good dent on them or wiped them out with all my units. This may have taken a fair amount of his firepower off the table.
Bringing them in on the other flank and piecemeal meant that Ken had plenty of firepower to take them out in stages as I fed the units to him.
To be honest, after turn 2, the game was pretty much over. I had lost a number of my units and Ken had built up quite a lead in points. I kept playing on, wanting to maximise my maelstrom points for the tournament.
I'm not a huge fan of the Kill Confirmed maelstrom mission. I dislike Kill Points as a game mechanic, simply due to the inherent imbalance in the armies you can face. In this game, Ken had the potential to score 22 kill points, while I could score a maximum of 11 kill points. He had the potential to score double the number of points that I could.
As a result, he did not need to even focus on the maelstrom mission in order to win. As it was, he was able to score a number of maelstrom points and get a nice, big score at the end, but this seemed to be more of a side issue than actively going for the points. Ken just needed to focus on killing my army to win the game. Not to take anything away from Ken's victory, I was supremely outplayed, but think I might have stood more of a chance or made it a closer game if it was maelstrom points alone.
I would actually have been better off facing his army in the first or second mission, as I scored more maelstrom points in this game (8 to 5 if you are keeping score), but was just crushed thanks to the number of kill points my army gives up.
This obviously goes into factoring the army list during the design stage. I knew my army would give up a lot of kill points and suffer in this mission. However, building the army to restrict the number of kill points would have made me suffer in the other maelstrom missions, I think. It's a tricky one for a Space Marine army. You want to take a large number of units to access the command points, but doing so will really hamper you in games where kill points are taken into effect.
I think this army would really suffer in ETC-style missions, where kill points are a big factor as well. It is good for taking objectives and maelstrom games, but does suffer for individual unit durability.
If you are interested, the timings for the game were:
1.15 pm- Deployment
1.30 pm- GK Turn 1
2.00 pm- WS Turn 1
2.15 pm- GK Turn 2
2.50 pm- WS Turn 2
2.57 pm- GK Turn 3
3.05 pm- WS Turn 3
3.13 pm- GK Turn 4
I stopped keeping track after that, as it was clear the game would end soon.
So with one win and one loss, I was hoping to secure a second win in my third game to come out ahead during the day.
Oh dear, that was a bit of a tough draw and brutal defeat.
ReplyDeleteUnfortunately, the match up and mission didn’t suit your army, (this time).
Your army seems very evenly spread with no “super” unit which is great for a lot of missions and against a lot of armies, but every now and then a combination will not work. Sometimes an army will have a uber unit like a primarch or a landraider etc and I don’t see how your army will directly deal with that threat.
Yes as you mentioned some of this was down to a few mistakes you made but I think it would have still been a tough ask, given the match yup.
While I appreciate you don’t like this mission as your army gives up a lot of kill points that’s the balancing factor of all the missions. Some mission suits your army, and some don’t.
Your army generates a lot of CPs but gives up KPs. You could always combine units and get less CPs so when missions like this turn up you don’t give up a lot of KPs, but the option of combat squads are still there.
As for ETC that is why you see these dedicated armies as everyone knows the missions so a reasonable focused army can be created which the only variable it has to deal with is the army it faces. Events like this one you attended and the ones local to me are far harder to choose an army for as at our we don’t know any missions until the day, and then we roll and it could be any of the 24!
Thanks, I did think it was a tough match up. There was so much Storm Bolter fire that my poor armour saves could not keep up.
DeleteKill points is a nice balancing factor in many missions. However, it does create situations such as this game, where in a maelstrom mission, you don't even need to focus on the maelstrom points. Ken just focused on wiping out my army for the game, with the maelstrom cards as a sort of afterthought.
I could counter it with going for combat squads as you said. This would give me the flexibility to go after the MSU army if I wanted, but would give me an option for combating in this sort of game. I could probably do it with the loss of only a few command points (go for two Battalions).
Tough loss, Mike! Good write up...I feel guilty reading through for your opponent's Grey Knight strategies. I was pleased to see a game with the Grand Master in Nemesis Dreadknight armor having so recently painted my own...
ReplyDeleteOn the game, I agree that kill points are a poor and imbalanced mechanic given how the various factions are formed.
the KP mechanic is there to limit people taking loads of small squads. just like the 6 objectives are there to stop deathstar armies.
Deletethe more missions available the harder to get a fully balanced army and at some point you will get bad match up. that is why i like it so much as it makes it really hard to pick an army that will cover all missions and army match ups.
I would be interested to see how these armies matched up in terms of power levels. That might be a better mechanic for determining the match up between armies, but that is difficult when it comes to determining scores for the game.
Delete@toonboy78 I could see where kill points add some balance for armies like Custodes or Grey Knights where holding and achieving objectives may be more difficult with less units on the table. So if a tourney mixes these, small elite armies have a chance to get an advantage in kill point games while possibly struggling in other scenarios. In the casual games I play, kill points are limitting when you have armies like guard, orks, tyranids, horde chaos, etc. that use unit sacrifice as a strategy.
DeleteEven the armies that you just listed all have ways around just tossing small units into meat grinders.
ReplyDeleteOrks can function just fine running giant blocks of infantry (and can actually “mob up” with the strategem, further mitigating this issue... as can IG).
It makes MSU less of a no brainer, even screen units become a calculated risk, 3 Units of scouts should be in every SM list, but nekkid and waiting to die, but in a Killpoint game they become a liability.
It’s an excellent way to balance CP battery armies, sure the Maelstorm Missions didn’t really impact your game, but with two armies that were similar they become vitally important (either 2 Horde Armies or 2 Elite Armies).
MSU is a better way to play 40k, it mitigates Moral losses, forces opponents into “overkilling” units and gives you superior objective control, pretending that Kill Points are bad because it goes against a specific army design (especially such a prevelant form of army composition) is a close minded way at looking at the Tactics of the Game from the list building perspective.
Yeah, it really is a trade off between MSU, kill points and command points. I'm going to be looking at a variation of the list that uses combat squads and a couple of Battalions to try and mitigate the kill points issue, while still allowing me to run MSU in other mission types.
DeleteIf more Tournaments used Kill Points in my local I think it would give Space Marines an often overlooked advantage in that department when it came to the list building phase.
ReplyDeleteIt’s one of the things I have a love hate relationship with the ITC rules, sure you can pick which secondaries best compliment ones own army from game to game, which is nice, but it also makes it so I’m never really forced into a truly difficult choice when it comes to list building.
I think being able to modify ones own Secondaries is why certain army builds do so well in ITC and some armies suffer brutally (Imperial Knights), it’s interesting to see tournaments that are “straight from the book” and I really like it.