
This week's battle report features a civil war between Ork Clans- My Deathskulls army takes on Sebastian's Bad Moon Orks in a straight up brawl for supremacy.


My army consisted of:
Warboss- Power Claw, Shoota, Eavy Armour, Bosspole (With SL1)
Painboy (With SL1)
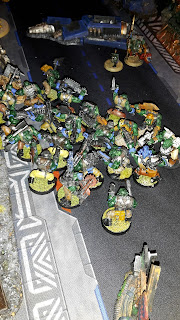
25 Shoota Boyz- Nob with power claw and Bosspole, 3 Big Shootas (SB1)
24 Slugga Boyz- Nob with power claw and Bosspole, 3 Big Shootas (SL1)
16 Stormboyz- Nob with power claw and Bosspole (ST1)
6 Warbikers- Nob with power claw and Bosspole (WB)
12 Slugga Boyz- Trukk with big shoota (TB)
Wartrakk- Scorcha (W1)
Wartrakk- Scorcha (W2)
Deff Dread- 3 Power Claws, Scorcha (DD)
My army is always led by a Warboss. He is the toughest in the mob and allows me to Waaagh if I want to. I took him with a power claw and some armour for protection. I also supported him with a Painboy. I thought he would be more useful than a Big Mek with Kustom force field, as I would get the Feel no Pain bonus in combat too.
For my Orks, I always like to run big mobs of boyz to overwhelm the enemy. I selected two large mobs of Boyz, one shoota mob and one slugga mob. Each mob had a Nob with power claw and bosspole. I knew Seb liked to field a lot of walkers, so thought I would need the Power claws to deal with them. Originally, I made the mobs 30 strong, but then took out 5 models from each mob to get extra points elsewhere. That is why each mob has 3 big shootas instead of the 2 they are allowed to take, as I forgot to remove the extra one.
I love the Stromboyz models and the idea of an Ork with a rokkit strapped to his back. Unfortunately, they don't get used much as their weak armour means they invariably die before getting to the enemy. Against Orks though, I thought they would be perfect, as I could use their high mobility to get to the opposing Mobs and not have to worry too much about their firepower.
I also took a mob of boyz in a trukk for objective grabbing and generally getting in the way.
To round off the army, I took a couple of wartrakks and a Deff Dread. I love wartrakks armed with Scorchas. As they are template weapons, you don't have to worry about Ork ballistic skill and their Outflank ability is great for getting to the squishy bits of the enemy army. The Deff Dread was there to bring some more muscle to the army and deal with any enemy walkers in combat.
My warlord trait gave me Bellowing Tyrant, allowing re-rolls to morale checks within 12" of the warboss.
My warlord trait gave me Bellowing Tyrant, allowing re-rolls to morale checks within 12" of the warboss.
Seb's army consisted of:
Warboss- Mega Armour, Lucky Stikk, Cybork Body (with MN)
Warboss- Warbike, Power Claw (with NB)
Painboy- Warbike (with NB)
3 Meganobz- TL Shootas, Trukk (MN)
3 Nobz- Warbikes, Power Claw, 2 Uge Choppas (NB)
24 Slugga Boyz- Nob with Uge Choppa and Bosspole (SB1)
24 Slugga Boyz- Nob with Uge Choppa and Bosspole (SB2)
15 Gretchin- Runtherd (G)
Killa Kan- Grotzooka (KK1)
Killa Kan- Grotzooka (KK2)
Killa Kan- Grotzooka (KK3)
Lots of hard hitting units in Seb's army. The two units of Nobz could prove difficult to deal with, hopefully my large number of attacks could take them out.
His Warlord trait gave him Kunnin' but Brutal, giving the Mega armour Warboss a re-roll to his saving throw. Not too useful as he already has the Lucky Stikk.
For mission, we rolled the Scouring. This has 6 objectives of varying points totals that are revealed after deployment. We were playing on a 4x4 foot board, so the boyz would be getting stuck in fairly quickly.
We rolled for choosing side. I rolled a 5, but Seb rolled a 6 and won, selecting the board edge with more cover. We then rolled for deployment. I got another 5, while Seb rolled another 6, winning the roll and choosing to go first.
He deployed a mob of Boyz and the warbikers to his right, supported by a Killa Kan. On the other flank, the second boyz mob, gretchin, two killa kans and trukk with the Meganobz deployed.
I deployed the slugga boyz in the centre to go for the middle objective, joined by the Warboss and Painboy. The shoota boyz went on their right, ready to advance on the defence line and get the objective. The Stormboyz went to the left, in cover behind the large ruins, with the Deff Dread and warbikers beside them. I decided to keep the two wartrakks in reserve to Outflank and roast the large mobs. The trukk boyz also went in reserve for late game objective grabbing.
After revealing the points for the objective, things looked pretty even. The objectives on my side were worth 8 pts with the ones on Seb's side worth 7 pts. Looks like there would be a big scrap in the middle for the 4 pt objective, just the way the Orks like it.


I failed to seize the initiative and Seb took the first turn.
TURN 1- BAD MOONS

The Bad Moon Orks wasted no time, both mobs of boyz advancing, while the Meganobz and warbikers moved towards the Deathskull slugga boyz.


The warbikers fired at the Deathskull slugga boyz, wounding them three times. Amazingly, the 5+ cover save blocked all three wounds and the squad was intact.
The ork mobs ran forward, eager to close with the enemy. The excitement of combat was too much for the trukk driver and he surged forward towards the enemy lines, stopping in front of the slugga boyz.
TURN 1- DEATHSKULLS

See the opposing army move towards them, the Deathskulls Warboss ordered an all out advance. The Slugga Boyz, Warbikers and Deff Dread advanced on the Bad Moons trukk, the shoota boyz moved up towards the trench line, while the Stormboyz gunned their rokkit packs and barrelled towards the Bad Moons mob on the other side of the ruins.


The Deff Dread fired its Scorcha at the trukk in front of him, but failed to cause any damage to the vehicle or its passengers. The Slugga boyz fired at the trukk, but failed to damage it with their sluggas or big shootas.
The warbikers fired at the trukk and finally succeeded in wrecking the transport. The Meganobz piled out of the vehicle and came under fire from the shoota boyz. The Deathskulls managed to kill one of the squad with their big shootas.

The Bad Moon meganobz then came under assault from the Deathskulls. The slugga boyz and warbikers assaulted the meganobz, but the Deff Dread failed his charge through the wreckage of the trukk.
The warbikers struck at the meganobz, causing 4 wounds, none of which made it through the tough armour of the nobz. The slugga boyz struck, the mob causing 17 wounds on the meganobz, of which, Seb failed a single save!
The Power claw wielding Nobs then struck, killing the last two Meganobz and wounding the mega armour Warboss. My Warboss then attacked, but managed to miss with all 5 of his attacks (despite needing 4+). The Meganobz and Bad Moon Warboss struck back, killing 5 of the warbike mob. I lost combat by one, failing my morale check on an 8 (despite having a re-roll). I lost one boy as the Nob restored order to the mob.


The Stormboyz assaulted the Bad Moon slugga boyz on my left flank. Four of the stormboyz died to overwatch fire from the slugga boyz. The Deathskulls crashed into the slugga boyz, the squad killing 9 and the Nob smashing three with his power claw. The sluggas struck back, killing 4 of the stormboyz. The slugga boyz failed their morale check, three of the mob dying as order was restored.


TURN 2- BAD MOONS

The grots clamoured onto the trenches opposite the shoota boyz as the nob bikers advanced on the Deathskulls. The Killa Kan on the left retreated from the Ork lines, the cowardly grot inside not liking his odds. The Kan on the right flank moved towards the Stormboyz.


In the shooting phase, the Killa Kan on the right fired at the Deff Dread, but failed to damage the Ork walker. The other two Kans fired their grotzookas at the shoota boyz. The cover of the trench mitigated the damage, but six of the boyz still fell. The Nob bikers added their firepower to the barrage, killing another two of the Deathskull shoota boyz.
In the assault phase, the Deathskull slugga boyz struck at the Bad Moon Warboss. They wounded the enemy warlord seven times, but failed to penetrate his armour. The power claw Nobs then attacked, wounding him once, the Deathskull Warboss delivering the killing blow to the enemy warlord. Before he was struck down, the Bad Moon Warboss succeeded in killing the warbike Nob.
On the right flank, the slugga boy's Nob issued a challenge to his Deathskulls counterpart. Both Nobs rained furious blows on one another. When the dust settled, the Bad Moon Nob was slain, while the Deathskull Nob was seriously wounded, but lived.
The stormboyz and slugga boyz struck at one another. With 24 attacks, the stormboyz caused a whole one wound and killed one slugga boy. The slugga boyz killed two stormboyz in reply, resulting in a drawn combat.
TURN 2- DEATHSKULLS

With a belch of exhaust fumes, one of the wartrakks arrived, moving on the right flank behind the Bad Moon slugga boyz. The trukk also arrived, moving to support the slugga boyz in the centre.


The Slugga boyz and shoota boyz advanced on the Bad Moon Nob bikers, while the Deff Dread went after a Killa Kan.
In the shooting phase, the slugga boyz opened fire on the Nob Bikers, slaying two with their shots. The Shoota boyz added their firepower, wounding the last Nob once. The Deff Dread fired his Scorcha at the Killa Kan, but failed to wound it.
The Wartrakk fired its Scorcha at the Bad Moon Slugga Boyz, killing 5 of the Orks.


In the assault phase, the shoota boyz and slugga boyz assaulted the Nob bikers. The Deathskulls tore into the Bad Moons, killing the last Nob biker, the Painboy and wounding the Warboss. The Painboy managed to slay one of the slugga boyz before he was taken down.
The Deathskull Warboss issued a bellowing challenge against the Bad Moon Warboss. The Warbosses clashed with one another, the Bad Moon Warboss easily killing his opponent with his Instant Death attacks. The Deathskull Warboss also managed to slay his opponent as he was struck down. The slugga boyz and shoota boyz consolidated into cover.


The Deff Dread tried to charge the Killa Kan, but failed to make it into combat.
The fight between the Stormboyz and slugga boyz continued. The Stormboyz killed two of the slugga boyz for the loss of one stormboy in return. The Bad Moons passed their morale check and the fight continued.

TURN 3- BAD MOONS

On the left flank, the Killa Kan advanced on the Wartrakk. The grots and Slugga boyz advanced on the Deathskull shoota boyz. On the other flank, the Killa Kan retreated from the Deff Dread.


The two Killa Kans fired at the Slugga Boyz. Despite getting 17 hits in total, only 5 Orks died due to a combination of cover saves and Feel no Pain bonuses from the Painboy. The third Killa Kan fired at the Wartrakk, but failed to damage it. The grots and Slugga Boyz fired at the Deathskull shoota boyz, killing 5 of the Orks. The mob failed their morale check, the Nob killing one boy to restore order.
The Killa Kan assaulted the Wartrakk, glancing the vehicle once.

The grots charged the shoota boyz. Their duty as a sacrificial screen worked well, as 7 grots were slain from overwatch fire and failed their charge. This allowed the Slugga Boyz to assault the shoota boyz unharmed. The Bad Moons struck in fury, with 76 attacks causing 24 wounds on the shoota boyz. Amazingly, I failed to roll a single save (even on a 6+ I should have saved at least a few) and the mob was wiped out. The Shoota boyz managed to take down 5 slugga boyz before they were destroyed.


In the combat between the Stormboyz and Slugga boyz, the Stormboyz finally managed to wipe out their opponents for the loss of two Stormboyz in return.
TURN 3- DEATHSKULLS

The final Wartrakk arrived, moving up to engage the Bad Moon slugga boyz, the other Wartrakk moving to engage the grots. The Painboy led the Deathskull slugga boyz against their Bad Moon counterparts. The Stormboyz, now freed from combat, advanced towards the nearby Killa Kan.


The Wartrakk fired at the slugga boyz, its Scorcha killing 7 of the mob. The second Wartrakk succeeded in killing 6 grots on the defense line. The Deathskull slugga boyz fired at the Bad Moons slugga boyz, killing another 4 of the mob.

The Deff Dread and Stormboyz fired at the Killa Kan, but could not damage it.


In the assault phase, the Stormboyz charged the Killa Kan, the Nob with the power claw easily wrecking the enemy vehicle. The Kan managed to kill two of the Stormboyz before it was destroyed.
The Slugga boyz charged the Bad Moon slugga boyz, easily wiping out the enemy unit for the loss of two boyz in return. The two Nobs fought in a challenge. The Deathskull Nob easily slew his counterpart with his power claw, taking a wound in the process.
TURN 4- BAD MOONS

The Killa Kan on the left flank advanced on the damaged Wartrakk, with the other Kan moved back towards the backfield objective.


The first Kan fired at the Wartrakk, but failed to damage it. The second Kan fired at the Boyz, killing one of the boyz.
A Killa Kan charged the Wartrakk, wrecking the enemy vehicle.

TURN 4- DEATHSKULLS

With time running out on the game, the Deathskulls moved towards the objectives to end the game.


VICTORY POINTS:
Bad Moons- 5 VP (inc. Slay the Warlord)
Deathskulls- 13 VP (inc. Slay the Warlord, First Blood and Linebreaker)
AFTER-BATTLE THOUGHTS
Thanks to Seb for a great Ork on Ork match up!
Having not played my Orks in about two years, it was nice to get them back on the table. I forgot how much fun it can be to roll whole handfuls of dice in close combat.
I was a little worried at the start of the game when my slugga boyz bounced off of the Meganobz without doing any damage. Fortunately, my Power Claw Nobs were able to cause some damage and finish off the Meganobz and wound the Warboss. Annoyingly, my own Warboss fluffed every attack and failed to cause any damage.
I was also concerned when my Stormboyz lost so many to overwatch fire. I thought I would be in serious trouble in that combat and it did drag on for several turns. It goes to show the importance of charging with Orks for the extra attacks and strength bonuses, especially against other Orks.
My Deff Dread was pretty useless, failing to wound anything with his Scorcha and failing all his charge attempts. Other than that, the rest of the army performed very well; the massed numbers of the sneaky Deathskulls were more than enough for the fancy weapons and armour of the Bad Moons.
Lots of hard hitting units in Seb's army. The two units of Nobz could prove difficult to deal with, hopefully my large number of attacks could take them out.
His Warlord trait gave him Kunnin' but Brutal, giving the Mega armour Warboss a re-roll to his saving throw. Not too useful as he already has the Lucky Stikk.
For mission, we rolled the Scouring. This has 6 objectives of varying points totals that are revealed after deployment. We were playing on a 4x4 foot board, so the boyz would be getting stuck in fairly quickly.
We rolled for choosing side. I rolled a 5, but Seb rolled a 6 and won, selecting the board edge with more cover. We then rolled for deployment. I got another 5, while Seb rolled another 6, winning the roll and choosing to go first.
He deployed a mob of Boyz and the warbikers to his right, supported by a Killa Kan. On the other flank, the second boyz mob, gretchin, two killa kans and trukk with the Meganobz deployed.
I deployed the slugga boyz in the centre to go for the middle objective, joined by the Warboss and Painboy. The shoota boyz went on their right, ready to advance on the defence line and get the objective. The Stormboyz went to the left, in cover behind the large ruins, with the Deff Dread and warbikers beside them. I decided to keep the two wartrakks in reserve to Outflank and roast the large mobs. The trukk boyz also went in reserve for late game objective grabbing.
After revealing the points for the objective, things looked pretty even. The objectives on my side were worth 8 pts with the ones on Seb's side worth 7 pts. Looks like there would be a big scrap in the middle for the 4 pt objective, just the way the Orks like it.


I failed to seize the initiative and Seb took the first turn.
TURN 1- BAD MOONS

The Bad Moon Orks wasted no time, both mobs of boyz advancing, while the Meganobz and warbikers moved towards the Deathskull slugga boyz.


The warbikers fired at the Deathskull slugga boyz, wounding them three times. Amazingly, the 5+ cover save blocked all three wounds and the squad was intact.
The ork mobs ran forward, eager to close with the enemy. The excitement of combat was too much for the trukk driver and he surged forward towards the enemy lines, stopping in front of the slugga boyz.
TURN 1- DEATHSKULLS

See the opposing army move towards them, the Deathskulls Warboss ordered an all out advance. The Slugga Boyz, Warbikers and Deff Dread advanced on the Bad Moons trukk, the shoota boyz moved up towards the trench line, while the Stormboyz gunned their rokkit packs and barrelled towards the Bad Moons mob on the other side of the ruins.


The Deff Dread fired its Scorcha at the trukk in front of him, but failed to cause any damage to the vehicle or its passengers. The Slugga boyz fired at the trukk, but failed to damage it with their sluggas or big shootas.
The warbikers fired at the trukk and finally succeeded in wrecking the transport. The Meganobz piled out of the vehicle and came under fire from the shoota boyz. The Deathskulls managed to kill one of the squad with their big shootas.

The Bad Moon meganobz then came under assault from the Deathskulls. The slugga boyz and warbikers assaulted the meganobz, but the Deff Dread failed his charge through the wreckage of the trukk.
The warbikers struck at the meganobz, causing 4 wounds, none of which made it through the tough armour of the nobz. The slugga boyz struck, the mob causing 17 wounds on the meganobz, of which, Seb failed a single save!
The Power claw wielding Nobs then struck, killing the last two Meganobz and wounding the mega armour Warboss. My Warboss then attacked, but managed to miss with all 5 of his attacks (despite needing 4+). The Meganobz and Bad Moon Warboss struck back, killing 5 of the warbike mob. I lost combat by one, failing my morale check on an 8 (despite having a re-roll). I lost one boy as the Nob restored order to the mob.


The Stormboyz assaulted the Bad Moon slugga boyz on my left flank. Four of the stormboyz died to overwatch fire from the slugga boyz. The Deathskulls crashed into the slugga boyz, the squad killing 9 and the Nob smashing three with his power claw. The sluggas struck back, killing 4 of the stormboyz. The slugga boyz failed their morale check, three of the mob dying as order was restored.


TURN 2- BAD MOONS

The grots clamoured onto the trenches opposite the shoota boyz as the nob bikers advanced on the Deathskulls. The Killa Kan on the left retreated from the Ork lines, the cowardly grot inside not liking his odds. The Kan on the right flank moved towards the Stormboyz.


In the shooting phase, the Killa Kan on the right fired at the Deff Dread, but failed to damage the Ork walker. The other two Kans fired their grotzookas at the shoota boyz. The cover of the trench mitigated the damage, but six of the boyz still fell. The Nob bikers added their firepower to the barrage, killing another two of the Deathskull shoota boyz.
In the assault phase, the Deathskull slugga boyz struck at the Bad Moon Warboss. They wounded the enemy warlord seven times, but failed to penetrate his armour. The power claw Nobs then attacked, wounding him once, the Deathskull Warboss delivering the killing blow to the enemy warlord. Before he was struck down, the Bad Moon Warboss succeeded in killing the warbike Nob.
On the right flank, the slugga boy's Nob issued a challenge to his Deathskulls counterpart. Both Nobs rained furious blows on one another. When the dust settled, the Bad Moon Nob was slain, while the Deathskull Nob was seriously wounded, but lived.
The stormboyz and slugga boyz struck at one another. With 24 attacks, the stormboyz caused a whole one wound and killed one slugga boy. The slugga boyz killed two stormboyz in reply, resulting in a drawn combat.
TURN 2- DEATHSKULLS

With a belch of exhaust fumes, one of the wartrakks arrived, moving on the right flank behind the Bad Moon slugga boyz. The trukk also arrived, moving to support the slugga boyz in the centre.


The Slugga boyz and shoota boyz advanced on the Bad Moon Nob bikers, while the Deff Dread went after a Killa Kan.
In the shooting phase, the slugga boyz opened fire on the Nob Bikers, slaying two with their shots. The Shoota boyz added their firepower, wounding the last Nob once. The Deff Dread fired his Scorcha at the Killa Kan, but failed to wound it.
The Wartrakk fired its Scorcha at the Bad Moon Slugga Boyz, killing 5 of the Orks.


In the assault phase, the shoota boyz and slugga boyz assaulted the Nob bikers. The Deathskulls tore into the Bad Moons, killing the last Nob biker, the Painboy and wounding the Warboss. The Painboy managed to slay one of the slugga boyz before he was taken down.
The Deathskull Warboss issued a bellowing challenge against the Bad Moon Warboss. The Warbosses clashed with one another, the Bad Moon Warboss easily killing his opponent with his Instant Death attacks. The Deathskull Warboss also managed to slay his opponent as he was struck down. The slugga boyz and shoota boyz consolidated into cover.


The Deff Dread tried to charge the Killa Kan, but failed to make it into combat.
The fight between the Stormboyz and slugga boyz continued. The Stormboyz killed two of the slugga boyz for the loss of one stormboy in return. The Bad Moons passed their morale check and the fight continued.

TURN 3- BAD MOONS

On the left flank, the Killa Kan advanced on the Wartrakk. The grots and Slugga boyz advanced on the Deathskull shoota boyz. On the other flank, the Killa Kan retreated from the Deff Dread.


The two Killa Kans fired at the Slugga Boyz. Despite getting 17 hits in total, only 5 Orks died due to a combination of cover saves and Feel no Pain bonuses from the Painboy. The third Killa Kan fired at the Wartrakk, but failed to damage it. The grots and Slugga Boyz fired at the Deathskull shoota boyz, killing 5 of the Orks. The mob failed their morale check, the Nob killing one boy to restore order.
The Killa Kan assaulted the Wartrakk, glancing the vehicle once.

The grots charged the shoota boyz. Their duty as a sacrificial screen worked well, as 7 grots were slain from overwatch fire and failed their charge. This allowed the Slugga Boyz to assault the shoota boyz unharmed. The Bad Moons struck in fury, with 76 attacks causing 24 wounds on the shoota boyz. Amazingly, I failed to roll a single save (even on a 6+ I should have saved at least a few) and the mob was wiped out. The Shoota boyz managed to take down 5 slugga boyz before they were destroyed.


In the combat between the Stormboyz and Slugga boyz, the Stormboyz finally managed to wipe out their opponents for the loss of two Stormboyz in return.
TURN 3- DEATHSKULLS

The final Wartrakk arrived, moving up to engage the Bad Moon slugga boyz, the other Wartrakk moving to engage the grots. The Painboy led the Deathskull slugga boyz against their Bad Moon counterparts. The Stormboyz, now freed from combat, advanced towards the nearby Killa Kan.


The Wartrakk fired at the slugga boyz, its Scorcha killing 7 of the mob. The second Wartrakk succeeded in killing 6 grots on the defense line. The Deathskull slugga boyz fired at the Bad Moons slugga boyz, killing another 4 of the mob.


The Deff Dread and Stormboyz fired at the Killa Kan, but could not damage it.


In the assault phase, the Stormboyz charged the Killa Kan, the Nob with the power claw easily wrecking the enemy vehicle. The Kan managed to kill two of the Stormboyz before it was destroyed.
The Slugga boyz charged the Bad Moon slugga boyz, easily wiping out the enemy unit for the loss of two boyz in return. The two Nobs fought in a challenge. The Deathskull Nob easily slew his counterpart with his power claw, taking a wound in the process.
TURN 4- BAD MOONS

The Killa Kan on the left flank advanced on the damaged Wartrakk, with the other Kan moved back towards the backfield objective.


The first Kan fired at the Wartrakk, but failed to damage it. The second Kan fired at the Boyz, killing one of the boyz.
A Killa Kan charged the Wartrakk, wrecking the enemy vehicle.

TURN 4- DEATHSKULLS

With time running out on the game, the Deathskulls moved towards the objectives to end the game.


VICTORY POINTS:
Bad Moons- 5 VP (inc. Slay the Warlord)
Deathskulls- 13 VP (inc. Slay the Warlord, First Blood and Linebreaker)
AFTER-BATTLE THOUGHTS
Thanks to Seb for a great Ork on Ork match up!
Having not played my Orks in about two years, it was nice to get them back on the table. I forgot how much fun it can be to roll whole handfuls of dice in close combat.
I was a little worried at the start of the game when my slugga boyz bounced off of the Meganobz without doing any damage. Fortunately, my Power Claw Nobs were able to cause some damage and finish off the Meganobz and wound the Warboss. Annoyingly, my own Warboss fluffed every attack and failed to cause any damage.
I was also concerned when my Stormboyz lost so many to overwatch fire. I thought I would be in serious trouble in that combat and it did drag on for several turns. It goes to show the importance of charging with Orks for the extra attacks and strength bonuses, especially against other Orks.
My Deff Dread was pretty useless, failing to wound anything with his Scorcha and failing all his charge attempts. Other than that, the rest of the army performed very well; the massed numbers of the sneaky Deathskulls were more than enough for the fancy weapons and armour of the Bad Moons.
Hi Michael,
ReplyDeletethanks for writing up our Ork vs Ork brawl. It was great fun, despite beeing tactically outmaneuvered by a kunnin' Warboss.. I've to admit, in the end I felt a bit foolish compared to your good tactical thinking. Haha! That said I also underestimated you playing Orks. Biggest mistake. ;)
Sending my Warboss and his retinue of MegaNobz into a 25er Ork-Slugga-Mob which had two PKs, was a bad idea, because even a Lukky stikk can't help against PKs. I also should have focussed on the centre of the board when deploying and my left wing with the Grots in front of it was just too slow to make itself really useful.
Now I think, I should have let you take the first turn. After my 1st turn movement I wasn't really in range of anything. I misjudged the range of the KillaKan's Grotzookas, too. Played right into your hands ...
And the Warbuggies and Wartrakks: I really haven't had them on my mind. When they came on I was a bit surprised by beeing skorched in the back.
Nevertheless, it was really good fun and I am up for a rematch of any scale anytime!
Orks always win ...
Seb
Cheers Seb.
DeleteI was really surprised when you threw your Meganobz forward without support. As it was, it was only the power claws you had to worry about as the boyz did very little harm to them. I thought that your Nob bikers would smash into them the following turn and cause chaos in my mob.
I love taking the warbuggies. They can be relied upon to get guaranteed hits with the scorcha and will make a mess of most units that aren't marines.
A bigger Ork bash should definitely be on the cards at some point in the future!