
Game 2 of the North West Open tournament would see my Deathwatch take on James and his Harlequin force. James had actually missed his first game due to traffic, but one of the shop staff members had stepped in and secured him a win for game 1. It would be interesting to see how well matched I was with his army in round 2.

The mission for game 2 was ITC scenario 5- Big Guns Never Tire. In this, the primary mission was holding the four objectives and killing Heavy Support choices. Each objective was worth 3 points to whoever controlled it at the end of the game, with each slain Heavy Support choice worth a bonus point.
For the maelstrom mission, each player had two maelstrom objectives (numbered 1 and 2). Each player had to place their maelstrom objective 1 in their own deployment zone and maelstrom objective 2 in their opponent's deployment zone. The maelstrom objective table was as follows:
- Hold maelstrom objective 1 in the enemy deployment zone.
- Hold maelstrom objective 2 in the enemy deployment zone.
- Hold maelstrom objective 1 in your own deployment zone.
- Hold maelstrom objective 2 in your own deployment zone.
- Destroy an enemy unit
- Destroy an enemy unit
As per ITC rules, you could only score maelstrom points generated at the start of your following turn. In addition, if you roll two of 1, 2,3 or 4, you can exchange for hold 3 objectives for 3 points. If you roll up 5 and 6, you can exchange it for kill 3 enemy units for 3 points.
The tertiary objectives were Slay the Warlord, Linebreaker and Ground Control (control or contest 2 or more objectives at the end of the game). We would be using Front Line assault deployment. I actually ended up on the same table as game 1, so would be familiar with the terrain!
My army consisted of:
Battalion Detachment
Watch Master (W)
Watch Captain- Jump Pack, Pair Lightning Claws (W)
Kill Team 1- 5 Veterans, Vanguard Veteran with Pair Lightning Claws, 3 Frag Cannons, Storm Shield. (KT1)
Kill Team 2- 5 Veterans, 2 Missile Launchers, 3 Stalker Boltguns (KT2)
Kill Team 3- 5 Veterans, 2 Missile Launchers, 3 Stalker Boltguns (KT3)
Kill Team 4- 5 Veterans, Meltagun, 3 combi-Meltas (KT4)
Kill Team 5- 5 Veterans, 2 Frag Cannons (KT5)
Rhino (R)
Drop Pod- Storm Bolter (DP)
6 Vanguard Veterans- 2 Pairs Lightning Claws, Power Sword and Bolt Pistol, 3 with Bolt Pistols and Chainswords (VV1)
3 Deathwatch Bikers- Power Axe, Power Sword (DB1)
3 Deathwatch Bikers- two Power Swords (DB2)
Corvus Blackstar- Auspex Array, Hurricane Bolter, Twin Assault Cannons, 2 Blackstar Rocket Launchers (CB)
Vindicare Assassin (V)
6 Command Points
My Warlord was the Watch Master, who took the Tenacious Survivor warlord trait.
James' army consisted of:
Battalion Detachment
Troupe Master- Fusion Pistol, Power Sword (TM1)
Troupe Master- Fusion Pistol, Power Sword (TM2)
5 Troupe Players- 5 Fusion Pistols, 5 Harlequin's Caresses (TP1)
5 Troupe Players- 5 Fusion Pistols, 5 Harlequin's Caresses (TP2)
5 Troupe Players- 5 Fusion Pistols, 5 Harlequin's Embraces (TP3)
Starweaver- 2 Shuriken Cannons (S1)
Starweaver- 2 Shuriken Cannons (S2)
Starweaver- 2 Shuriken Cannons (S3)
Soltaire- Harlequin's kiss, Harlequin's caress (St)
Spearhead Detachment
Shadowseer- Smite, Twilight Pathways psychic powers (Sh)
Voidweaver- 2 Shuriken Cannons, Haywire Cannon (V1)
Voidweaver- 2 Shuriken Cannons, Haywire Cannon (V2)
Voidweaver- 2 Shuriken Cannons, Haywire Cannon (V3)
Voidweaver- 2 Shuriken Cannons, Haywire Cannon (V4)
Hemlock Wraithfighter- Smite, Enhance/Drain psychic powers (H1)
Hemlock Wraithfighter- Smite, Enhance/Drain psychic powers (H2)
7 Command Points
A lot of Fusion pistols, combat ability and invulnerable saves to have to deal with!
We placed the objectives as shown below:

I won the roll for deployment and chose to go first. The deployment order was as follows:
James countered by deploying much of his transport vehicles out of line of sight of my firepower. Most of his army set up pretty far back, they all had good mobility to be able to get to me quickly if necessary.


As I deployed first, I got +1 to go first and was fortunate enough to roll high enough to choose the first turn. James failed to seize the initiative and I took the first turn.
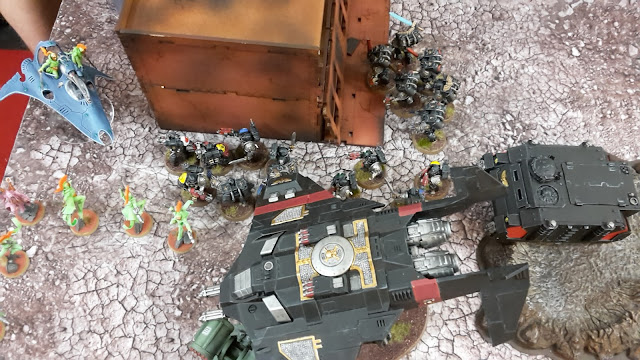
TURN 1- DEATHWATCH
In turn 1, I rolled for my maelstrom objectives and chose Hold objective 2 in my deployment zone and Destroy an enemy unit.

Both Bike units moved towards the objective on my left flank, hoping that at least one would survive to claim it in the following turn. The Rhino moved ahead, advancing to close the distance as quickly as possible. The Corvus Blackstar moved up the battlefield to target the Harlequin forces.


The Assassin arrived from reserve, deploying on top of a building on my left flank. I also decided to bring in the Drop Pod, landing on the far left to target one of the enemy vehicles.
The Meltagun Kill Team fired at the Starweaver, hitting and wounding four times with their Meltaguns. James managed to pass two of his saves, expending a Command Point re-roll to pass a third save. Unfortunately, the single wound did 3 damage and the vehicle survived. The Watch Master added his firepower from his Guardian Spear, taking another wound from it.
The Corvus Blackstar targeted the Voidweaver on the left flank, taking four wounds from it with its combined firepower. The Assassin tried to target one of the Hemlock Wraithfighters, but missed it.
One of the backfield Kill Teams fired their missiles at a Hemlock. One missile hit and wounded, taking 5 damage from the flyer. The Stalker Bolters of the squad managed to take a wound from one of the Starweavers.
The second Kill Team fired at the damaged flyer, one of the missiles hitting and wounding, but only managed to do one point of damage.
The Corvus Blackstar assaulted the Voidweaver (again, this was early in 8th edition and I completely forgot that I had moved too far to charge that turn). The Meltagun Kill Team tried to assault the Starweaver, but failed its charge, even with a Command Point re-roll.
The Corvus Blackstar failed to take the final wound from the Voidweaver, suffering one wound in return from the enemy skimmer.
Not the greatest of first turns. The invulnerable saves of the enemy skimmers had kept them from harm from most of my firepower.
TURN 1- HARLEQUINS
In his first turn, James also chose to Hold his own objective 2 and to kill an enemy unit.

On the right flank, the Troupe Master led his Troupe Players to engage the Meltagun Kill Team, while the Voidweaver fell back from combat with the Deathwatch flyer. The two Hemlock Fighters flew across the battlefield to target the two Kill Teams in the Deathwatch deployment zone, one Voidweaver moving up to support it. The Soltaire also advanced on the enemy lines.


Another Starweaver moved towards the Corvus Blackstar, the Troupe Players and Spiritseer leaping out to target the flyer. They were joined by another Voidweaver.
In the psychic phase, the Spiritseer cast Smite, taking three wounds from the Corvus Blackstar. One of the Hemlock Wraithfighters cast Smite, killing three of the Kill Team in front of it. The other flyer failed to manifest the power.
In the shooting phase, the Hemlock Wraithfighters attempted to finish off the Kill Teams in front of them. One flyer split its fire between the two squads, killing one from one squad and two from the other squad. The second flyer fired at the back squad, getting 6 hits with his 2D3 shots and wiping out the unit.


The Voidweaver fired at the last Missile Launcher Veteran, wounding him four times. I passed all my 2+ armour saves (after using one command point re-roll to keep him alive).
One of the Voidreavers targeted the Corvus Blackstar, wounding it three times in total. The Shadowseer also opened fire on it, but missed with his Fusion pistol. The Troupe in front of the Corvus fired at it, only hitting with two of their shots. Both Fusion Pistols failed to wound. James used a Command Point re-roll, but also failed to wound with the re-roll- a very lucky escape for me! Both the Starweavers and the other Voidweaver turned their fire on the Corvus Blackstar, the combined firepower taking another 3 wounds with their combined firepower and leaving it on 5.
On the right flank, the Harlequin troupe fired at the Meltagun Kill Team, killing two of the squad. The Troupe Master fired at the squad, killing another one of the Veterans.
In the charge phase, one of the Starweavers assaulted the Corvus Blackstar. The assault cannon managed to put a single wound on the skimmer, which was saved by James thanks to the use of a Command Point re-roll. The Harlequin troupe charged the Kill Team in front of them. Some great overwatch fire from the surviving Veterans saw three of the squad fall before they reached combat. The Troupe Master charged the Watch Master, suffering no damage from overwatch.
In the fight phase, the Harlequin Troupe easily killed the last two Veterans in combat, then consolidating towards the Watch Master. The Troupe Master struck at the Watch Master, wounding him twice.
The Watch Master chose to attack the newly arrived troupe, wounding three of the squad, but only killing one thanks to their invulnerable saves and the use of a Command Point re-roll.


The Starweaver and Corvus Blackstar did no harm to one another in combat. At the end of the turn, I passed my morale test. James also passed the test on the last member of the Troupe after using another command point re-roll, to deny me the maelstrom point.
TURN 2- DEATHWATCH
At the start of my turn, I scored a point for holding objective 2. This turn, I chose to hold objective 2 in my opponent's deployment zone and to kill an enemy unit.

The Watch Master fell back from combat, as the two Bike units moved up to support him. The Kill Team disembarked from the Corvus Blackstar to go after the Harlequin troupe in front of them, the Deathwatch flyer moving back slightly to secure the objective.


The Kill Team in the Rhino disembarked, moving up to support the main attack, the Rhino also moving up after the squad has disembarked. Finally, the Vanguard Veterans arrived, landing on the other side of the building and hoping to target the Voidweaver in the assault phase.
In the shooting phase, the Drop Pod fired at the last of the Harlequin Troupe, killing him. One squad of Bikers fired at the Troupe Master, putting 9 wounds on him. His capering helped somewhat as he only took 4 wounds. The Assassin trained his rifle at the Troupe Master and killed him outright, gaining me Slay the Warlord.
The other Bike squad opened fire on the second Troupe, killing four of the squad with some impressive shooting. The Rhino fired at the squad, hoping to kill the last one, but proved unsuccessful.
One of the Kill Teams was forced to fire their two Frag Cannons at the last of the Troupe, easily killing him.


The second Kill Team fired at the Starweaver, taking four wounds with their Frag Cannons. The squad's Bolters failed to damage it, but a krak grenade from the Vanguard Veteran in the Kill Team managed to hit and wound. James failed his save, but used a command point re-roll to pass it. The Captain then threw another grenade at the skimmer, hitting and wounding, but the shot was saved.
The Corvus Blackstar opened fire on the damaged Starweaver, its hurricane bolters causing the enemy skimmer to explode, killing another of the nearby damaged Starweavers.
The lone Veteran with the Missile Launcher fired at the damaged Hemlock, but failed to hit.
In the charge phase, Kill Team 1 and the Watch Captain assaulted the Shadowseer. The overwatch fire of the Harlequin managed to kill three of the squad. The Vanguard Veterans failed their charge against the Voidweaver, even with the use of a Command Point re-roll.
The Watch Captain struck at the Shadowseer, taking two wounds from her. The rest of the Veterans managed to bring her down with their massed attacks.

The second turn had gone a lot better for me, as I had taken out much of the enemy unit on my left flank. However, the two flyers were still going strong and could prove devastating to my army.
TURN 2- HARLEQUINS
At the start of his turn, James scored Kill an Enemy unit. For next turn he chose to hold objective 2 in his deployment zone and to kill an enemy unit.

The Soltaire leapt into the air, using his Blitz ability to travel 28" and go for the Kill Teams on the Harlequin's right flank. The two Hemlock Wraithfighters moved across the battlefield to support him. The two Voidweavers next to the Kill Team retreated, as the last Starweaver moved up to join them. The Voidweaver moved up towards the lone Veteran in the Deathwatch deployment zone.


In the psychic phase, one of the flyers cast Smite, causing two wounds and killing one of the Bikers. The second flyer managed to do another three wounds with Smite, killing another of the Bikers.
In the shooting phase, the Voidweaver targeted the Corvus Blackstar, wounding it twice. One of the Hemlocks targeted the flyer, killing it off with its flamer weapons.
The Starweaver targeted the Vanguard Veterans, killing one of the squad. The Hemlock Wraithfighter added its firepower, killing another three of the squad.

A second Voidweaver fired at Kill Team 1 in front of it, wounding twice but failing to get past their armour. Finally, the last Voidweaver fired at the lone Missile Launcher Veteran, killing him.

The Soltaire assaulted the Vanguard Veterans, easily wiping them out.
MAELSTROM POINTS:
Deathwatch- 1
Harlequins- 1
At the end of turn 2, things were in the balance. We were drawn on maelstrom points, but this Hemlock Wraithfighters were so damn powerful, decimating much of my army.
TURN 3- DEATHWATCH
At the start of my third turn, I scored both my maelstrom points. This turn, I opted for two lots of Destroy an enemy unit.

The Watch Master and remaining Bikers moved up to engage the Soltaire. The two Kill Teams then went after separate Voidweavers, the Watch Captain joining the squad on the right. The Rhino moved to secure one of the objectives in the Deathwatch deployment zone.


The Assassin opened fire on the Soltaire, hitting and rolling a 6 to wound. This meant I did D6 damage and was very happy when I rolled another 6, killing the Soltaire outright in a single shot.
The Kill Team fired their Frag Cannons at the Voidweaver, hitting and wounding 7 times. James then passed all but one of his 4+ saves! The squad's Bolters then fired, doing two wounds. James passed one save, using his last command point to re-roll the failed save, but he failed again and the Voidweaver was destroyed.

The Drop Pod fired on the damaged Hemlock, wounding it once. The Bikers opened fire on the same flyer, wounding it once more and leaving it on 4 wounds.
The other Kill Team fired at the Voidweaver, wounding it three times with the Frag Cannon. The Watch Captain threw a Krak grenade at it, causing another 2 wounds.
The Watch Captain and Kill Team assaulted the damaged skimmer. The Captain managed to do a single wound, while the Vanguard Veteran in the kill team was able to finish it off.


Annoyingly, I had killed three units this turn. Had I risked it and gone for this in my objectives, I would have gained an additional maelstrom point.
TURN 3- HARLEQUINS
At the start of turn 3, James scored a single point for killing an enemy unit. This turn, he chose to kill three enemy units for 3 maelstrom points, a feat he could achieve quite easily if the past two turns were anything to go by.

The two Wraitfighters moved up towards the two Kill Keams in the Harlequin deployment zone, while one of the Voidweavers moved to secure an objective. The other Starweaver and Voidweaver moved back slightly from the Deathwatch.


In the psychic phase, the two flyers cast Smite, killing four of the Veterans in the Kill Team behind them.
A Voidweaver fired at the Kill Team, killing one of the squad with its Shuriken fire. The second Voidweaver fired at the Rhino, wounding it once. The Starweaver fired at one of the Bikers, killing him.
One of the Hemlock Wraithfighters targeted the two Kill Team, wiping them out with their (over)powerful flamer weapons. The second flyer targeted the Watch Master, wounding him 3 times, but I fortunately made all three of my invulnerable saves.
MAELSTROM POINTS:
Deathwatch- 3
Harlequins- 2
Things were starting to go very bad for the Deathwatch. Those two flyers on their own were decimating my army and had scored James his 3 maelstrom points.
TURN 4- DEATHWATCH
This turn, I scored both my maelstrom points for killing two enemy units. This turn, I had to chose holding his objective 2 and killing an enemy unit.

The Watch Captain moved up on the enemy flyers, supported by the remaining Bikers, while the Watch Master moved to grab the objective. The Rhino moved to secure another objective.

The Assassin fired his rifle at one of the flyers. He hit and I managed to roll a 6 to wound once more. I rolled another 6 for damage and one of the cursed Hemlocks was destroyed!
The Bikers opened fire on the remaining flyer, managing to do four wounds to it with their Vengeance shells. The Captain tried to throw a grenade at it, but missed with his attack. The Drop Pod added its firepower, but failed to do any damage.
In the charge phase, the Captain assaulted the Hemlock Wraithfighter, suffering two wounds from overwatch. He struck at the flyer, wounding it three times, but James only failed one of his 5+ saves and took a single wound, leaving it on 7.

TURN 4- HARLEQUINS
At the start of turn 4, James scored 3 points for killing three units. This turn he chose destroy an enemy unit and Hold objective 2 in my deployment zone.

The Hemlock moved to engage the Rhino, while the Voidweaver moved across the battlefield to support it. The troupe got out of the Starweaver and advanced to the cover of one of the buildings. The Starweaver then moved to secure the second objective in the Deathwatch deployment zone, as the final Voidweaver moved to secure another.


The Hemlock cast Smite on the Rhino, taking one wound from it. It then fired at the Rhino, wounding it once and causing 2 damage.
The Voidweaver fired at the Rhino, wounding it once and leaving it on 6 wounds.


The Harlequin Troupe attempted to charge the Watch Captain, but failed to make the distance.
MAELSTROM POINTS:
Deathwatch- 5
Harlequins- 5


6 Command Points
My Warlord was the Watch Master, who took the Tenacious Survivor warlord trait.
James' army consisted of:
Battalion Detachment
Troupe Master- Fusion Pistol, Power Sword (TM1)
Troupe Master- Fusion Pistol, Power Sword (TM2)
5 Troupe Players- 5 Fusion Pistols, 5 Harlequin's Caresses (TP1)
5 Troupe Players- 5 Fusion Pistols, 5 Harlequin's Caresses (TP2)
5 Troupe Players- 5 Fusion Pistols, 5 Harlequin's Embraces (TP3)
Starweaver- 2 Shuriken Cannons (S1)
Starweaver- 2 Shuriken Cannons (S2)
Starweaver- 2 Shuriken Cannons (S3)
Soltaire- Harlequin's kiss, Harlequin's caress (St)
Spearhead Detachment
Shadowseer- Smite, Twilight Pathways psychic powers (Sh)
Voidweaver- 2 Shuriken Cannons, Haywire Cannon (V1)
Voidweaver- 2 Shuriken Cannons, Haywire Cannon (V2)
Voidweaver- 2 Shuriken Cannons, Haywire Cannon (V3)
Voidweaver- 2 Shuriken Cannons, Haywire Cannon (V4)
Hemlock Wraithfighter- Smite, Enhance/Drain psychic powers (H1)
Hemlock Wraithfighter- Smite, Enhance/Drain psychic powers (H2)
7 Command Points
A lot of Fusion pistols, combat ability and invulnerable saves to have to deal with!
We placed the objectives as shown below:

I won the roll for deployment and chose to go first. The deployment order was as follows:
- Drop Pod (Kill Team 4 and Watch Master)
- Hemlock Wraithfighter
- Vanguard Veterans (reserve)
- Hemlock Wraithfighter
- Kill Team 2 (missile launchers)
- Voidweaver
- Kill Team 3 (missile launchers)
- Voidweaver
- Deathwatch Bikers (LHS)
- Voidweaver
- Deathwatch Bikers (centre)
- Voidweaver
- Rhino (Kill Team 5)
- Starweaver
- Assassin (reserve)
- Starweaver
- Corvus Blackstar (Kill Team 1 and Watch Captain)
- Starweaver
- Soltaire
James countered by deploying much of his transport vehicles out of line of sight of my firepower. Most of his army set up pretty far back, they all had good mobility to be able to get to me quickly if necessary.


As I deployed first, I got +1 to go first and was fortunate enough to roll high enough to choose the first turn. James failed to seize the initiative and I took the first turn.
TURN 1- DEATHWATCH
In turn 1, I rolled for my maelstrom objectives and chose Hold objective 2 in my deployment zone and Destroy an enemy unit.

Both Bike units moved towards the objective on my left flank, hoping that at least one would survive to claim it in the following turn. The Rhino moved ahead, advancing to close the distance as quickly as possible. The Corvus Blackstar moved up the battlefield to target the Harlequin forces.


The Assassin arrived from reserve, deploying on top of a building on my left flank. I also decided to bring in the Drop Pod, landing on the far left to target one of the enemy vehicles.
The Meltagun Kill Team fired at the Starweaver, hitting and wounding four times with their Meltaguns. James managed to pass two of his saves, expending a Command Point re-roll to pass a third save. Unfortunately, the single wound did 3 damage and the vehicle survived. The Watch Master added his firepower from his Guardian Spear, taking another wound from it.
The Corvus Blackstar targeted the Voidweaver on the left flank, taking four wounds from it with its combined firepower. The Assassin tried to target one of the Hemlock Wraithfighters, but missed it.
One of the backfield Kill Teams fired their missiles at a Hemlock. One missile hit and wounded, taking 5 damage from the flyer. The Stalker Bolters of the squad managed to take a wound from one of the Starweavers.
The second Kill Team fired at the damaged flyer, one of the missiles hitting and wounding, but only managed to do one point of damage.
The Corvus Blackstar assaulted the Voidweaver (again, this was early in 8th edition and I completely forgot that I had moved too far to charge that turn). The Meltagun Kill Team tried to assault the Starweaver, but failed its charge, even with a Command Point re-roll.
The Corvus Blackstar failed to take the final wound from the Voidweaver, suffering one wound in return from the enemy skimmer.
Not the greatest of first turns. The invulnerable saves of the enemy skimmers had kept them from harm from most of my firepower.
TURN 1- HARLEQUINS
In his first turn, James also chose to Hold his own objective 2 and to kill an enemy unit.

On the right flank, the Troupe Master led his Troupe Players to engage the Meltagun Kill Team, while the Voidweaver fell back from combat with the Deathwatch flyer. The two Hemlock Fighters flew across the battlefield to target the two Kill Teams in the Deathwatch deployment zone, one Voidweaver moving up to support it. The Soltaire also advanced on the enemy lines.


Another Starweaver moved towards the Corvus Blackstar, the Troupe Players and Spiritseer leaping out to target the flyer. They were joined by another Voidweaver.
In the psychic phase, the Spiritseer cast Smite, taking three wounds from the Corvus Blackstar. One of the Hemlock Wraithfighters cast Smite, killing three of the Kill Team in front of it. The other flyer failed to manifest the power.
In the shooting phase, the Hemlock Wraithfighters attempted to finish off the Kill Teams in front of them. One flyer split its fire between the two squads, killing one from one squad and two from the other squad. The second flyer fired at the back squad, getting 6 hits with his 2D3 shots and wiping out the unit.


The Voidweaver fired at the last Missile Launcher Veteran, wounding him four times. I passed all my 2+ armour saves (after using one command point re-roll to keep him alive).
One of the Voidreavers targeted the Corvus Blackstar, wounding it three times in total. The Shadowseer also opened fire on it, but missed with his Fusion pistol. The Troupe in front of the Corvus fired at it, only hitting with two of their shots. Both Fusion Pistols failed to wound. James used a Command Point re-roll, but also failed to wound with the re-roll- a very lucky escape for me! Both the Starweavers and the other Voidweaver turned their fire on the Corvus Blackstar, the combined firepower taking another 3 wounds with their combined firepower and leaving it on 5.
On the right flank, the Harlequin troupe fired at the Meltagun Kill Team, killing two of the squad. The Troupe Master fired at the squad, killing another one of the Veterans.
In the charge phase, one of the Starweavers assaulted the Corvus Blackstar. The assault cannon managed to put a single wound on the skimmer, which was saved by James thanks to the use of a Command Point re-roll. The Harlequin troupe charged the Kill Team in front of them. Some great overwatch fire from the surviving Veterans saw three of the squad fall before they reached combat. The Troupe Master charged the Watch Master, suffering no damage from overwatch.
In the fight phase, the Harlequin Troupe easily killed the last two Veterans in combat, then consolidating towards the Watch Master. The Troupe Master struck at the Watch Master, wounding him twice.
The Watch Master chose to attack the newly arrived troupe, wounding three of the squad, but only killing one thanks to their invulnerable saves and the use of a Command Point re-roll.


The Starweaver and Corvus Blackstar did no harm to one another in combat. At the end of the turn, I passed my morale test. James also passed the test on the last member of the Troupe after using another command point re-roll, to deny me the maelstrom point.
TURN 2- DEATHWATCH
At the start of my turn, I scored a point for holding objective 2. This turn, I chose to hold objective 2 in my opponent's deployment zone and to kill an enemy unit.

The Watch Master fell back from combat, as the two Bike units moved up to support him. The Kill Team disembarked from the Corvus Blackstar to go after the Harlequin troupe in front of them, the Deathwatch flyer moving back slightly to secure the objective.


The Kill Team in the Rhino disembarked, moving up to support the main attack, the Rhino also moving up after the squad has disembarked. Finally, the Vanguard Veterans arrived, landing on the other side of the building and hoping to target the Voidweaver in the assault phase.
In the shooting phase, the Drop Pod fired at the last of the Harlequin Troupe, killing him. One squad of Bikers fired at the Troupe Master, putting 9 wounds on him. His capering helped somewhat as he only took 4 wounds. The Assassin trained his rifle at the Troupe Master and killed him outright, gaining me Slay the Warlord.
The other Bike squad opened fire on the second Troupe, killing four of the squad with some impressive shooting. The Rhino fired at the squad, hoping to kill the last one, but proved unsuccessful.
One of the Kill Teams was forced to fire their two Frag Cannons at the last of the Troupe, easily killing him.


The second Kill Team fired at the Starweaver, taking four wounds with their Frag Cannons. The squad's Bolters failed to damage it, but a krak grenade from the Vanguard Veteran in the Kill Team managed to hit and wound. James failed his save, but used a command point re-roll to pass it. The Captain then threw another grenade at the skimmer, hitting and wounding, but the shot was saved.
The Corvus Blackstar opened fire on the damaged Starweaver, its hurricane bolters causing the enemy skimmer to explode, killing another of the nearby damaged Starweavers.
The lone Veteran with the Missile Launcher fired at the damaged Hemlock, but failed to hit.
In the charge phase, Kill Team 1 and the Watch Captain assaulted the Shadowseer. The overwatch fire of the Harlequin managed to kill three of the squad. The Vanguard Veterans failed their charge against the Voidweaver, even with the use of a Command Point re-roll.
The Watch Captain struck at the Shadowseer, taking two wounds from her. The rest of the Veterans managed to bring her down with their massed attacks.

The second turn had gone a lot better for me, as I had taken out much of the enemy unit on my left flank. However, the two flyers were still going strong and could prove devastating to my army.
TURN 2- HARLEQUINS
At the start of his turn, James scored Kill an Enemy unit. For next turn he chose to hold objective 2 in his deployment zone and to kill an enemy unit.

The Soltaire leapt into the air, using his Blitz ability to travel 28" and go for the Kill Teams on the Harlequin's right flank. The two Hemlock Wraithfighters moved across the battlefield to support him. The two Voidweavers next to the Kill Team retreated, as the last Starweaver moved up to join them. The Voidweaver moved up towards the lone Veteran in the Deathwatch deployment zone.


In the psychic phase, one of the flyers cast Smite, causing two wounds and killing one of the Bikers. The second flyer managed to do another three wounds with Smite, killing another of the Bikers.
In the shooting phase, the Voidweaver targeted the Corvus Blackstar, wounding it twice. One of the Hemlocks targeted the flyer, killing it off with its flamer weapons.
The Starweaver targeted the Vanguard Veterans, killing one of the squad. The Hemlock Wraithfighter added its firepower, killing another three of the squad.

A second Voidweaver fired at Kill Team 1 in front of it, wounding twice but failing to get past their armour. Finally, the last Voidweaver fired at the lone Missile Launcher Veteran, killing him.

The Soltaire assaulted the Vanguard Veterans, easily wiping them out.
MAELSTROM POINTS:
Deathwatch- 1
Harlequins- 1
At the end of turn 2, things were in the balance. We were drawn on maelstrom points, but this Hemlock Wraithfighters were so damn powerful, decimating much of my army.
TURN 3- DEATHWATCH
At the start of my third turn, I scored both my maelstrom points. This turn, I opted for two lots of Destroy an enemy unit.

The Watch Master and remaining Bikers moved up to engage the Soltaire. The two Kill Teams then went after separate Voidweavers, the Watch Captain joining the squad on the right. The Rhino moved to secure one of the objectives in the Deathwatch deployment zone.


The Assassin opened fire on the Soltaire, hitting and rolling a 6 to wound. This meant I did D6 damage and was very happy when I rolled another 6, killing the Soltaire outright in a single shot.
The Kill Team fired their Frag Cannons at the Voidweaver, hitting and wounding 7 times. James then passed all but one of his 4+ saves! The squad's Bolters then fired, doing two wounds. James passed one save, using his last command point to re-roll the failed save, but he failed again and the Voidweaver was destroyed.

The Drop Pod fired on the damaged Hemlock, wounding it once. The Bikers opened fire on the same flyer, wounding it once more and leaving it on 4 wounds.
The other Kill Team fired at the Voidweaver, wounding it three times with the Frag Cannon. The Watch Captain threw a Krak grenade at it, causing another 2 wounds.
The Watch Captain and Kill Team assaulted the damaged skimmer. The Captain managed to do a single wound, while the Vanguard Veteran in the kill team was able to finish it off.


Annoyingly, I had killed three units this turn. Had I risked it and gone for this in my objectives, I would have gained an additional maelstrom point.
TURN 3- HARLEQUINS
At the start of turn 3, James scored a single point for killing an enemy unit. This turn, he chose to kill three enemy units for 3 maelstrom points, a feat he could achieve quite easily if the past two turns were anything to go by.

The two Wraitfighters moved up towards the two Kill Keams in the Harlequin deployment zone, while one of the Voidweavers moved to secure an objective. The other Starweaver and Voidweaver moved back slightly from the Deathwatch.


In the psychic phase, the two flyers cast Smite, killing four of the Veterans in the Kill Team behind them.
A Voidweaver fired at the Kill Team, killing one of the squad with its Shuriken fire. The second Voidweaver fired at the Rhino, wounding it once. The Starweaver fired at one of the Bikers, killing him.
One of the Hemlock Wraithfighters targeted the two Kill Team, wiping them out with their (over)powerful flamer weapons. The second flyer targeted the Watch Master, wounding him 3 times, but I fortunately made all three of my invulnerable saves.
MAELSTROM POINTS:
Deathwatch- 3
Harlequins- 2
Things were starting to go very bad for the Deathwatch. Those two flyers on their own were decimating my army and had scored James his 3 maelstrom points.
TURN 4- DEATHWATCH
This turn, I scored both my maelstrom points for killing two enemy units. This turn, I had to chose holding his objective 2 and killing an enemy unit.

The Watch Captain moved up on the enemy flyers, supported by the remaining Bikers, while the Watch Master moved to grab the objective. The Rhino moved to secure another objective.

The Assassin fired his rifle at one of the flyers. He hit and I managed to roll a 6 to wound once more. I rolled another 6 for damage and one of the cursed Hemlocks was destroyed!
The Bikers opened fire on the remaining flyer, managing to do four wounds to it with their Vengeance shells. The Captain tried to throw a grenade at it, but missed with his attack. The Drop Pod added its firepower, but failed to do any damage.
In the charge phase, the Captain assaulted the Hemlock Wraithfighter, suffering two wounds from overwatch. He struck at the flyer, wounding it three times, but James only failed one of his 5+ saves and took a single wound, leaving it on 7.

TURN 4- HARLEQUINS
At the start of turn 4, James scored 3 points for killing three units. This turn he chose destroy an enemy unit and Hold objective 2 in my deployment zone.

The Hemlock moved to engage the Rhino, while the Voidweaver moved across the battlefield to support it. The troupe got out of the Starweaver and advanced to the cover of one of the buildings. The Starweaver then moved to secure the second objective in the Deathwatch deployment zone, as the final Voidweaver moved to secure another.


The Hemlock cast Smite on the Rhino, taking one wound from it. It then fired at the Rhino, wounding it once and causing 2 damage.
The Voidweaver fired at the Rhino, wounding it once and leaving it on 6 wounds.


The Harlequin Troupe attempted to charge the Watch Captain, but failed to make the distance.
MAELSTROM POINTS:
Deathwatch- 5
Harlequins- 5
TURN 5- DEATHWATCH
At the start of my turn, I scored all my maelstrom objectives for 2 points. This turn, I chose to hold objective 2 in each deployment zone for my two objectives.

The Watch Master moved into cover, out of line of sight, but still holding the objective. The Watch Captain and remaining Bikers flanked the Troupe, moving around each side of the building to target them.


The Assassin fired at the Flyer once more, hoping to equal his success from his last shot. I managed to hit, but failed to wound. I used a Command Point re-roll, but failed to wound. The Drop Pod and Rhino fired at the Hemlock, doing a single wound on the flyer.
The Bikers fired at the Troupe, killing four of the squad. The Captain threw a Frag Grenade at the lone survivor, wounding him twice, but he made his invulnerable saves.
In the charge phase, the Captain charged the Troupe Master and Bikers charged the Troupe player. The Bikers struck at the last survivor, hitting but failing to wound. The Captain attacked the Master with his Lightning Claws, taking four wounds from him. The Troupe Player was unable to harm the Bikers. The Troupe Master attacked the Captain, wounding him 5 times. I failed three of my 5+ saves and the Captain perished.

In the morale phase, the last member of the Troupe fled the field.
TURN 5- HARLEQUINS
At the start of his turn, James scored a single point for destroying an enemy unit. This turn, he chose to hold 3 objectives for 3 points.

The Troupe Master fell back from combat, as the Hemlock moved up to support him. The Voidweaver moved up to engage the Rhino, while the other two skimmers continued to hold the objectives.


The flyer cast Smite on the Bikers, causing 5 mortal wounds thanks to a high casting and killing two of the three.
The Hemlock then fired at the Rhino, wounding it twice and taking four damage from it, leaving it on a single wound. The Voidweaver fired at the Rhino, but failed to take its last wound.
In the charge phase, the Troupe Master assaulted the last Biker as the Voidweaver assaulted the Rhino. Both were successful in killing off their foes.


MAELSTROM POINTS:
Deathwatch- 7
Harlequins- 6
Things were incredibly close. I was currently winning on maelstrom points, James was winning on eternal war objectives and we were drawn on tertiary objectives. If the game ended now, I could pull of a great draw. Unfortunately, when I rolled the game continued for another turn. I had almost certainly lost the game at this point, but was curious to see if I could take down that last Hemlock.
TURN 6- DEATHWATCH
This turn, I scored one point for holding objective 2 in the Harlequin deployment zone. I chose to destroy an enemy unit and to hold my objective 2 in my deployment zone.

With only 3 models left on the board, this was going to be a quick turn. The Assassin fired at the Hemlock, but failed to hit. The Watch Master fired at the flyer, doing one wound on it. The Drop Pod also fired, causing one more wound and leaving it on four.

TURN 6- HARLEQUINS
James scored 3 points for holding 3 objectives. He once again rolled up and selected to hold 3 objectives for 3 points.

The Hemlock moved up on the Watch Master, as the Troupe Master advanced on him as well.

In the psychic phase, the Hemlock failed to cast Smite. It then fired at the Watch Master, wounding him three times. I made two invulnerable saves and the Watch Master was left on 3 wounds.
The Voidweaver fired at the Assassin, hitting once but failing to wound.
The Troupe Master then assaulted the Watch Master. The overwatch fire from the Guardian Spear was able to take his final wound and slay him to score me a maelstrom point.
MAELSTROM POINTS:
Deathwatch- 8
Harlequins- 9
We rolled and the game continued into its 7th turn.
TURN 7- DEATHWATCH
On the final turn, I scored one point for killing an enemy unit. I didn't roll for maelstrom points as there would be no possibility to score them.

The Assassin fired at the Flyer, but missed with his shot. The Watch Master targeted the Hemlock, taking another wound from it. The end of a very quick turn for me.
TURN 7- HARLEQUINS
In his final turn, James scored 3 points for holding 3 objectives.

The Hemlock moved up to engage the Assassin. He cast Smite on it, taking three wounds from him. He then shot at him in the shooting phase, wounding him twice, but I made both invulnerable saves.

With that, the game ended.
VICTORY POINTS:
Deathwatch: Eternal War- 5 (one objective and two HS slain), Maelstrom- 9, Slay the Warlord and Linebreaker.
Harlequins: Eternal War- 9 (three objectives), Maelstrom- 12, Linebreaker and Ground Control.
A win for the Harlequins. This gave me 2 tournament points to James' 18 tournament points.
AFTER-BATTLE THOUGHTS
I hate Hemlock Wraithfighters. They are incredibly good and seem designed to decimate an army such as mine. What is annoying is that all their attacks hit automatically. They get to cast Smite each turn, which hits automatically and does mortal wounds. They then get 2D3 18" instant hit flamers that hit automatically, kill most Marines easily, and do 2 damage each wound, making them great for taking on Bikers and characters. As they hit automatically, you need to destroy them, as taking them down tiers by wounding them has simply no influence on their effectiveness and damage output.
I honestly think that if it wasn't for those two flyers, then I might have stood a chance of winning this game. Without a doubt, the two flyers caused more damage to my army than the rest of James' army combined.
Unfortunately, I think this was a poor match up for me. I simply didn't have the volume of shots to get around all the invulnerable saves on his vehicles and infantry, meaning that every shot had to count. My missile launchers proved to be pretty useless, only scoring one wound before they were unceremoniously wiped out.
The Assassin more than made up for his abysmal performance from previous games, taking out a Troupe Master, Soltaire and Wraithfighter with his rifle. Just a pity he couldn't take out the second Wraithfighter as well.
I think that my plan worked well in principle. I was able to decimate one flank of the Harlequin army with my Frag Cannon units and combat ability. It's just a shame I couldn't kill more of the skimmers in turn 1 thanks to the invulnerable saves blocking most of my melta shots. With one flank gone, I was feeling good about the game, but then the flyers came over and put an end to that.
Annoyingly, had the game ended on turn 5, I would have come away with a hard fought (and I think deserved) draw. Given that the game ended with me having 3 models on the board and James having four models on the board, I don't think 18-2 is a fair reflection of how the game went, but that's the way it ended up.
I would be interested to see which army actually won the first game to have me facing off against James and whether I would have done any better against it.
So with one win and one loss so far, I was interested to see how the rest of the tournament would go.
Deathwatch- 7
Harlequins- 6
Things were incredibly close. I was currently winning on maelstrom points, James was winning on eternal war objectives and we were drawn on tertiary objectives. If the game ended now, I could pull of a great draw. Unfortunately, when I rolled the game continued for another turn. I had almost certainly lost the game at this point, but was curious to see if I could take down that last Hemlock.
TURN 6- DEATHWATCH
This turn, I scored one point for holding objective 2 in the Harlequin deployment zone. I chose to destroy an enemy unit and to hold my objective 2 in my deployment zone.

With only 3 models left on the board, this was going to be a quick turn. The Assassin fired at the Hemlock, but failed to hit. The Watch Master fired at the flyer, doing one wound on it. The Drop Pod also fired, causing one more wound and leaving it on four.

TURN 6- HARLEQUINS
James scored 3 points for holding 3 objectives. He once again rolled up and selected to hold 3 objectives for 3 points.

The Hemlock moved up on the Watch Master, as the Troupe Master advanced on him as well.

In the psychic phase, the Hemlock failed to cast Smite. It then fired at the Watch Master, wounding him three times. I made two invulnerable saves and the Watch Master was left on 3 wounds.
The Voidweaver fired at the Assassin, hitting once but failing to wound.
The Troupe Master then assaulted the Watch Master. The overwatch fire from the Guardian Spear was able to take his final wound and slay him to score me a maelstrom point.
MAELSTROM POINTS:
Deathwatch- 8
Harlequins- 9
We rolled and the game continued into its 7th turn.
TURN 7- DEATHWATCH
On the final turn, I scored one point for killing an enemy unit. I didn't roll for maelstrom points as there would be no possibility to score them.

The Assassin fired at the Flyer, but missed with his shot. The Watch Master targeted the Hemlock, taking another wound from it. The end of a very quick turn for me.
TURN 7- HARLEQUINS
In his final turn, James scored 3 points for holding 3 objectives.

The Hemlock moved up to engage the Assassin. He cast Smite on it, taking three wounds from him. He then shot at him in the shooting phase, wounding him twice, but I made both invulnerable saves.

With that, the game ended.
VICTORY POINTS:
Deathwatch: Eternal War- 5 (one objective and two HS slain), Maelstrom- 9, Slay the Warlord and Linebreaker.
Harlequins: Eternal War- 9 (three objectives), Maelstrom- 12, Linebreaker and Ground Control.
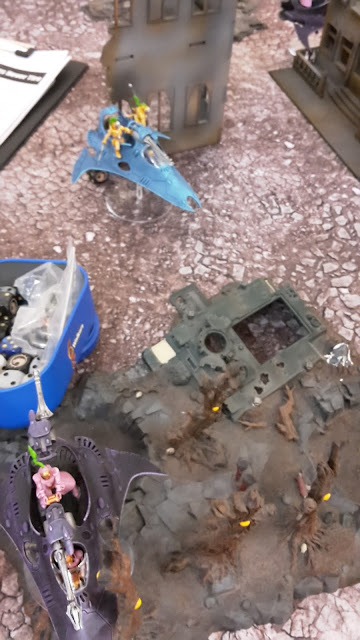
 |
| End of the game. |
A win for the Harlequins. This gave me 2 tournament points to James' 18 tournament points.
AFTER-BATTLE THOUGHTS
I hate Hemlock Wraithfighters. They are incredibly good and seem designed to decimate an army such as mine. What is annoying is that all their attacks hit automatically. They get to cast Smite each turn, which hits automatically and does mortal wounds. They then get 2D3 18" instant hit flamers that hit automatically, kill most Marines easily, and do 2 damage each wound, making them great for taking on Bikers and characters. As they hit automatically, you need to destroy them, as taking them down tiers by wounding them has simply no influence on their effectiveness and damage output.
I honestly think that if it wasn't for those two flyers, then I might have stood a chance of winning this game. Without a doubt, the two flyers caused more damage to my army than the rest of James' army combined.
Unfortunately, I think this was a poor match up for me. I simply didn't have the volume of shots to get around all the invulnerable saves on his vehicles and infantry, meaning that every shot had to count. My missile launchers proved to be pretty useless, only scoring one wound before they were unceremoniously wiped out.
The Assassin more than made up for his abysmal performance from previous games, taking out a Troupe Master, Soltaire and Wraithfighter with his rifle. Just a pity he couldn't take out the second Wraithfighter as well.
I think that my plan worked well in principle. I was able to decimate one flank of the Harlequin army with my Frag Cannon units and combat ability. It's just a shame I couldn't kill more of the skimmers in turn 1 thanks to the invulnerable saves blocking most of my melta shots. With one flank gone, I was feeling good about the game, but then the flyers came over and put an end to that.
Annoyingly, had the game ended on turn 5, I would have come away with a hard fought (and I think deserved) draw. Given that the game ended with me having 3 models on the board and James having four models on the board, I don't think 18-2 is a fair reflection of how the game went, but that's the way it ended up.
I would be interested to see which army actually won the first game to have me facing off against James and whether I would have done any better against it.
So with one win and one loss so far, I was interested to see how the rest of the tournament would go.
Filthy Elves! Good report though. Do you actually take pictures of the emptied table from directly above or have you just computer modelled every piece of terrain you have ever encountered? I always hum the theme tune to Dad's Army when I look at your overheads.
ReplyDeletePhotos of every piece of terrain, I'm afraid. My computer skills are not that great! I do get a lot of weird looks taking photos all the time, especially when I stand on chairs to get better shots of the table.
DeleteGreat, now I'll be humming that tune every time I make one now!
Great batrep, I really thought you had this in the bag when you managed to withstand the first assaults where I thought Harlequins shine, and then killed the Solitaire so easily. Hemlocks really are quite brutal, I know I'll be bringing dedicated anti-air after my first encounter with them in 8th.
ReplyDeleteHarlequins are tough in combat, but fall so easily to massed bolter fire. The biggest issue for my Deathwatch is cracking the vehicles first and those incredibly powerful flyers.
Delete