
This week's battle report is another from the Medusa IV campaign that I am running. This campaign turn, Yans' Tau decided to attack my Guard's Shield Generator tile that had recently repelled an attack from Armel's Eldar.
As I had been playing my Guard the last few weeks, I asked if Yans wouldn't mind me using my White Scars, as I was keen to finally try out the new White Scars formations from the Kauyon supplement. Fortunately, he agreed and I was able to put together a Scarblade Strike Force for the game.
My army consisted of:
SCARBLADE STRIKE FORCE
HUNTING FORCE
Captain- Bike, Hunter's Eye, Glaive of Vengeance, Storm Shield (with CS)
5 Command Squad- Banner of the Eagle, Apothecary, 4 grav guns, 4 Storm Shields (CS)
8 Bikers- Sergeant with power axe and meltabombs, 2 Grav guns (B1)
8 Bikers- Sergeant with power axe and meltabombs, 2 Grav guns (B2)
3 Scout Bikers- Astartes grenade launcher, sergeant has meltabombs (SB)
Attack Bike- Multimelta (AB1)
Attack Bike- Multimelta (AB2)
STORMLANCE BATTLE DEMI-COMPANY
Chaplain- Bike, Auspex, Meltabombs (with CS)
5 Tactical Marines- Meltagun, sergeant has meltabombs (TM1)
Rhino (R1)
10 Tactical Marines- Grav gun, sergeant has meltabombs (TM2)
Rhino (R2)
10 Tactical Marines- Flamer, sergeant has meltabombs (TM3)
Rhino (R3)
5 Devastators- 4 grav cannons (D)
Rhino (R4)
Attack Bike- Heavy Bolter (AB3)
SPEARTIP STRIKE FORCE
5 Scouts- sergeant has meltabombs (S)
Landspeeder storm- Heavy bolter, Cerberus missile launcher (LS)
Landspeeder- Multimelta, Typhoon missile launcher (L)
My warlord trait initially gave me Deadly Ambush (+1 to my reserve rolls or -1 to my opponents), but I re-rolled and got Hammer of Khan, giving my warlord (the Captain) D3 hammer of wrath hits.
My force was led by a Captain wielding the Hunter's Eye and the Glaive of Vengeance for some close combat punch. He would be leading the Hunting Force, featuring two large 8-man bike squads, a scout bike squad and two attack bikes. The large bike squads were to take advantage of the formations rules, giving me double hammer of wrath hits if I had at least 5 models in the unit. The two attack bikes were armed with multimeltas to take on the heavier battle suits of the Tau.
The formation also allows me to choose a primary target (an enemy HQ) and secondary and tertiary targets. I get re-rolls to hit and to wound against the primary target, then the secondary once the primary is dead and so on. This should be very useful for my special weapons and multimeltas at taking on the Tau commander.
Next, I took a Stormlance to try out the formation. This consists of 4 units mounted in Rhinos and an attack bike. The units must start in the Rhinos, but get re-rolls to hit against units holding objectives and get to make a free move after shooting, even allowing them to get back in their transport if they can. This should be great for the Devastators, allowing me to deploy and fire all four grav cannons then get back in the relative safety of the squad's Rhino.
Finally, I took a Speartip strike force, allowing me to take one of my favourite units- the Scouts and Landspeeder storm. I also took an anti-tank Landspeeder for some more firepower. The Scouts are the only objective secured unit in my army, quite a big change as I normally like to take a lot of objective secured units.
On top of that, the Scarblade gives me re-rollable hammer of wrath wounds if I charge over 8" and, more importantly, gives me re-rolls to my Hit and Run tests (anyone who regularly reads my Ravenwing and White Scars battle reports will know that I have a tendency to fluff these at the most inopportune times).
EDIT: It has been pointed out that my army is above points (thanks to Nate for spotting this). My army comes in at around 2070 pts instead of 1850 pts. Apologies to Yans for this error, I must have missed out a squad when I was adding up the total.
Yans' army consisted of:
HUNTER CADRE
Commander- XV8 battlesuit (with CS)
5 Crisis Suits- 2 Plasma Rifles and Shield Generators (CS)
5 Strike Team- Pulse Rifles (FW1)
5 Strike Team- Pulse Carbines (FW2)
4 Pathfinders (P1)
4 Pathfinders (P2)
10 Kroot- sniper rounds (K)
Riptide- Ion Accelerator, TL Fusion blaster (R)
Stormsurge (S)
TX4 Piranha (P)
3 Stealth Suits (SS1)
3 Stealth Suits (SS2)
Ghostkeel- 2 drones (G)
Unfortunately, I did not get a full list of Yans' army, so am not too sure on what weapons each unit had. His warlord trait gave him a 3D6" assault move, perfect for outrunning my fast units. Quite a small army for 1850 pts, but I know how much of a threat the Stormsurge can be to my army. I would need to deal with the Pathfinders first to limit the damage the Stormsurge could do and hopefully I had enough grav and meltabombs to deal with it.
We decided to play a maelstrom mission and rolled up Deadlock. This gives you 6 tactical cards in the 1st turn, five in the 2nd and so on. This meant it was important to score as many points as possible early on as they get harder to score as the game goes on. We set up the objectives as shown below:
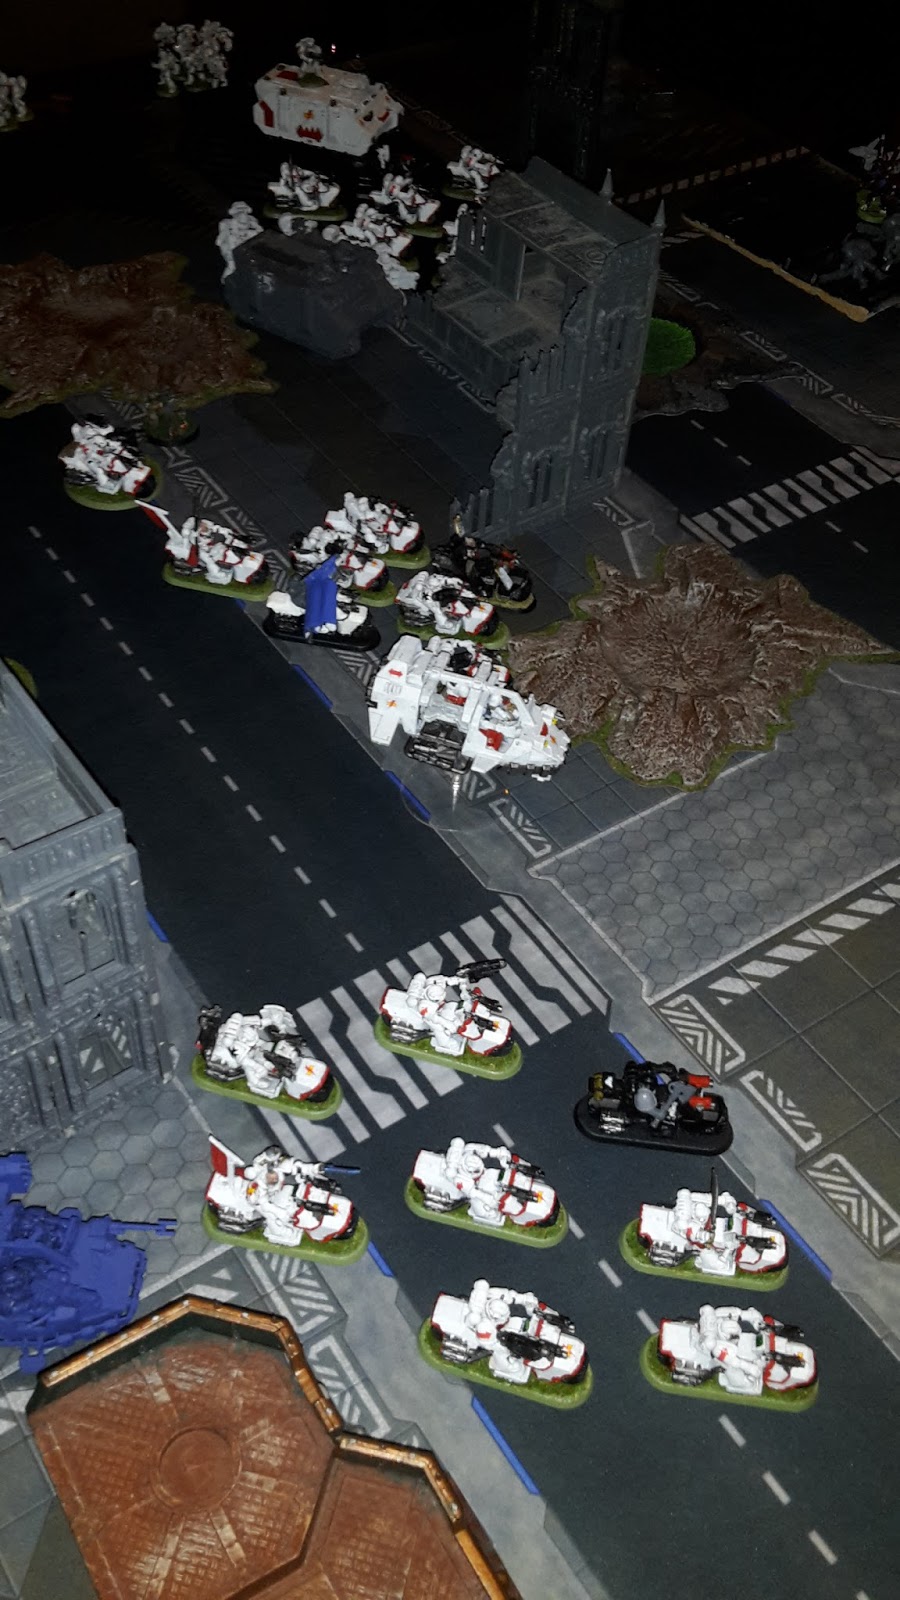
I won the roll for deployment zone and also for deployment and chose to go first (unsurprisingly). I deployed the Command Squad in the centre, ready to go for either flank depending on how Yans deployed. The two units of bikers went on either flank, back up by two Rhinos on each flank. The attack bikes and Landspeeders were spread around the army.
Yans deployed the Stormsurge and Pathfinders on his left flank, with the Riptide to the rear of his ranks. The Stealth units deployed to the left, with the Commander, Crisis Suits and Fire Warriors in the middle.
I infiltrated my Scout bikers close to the Pathfinders on my right flank.


For my Hunting Force, I chose the primary target to be the Tau Commander, the Stormsurge was the secondary target and the Riptide as the tertiary target.
Yans failed to seize and I got the first turn.
TURN 1- WHITE SCARS
In my first turn, I drew Supremacy (hold at least 2 objectives and twice as many as your opponent), Ascendency (hold 3 objectives), Hungry for Glory (issue a challenge), Assassinate (kill an enemy character), Hold the Line (have 3 of my units and no enemy units in my table edge) and No Prisoners (kill an enemy unit).

The White Scars Captain spotted his prey in amongst the ranks of the Tau army. He ordered his strike force to advance, eager to close with the enemy as close as possible.


The Command squad moved up to engage the Tau Commander, while the rest of the army advanced on the Tau units. The Scout bikers moved to capture objective 5, while the attack bikes manoeuvred to grab the other objectives.
The Landspeeder storm opened fire on the Pathfinders in the cover of the ruins, killing one of the squad with its Cerberus launcher, blinding the unit in the process. The Scout bikers opened fire upon the unit, killing one more of the Pathfinders. The White Scars bikers on the right flank opened fire on the unit, wiping them out.

The heavy bolter attack bike then targeted the Fire Warriors on the right, killing three of the unit. The survivors of the unit broke, fleeing from the unrelenting barrage of the White Scars.
The Landspeeder from the Speartip loosed its missiles at the Tau Piranha, the krak ordnance striking the enemy skimmer and obliterating it. The nearby attack bike fired its multimelta at the Stormsurge, but failed to damage it.
The Command Squad attacked their primary target, the Tau Commander and his unit. They wounded the squad twelve times with their grav guns, the invulnerable saves of the unit saving all but two of the crisis suits, who succumbed to the massed fire.
The Devastators disembarked from their Rhino to launch a storm of fire upon the Tau Commander. They wounded the unit four times, wounding the Tau Commander and one of the crisis suits (Yans managed to fail three of four look out sir rolls). With their attack over, the Devastators climbed back into the protection of the Rhino (thanks to the Stormlance's special rules).
The biker unit on the left flank fired their bolters at the Stealth suits picking their way through the ruins in front of them. The bolter fire killed two of the Tau suits, the grav guns targeted the lone survivor, but failed to take him out. Two of the nearby Rhinos targeted the Tau warrior with their storm bolters, but were unable to kill him.

At the end of my turn, I scored Ascendency for 3 points, Supremacy for 1 point, Hold the Line, No Prisoners and First Blood for 7 points in total.
TURN 1- TAU
This turn, Yans drew Multiple Distractions (have an enemy unit completely within 12" of your board edge and one unit completely within 12" of their board edge), The Lure (destroy a unit that charged last turn), Ambush (destroy an enemy unit or make them fail a morale check), Psychological warfare (force a failed morale check), Domination (hold all objectives) and Objective 6.

The Ghostkeel and Stealth suits advanced on the right flank, stumbling slightly, but continuing towards the enemy forces (Yans managed to fail 2 of his 3 difficult terrain tests for one unit, but fortunately passed the subsequent armour saves).
On the other flank, the Riptide and Stormsurge advanced on the White Scars, while the Tau Commander led his unit towards the Scars' command squad. The two fire warriors continued to fall back towards their deployment zone.


The Tau Commander and the Crisis suits opened fire on the Command Squad. Some good invulnerable saves and feel no pain rolls saw the Chaplain only take a single wound. The Kroot shot their sniper rounds at the command squad and managed to kill another of the elite warriors.
The Riptide attempted to overcharge its shield, but failed and took a wound. He then attempted to overcharge the Ion cannon, but failed and took another wound!
The Stormsurge targeted the the White Scars bikers on the Tau left flank. Its large blast weapon hit two of the bikers, but he then rolled a double 1 to wound and the unit was unharmed. The blast also hit the landspeeder, penetrating the vehicle and forcing it to snap fire. It then fired its Airburst frag missiles at the unit, killing one of the bikers.
The Stormsurge then loosed its cluster rockets at the Command squad, seven of the missile struck the unit. Unfortunately, not a single rocket wounded the squad. It then fired its missiles at the squad, finally killing one of the unit.
On the right flank, the Stealth Suits fired at the bikers in front of them, killing four of the unit. The survivors passed their morale check. The Ghostkeel fired at the Devastator's Rhino, wrecking the transport vehicle. The Fire Warriors targeted the Devastators as they emerged from the wrecked vehicle, killing one of the squad with their devastating crossfire.

The Riptide used its assault move to retreat from the White Scars, while the Commander's unit managed an impressive 17" assault move away from the Command Squad.


At the end of his turn, Yans scored no points and discarded Multiple Distractions.
Victory Poinst:
White Scars- 7
Tau- 0
TURN 2- WHITE SCARS
This turn, I drew Overwhelming Firepower (destroy an enemy unit in the shooting phase), Objective 6, Kingslayer (kill the enemy warlord) and had Assassinate and Hungry for Glory from last turn.

On the left flank, one tactical squad's Rhino moved up around the ruins to target the Ghostkeel, the squad inside disembarking to engage the battlesuit. The four bikers moved up over the ruins to engage the lone Stealth suit. In the centre, the Command squad went after the Tau Commander, while the Landspeeder storm advanced on the Kroot, the Scout squad disembarking and readying themselves for combat.
On the right flank, the White Scars bikers and Scout bikers moved up on the Stormsurge, while the attack bikes moved to secure the objectives.


On the left flank, the tactical squad opened fire on the Ghostkeel at point blank range. The squad's bolters hammered the Tau battlesuit, wounding it 3 times (Yans managed to fail 3 of his seven 2+ cover saves). The squad's flamer targeted the battlesuit and managed to destroy it.
The Command squad launched their attack on the Tau Commander. Their grav guns punished the unit, wounding them 11 times and utterly destroying the squad, and with that, the Hunting Force's primary target.
The two attack bikes fired their multimeltas at the Stormsurge, wounding it once. The bikers and scout bikers also targeted the Stormsurge, wounding it again. The Devastators shot at the Fire Warriors, their grav cannons easily wiping out the unit. The Scouts fired their pistols at the Kroot, killing two of the squad.
In the assault phase, the bike squad on the left assaulted the lone stealth suit. The single suit and the nearby stealth suit unit fired on the bikers with their overwatch fire, but failed to wound any of the squad despite hitting them multiple times. The sergeant issued a challenge to the Stealth suit, easily slaying the warrior with his hammer of wrath attack.

The Scouts assaulted the Kroot, one of the Scouts dying to overwatch fire. The Scouts killed 5 of the squad for no loss in return. The Kroot broke and were caught and cut down by the Scouts.
On the right flank, the White Scars bikers and scout bikers assaulted the stormsurge. Thanks to the formation rules, they managed 15 hammer of wrath attacks and wounded the stormsurge twice. The bikers attacked the massive battlesuit with their krak grenades, wounding it another 3 times. The Stormsurge failed to wound with any of its attacks. The biker sergeant struck with his power axe, but failed to wound it. The Scout bike sergeant clamped his meltabombs to the Stormsurge, the detonation finally destroying the Tau suit as its stomp attacks killed two of the bikers.
At the end of my turn, I scored Objective 6, Assassinate for 2 points, Kingslayer, Slay the Warlord Hungry for Glory and overwhelming Firepower for 3 points. This gave me 9 points for the turn.
Victory Points:
White Scars- 16
Tau- 0
With that, Yans decided to call the game there. He had a half-wounded Riptide, some Stealth suits and a unit of Pathfinders, whereas I had most of my army left and was ahead by 16 points.
AFTER-BATTLE THOUGHTS
Wow, those White Scars formations are really powerful.
Without a doubt, the Hunting Force has some brilliant special rules that really boost the effectiveness of the units in the formation.
Hunter's Prey is a great special rule, giving you re-rolls to hit and to wound against 3 targets in the enemy army (though only one at a time). Getting the re-rolls for the grav command squad against the Tau Commander and his unit were key to destroying this target, allowing me to consistently get 10+ wounds with my 12 shots each turn. Against that kind of consistent firepower, there was little the Tau defences could do. Once the Tau Commander was dealt with, the Stormsurge became the next target. Again, the re-rolls were key for taking it out so quickly, allowing my shooting to be more effective, and more importantly, getting re-rolls on the hammer of wrath and grenade attacks in combat caused much more wounds than I should have.
Thunderous assault is also great, giving double hammer of wrath hits if the unit has at least 5 models. Getting at least 10 automatic strength 5 hits in combat (assuming all get into base contact) is a huge bonus against almost any unit, and proved very useful against the Stormsurge (particularly with the re-rolls to wound from the Hunter's Prey).
I didn't get to use too many of the rules from the Stormlance, but the ability to disembark and re-embark with squads provided some added protection with additional firepower compared to the unit staying embarked.
In addition to the awesome rules from the formations, Yans had some terrible luck during the game. His Riptide managed to half kill itself in his first turn and his general rolling was pretty sub-par for most of the game. In contrast, my rolling was on fire in the game with some amazing saving throws and great luck with the maelstrom cards in the two turns.
I don't think the lack of objective secured hindered the army. It was one of my worries about the force, but I think the formation benefits could outweigh this disadvantage. I would be interested to try this out against another tournament list and see how it performs in objective or maelstrom missions.
I normally prefer a close game that could go either way up till the final turn rather than a one-sided stomping that is over by turn 2. This was definitely a game decided by who got first turn. It would have been interesting to see how the game would have went if I had gone second.
Thanks to Yans for the game and for allowing me to use my White Scars when I should have been using my Guard for the game. I will definitely be using the White Scars formations again in the future, but maybe not so much in friendly games.
10 Tactical Marines- Flamer, sergeant has meltabombs (TM3)
Rhino (R3)
5 Devastators- 4 grav cannons (D)
Rhino (R4)
Attack Bike- Heavy Bolter (AB3)
SPEARTIP STRIKE FORCE
5 Scouts- sergeant has meltabombs (S)
Landspeeder storm- Heavy bolter, Cerberus missile launcher (LS)
Landspeeder- Multimelta, Typhoon missile launcher (L)
My warlord trait initially gave me Deadly Ambush (+1 to my reserve rolls or -1 to my opponents), but I re-rolled and got Hammer of Khan, giving my warlord (the Captain) D3 hammer of wrath hits.
My force was led by a Captain wielding the Hunter's Eye and the Glaive of Vengeance for some close combat punch. He would be leading the Hunting Force, featuring two large 8-man bike squads, a scout bike squad and two attack bikes. The large bike squads were to take advantage of the formations rules, giving me double hammer of wrath hits if I had at least 5 models in the unit. The two attack bikes were armed with multimeltas to take on the heavier battle suits of the Tau.
The formation also allows me to choose a primary target (an enemy HQ) and secondary and tertiary targets. I get re-rolls to hit and to wound against the primary target, then the secondary once the primary is dead and so on. This should be very useful for my special weapons and multimeltas at taking on the Tau commander.
Next, I took a Stormlance to try out the formation. This consists of 4 units mounted in Rhinos and an attack bike. The units must start in the Rhinos, but get re-rolls to hit against units holding objectives and get to make a free move after shooting, even allowing them to get back in their transport if they can. This should be great for the Devastators, allowing me to deploy and fire all four grav cannons then get back in the relative safety of the squad's Rhino.
Finally, I took a Speartip strike force, allowing me to take one of my favourite units- the Scouts and Landspeeder storm. I also took an anti-tank Landspeeder for some more firepower. The Scouts are the only objective secured unit in my army, quite a big change as I normally like to take a lot of objective secured units.
On top of that, the Scarblade gives me re-rollable hammer of wrath wounds if I charge over 8" and, more importantly, gives me re-rolls to my Hit and Run tests (anyone who regularly reads my Ravenwing and White Scars battle reports will know that I have a tendency to fluff these at the most inopportune times).
EDIT: It has been pointed out that my army is above points (thanks to Nate for spotting this). My army comes in at around 2070 pts instead of 1850 pts. Apologies to Yans for this error, I must have missed out a squad when I was adding up the total.
Yans' army consisted of:
HUNTER CADRE
Commander- XV8 battlesuit (with CS)
5 Crisis Suits- 2 Plasma Rifles and Shield Generators (CS)
5 Strike Team- Pulse Rifles (FW1)
5 Strike Team- Pulse Carbines (FW2)
4 Pathfinders (P1)
4 Pathfinders (P2)
10 Kroot- sniper rounds (K)
Riptide- Ion Accelerator, TL Fusion blaster (R)
Stormsurge (S)
TX4 Piranha (P)
3 Stealth Suits (SS1)
3 Stealth Suits (SS2)
Ghostkeel- 2 drones (G)
Unfortunately, I did not get a full list of Yans' army, so am not too sure on what weapons each unit had. His warlord trait gave him a 3D6" assault move, perfect for outrunning my fast units. Quite a small army for 1850 pts, but I know how much of a threat the Stormsurge can be to my army. I would need to deal with the Pathfinders first to limit the damage the Stormsurge could do and hopefully I had enough grav and meltabombs to deal with it.
We decided to play a maelstrom mission and rolled up Deadlock. This gives you 6 tactical cards in the 1st turn, five in the 2nd and so on. This meant it was important to score as many points as possible early on as they get harder to score as the game goes on. We set up the objectives as shown below:
 |
| Shields represent the maelstrom objectives. |
I won the roll for deployment zone and also for deployment and chose to go first (unsurprisingly). I deployed the Command Squad in the centre, ready to go for either flank depending on how Yans deployed. The two units of bikers went on either flank, back up by two Rhinos on each flank. The attack bikes and Landspeeders were spread around the army.
Yans deployed the Stormsurge and Pathfinders on his left flank, with the Riptide to the rear of his ranks. The Stealth units deployed to the left, with the Commander, Crisis Suits and Fire Warriors in the middle.
I infiltrated my Scout bikers close to the Pathfinders on my right flank.
 |
| Deployment |


For my Hunting Force, I chose the primary target to be the Tau Commander, the Stormsurge was the secondary target and the Riptide as the tertiary target.
Yans failed to seize and I got the first turn.
TURN 1- WHITE SCARS
In my first turn, I drew Supremacy (hold at least 2 objectives and twice as many as your opponent), Ascendency (hold 3 objectives), Hungry for Glory (issue a challenge), Assassinate (kill an enemy character), Hold the Line (have 3 of my units and no enemy units in my table edge) and No Prisoners (kill an enemy unit).

The White Scars Captain spotted his prey in amongst the ranks of the Tau army. He ordered his strike force to advance, eager to close with the enemy as close as possible.


The Command squad moved up to engage the Tau Commander, while the rest of the army advanced on the Tau units. The Scout bikers moved to capture objective 5, while the attack bikes manoeuvred to grab the other objectives.
The Landspeeder storm opened fire on the Pathfinders in the cover of the ruins, killing one of the squad with its Cerberus launcher, blinding the unit in the process. The Scout bikers opened fire upon the unit, killing one more of the Pathfinders. The White Scars bikers on the right flank opened fire on the unit, wiping them out.

The heavy bolter attack bike then targeted the Fire Warriors on the right, killing three of the unit. The survivors of the unit broke, fleeing from the unrelenting barrage of the White Scars.
The Landspeeder from the Speartip loosed its missiles at the Tau Piranha, the krak ordnance striking the enemy skimmer and obliterating it. The nearby attack bike fired its multimelta at the Stormsurge, but failed to damage it.
The Command Squad attacked their primary target, the Tau Commander and his unit. They wounded the squad twelve times with their grav guns, the invulnerable saves of the unit saving all but two of the crisis suits, who succumbed to the massed fire.
The Devastators disembarked from their Rhino to launch a storm of fire upon the Tau Commander. They wounded the unit four times, wounding the Tau Commander and one of the crisis suits (Yans managed to fail three of four look out sir rolls). With their attack over, the Devastators climbed back into the protection of the Rhino (thanks to the Stormlance's special rules).
The biker unit on the left flank fired their bolters at the Stealth suits picking their way through the ruins in front of them. The bolter fire killed two of the Tau suits, the grav guns targeted the lone survivor, but failed to take him out. Two of the nearby Rhinos targeted the Tau warrior with their storm bolters, but were unable to kill him.

At the end of my turn, I scored Ascendency for 3 points, Supremacy for 1 point, Hold the Line, No Prisoners and First Blood for 7 points in total.
TURN 1- TAU
This turn, Yans drew Multiple Distractions (have an enemy unit completely within 12" of your board edge and one unit completely within 12" of their board edge), The Lure (destroy a unit that charged last turn), Ambush (destroy an enemy unit or make them fail a morale check), Psychological warfare (force a failed morale check), Domination (hold all objectives) and Objective 6.

The Ghostkeel and Stealth suits advanced on the right flank, stumbling slightly, but continuing towards the enemy forces (Yans managed to fail 2 of his 3 difficult terrain tests for one unit, but fortunately passed the subsequent armour saves).
On the other flank, the Riptide and Stormsurge advanced on the White Scars, while the Tau Commander led his unit towards the Scars' command squad. The two fire warriors continued to fall back towards their deployment zone.


The Tau Commander and the Crisis suits opened fire on the Command Squad. Some good invulnerable saves and feel no pain rolls saw the Chaplain only take a single wound. The Kroot shot their sniper rounds at the command squad and managed to kill another of the elite warriors.
The Riptide attempted to overcharge its shield, but failed and took a wound. He then attempted to overcharge the Ion cannon, but failed and took another wound!
The Stormsurge targeted the the White Scars bikers on the Tau left flank. Its large blast weapon hit two of the bikers, but he then rolled a double 1 to wound and the unit was unharmed. The blast also hit the landspeeder, penetrating the vehicle and forcing it to snap fire. It then fired its Airburst frag missiles at the unit, killing one of the bikers.
The Stormsurge then loosed its cluster rockets at the Command squad, seven of the missile struck the unit. Unfortunately, not a single rocket wounded the squad. It then fired its missiles at the squad, finally killing one of the unit.
On the right flank, the Stealth Suits fired at the bikers in front of them, killing four of the unit. The survivors passed their morale check. The Ghostkeel fired at the Devastator's Rhino, wrecking the transport vehicle. The Fire Warriors targeted the Devastators as they emerged from the wrecked vehicle, killing one of the squad with their devastating crossfire.

The Riptide used its assault move to retreat from the White Scars, while the Commander's unit managed an impressive 17" assault move away from the Command Squad.


At the end of his turn, Yans scored no points and discarded Multiple Distractions.
Victory Poinst:
White Scars- 7
Tau- 0
TURN 2- WHITE SCARS
This turn, I drew Overwhelming Firepower (destroy an enemy unit in the shooting phase), Objective 6, Kingslayer (kill the enemy warlord) and had Assassinate and Hungry for Glory from last turn.

On the left flank, one tactical squad's Rhino moved up around the ruins to target the Ghostkeel, the squad inside disembarking to engage the battlesuit. The four bikers moved up over the ruins to engage the lone Stealth suit. In the centre, the Command squad went after the Tau Commander, while the Landspeeder storm advanced on the Kroot, the Scout squad disembarking and readying themselves for combat.
On the right flank, the White Scars bikers and Scout bikers moved up on the Stormsurge, while the attack bikes moved to secure the objectives.


On the left flank, the tactical squad opened fire on the Ghostkeel at point blank range. The squad's bolters hammered the Tau battlesuit, wounding it 3 times (Yans managed to fail 3 of his seven 2+ cover saves). The squad's flamer targeted the battlesuit and managed to destroy it.
The Command squad launched their attack on the Tau Commander. Their grav guns punished the unit, wounding them 11 times and utterly destroying the squad, and with that, the Hunting Force's primary target.
The two attack bikes fired their multimeltas at the Stormsurge, wounding it once. The bikers and scout bikers also targeted the Stormsurge, wounding it again. The Devastators shot at the Fire Warriors, their grav cannons easily wiping out the unit. The Scouts fired their pistols at the Kroot, killing two of the squad.
In the assault phase, the bike squad on the left assaulted the lone stealth suit. The single suit and the nearby stealth suit unit fired on the bikers with their overwatch fire, but failed to wound any of the squad despite hitting them multiple times. The sergeant issued a challenge to the Stealth suit, easily slaying the warrior with his hammer of wrath attack.

The Scouts assaulted the Kroot, one of the Scouts dying to overwatch fire. The Scouts killed 5 of the squad for no loss in return. The Kroot broke and were caught and cut down by the Scouts.
On the right flank, the White Scars bikers and scout bikers assaulted the stormsurge. Thanks to the formation rules, they managed 15 hammer of wrath attacks and wounded the stormsurge twice. The bikers attacked the massive battlesuit with their krak grenades, wounding it another 3 times. The Stormsurge failed to wound with any of its attacks. The biker sergeant struck with his power axe, but failed to wound it. The Scout bike sergeant clamped his meltabombs to the Stormsurge, the detonation finally destroying the Tau suit as its stomp attacks killed two of the bikers.
 |
| The Stormsurge is assaulted..... |
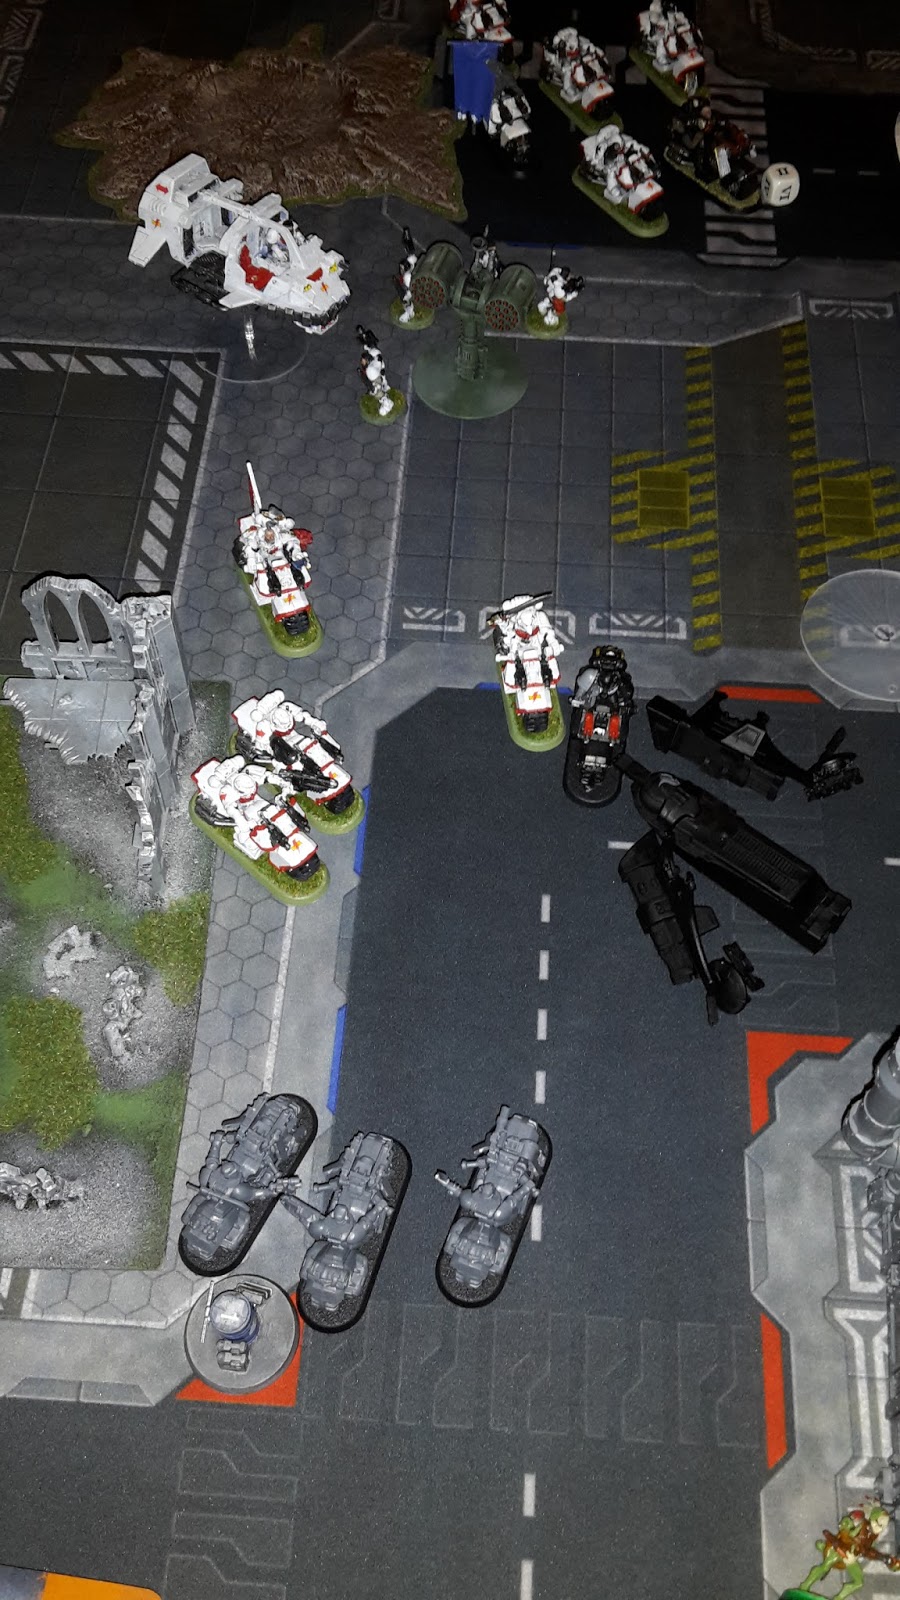 |
| ..... and brought down. |
At the end of my turn, I scored Objective 6, Assassinate for 2 points, Kingslayer, Slay the Warlord Hungry for Glory and overwhelming Firepower for 3 points. This gave me 9 points for the turn.
Victory Points:
White Scars- 16
Tau- 0
With that, Yans decided to call the game there. He had a half-wounded Riptide, some Stealth suits and a unit of Pathfinders, whereas I had most of my army left and was ahead by 16 points.
 |
| End of the Game. |
AFTER-BATTLE THOUGHTS
Wow, those White Scars formations are really powerful.
Without a doubt, the Hunting Force has some brilliant special rules that really boost the effectiveness of the units in the formation.
Hunter's Prey is a great special rule, giving you re-rolls to hit and to wound against 3 targets in the enemy army (though only one at a time). Getting the re-rolls for the grav command squad against the Tau Commander and his unit were key to destroying this target, allowing me to consistently get 10+ wounds with my 12 shots each turn. Against that kind of consistent firepower, there was little the Tau defences could do. Once the Tau Commander was dealt with, the Stormsurge became the next target. Again, the re-rolls were key for taking it out so quickly, allowing my shooting to be more effective, and more importantly, getting re-rolls on the hammer of wrath and grenade attacks in combat caused much more wounds than I should have.
Thunderous assault is also great, giving double hammer of wrath hits if the unit has at least 5 models. Getting at least 10 automatic strength 5 hits in combat (assuming all get into base contact) is a huge bonus against almost any unit, and proved very useful against the Stormsurge (particularly with the re-rolls to wound from the Hunter's Prey).
I didn't get to use too many of the rules from the Stormlance, but the ability to disembark and re-embark with squads provided some added protection with additional firepower compared to the unit staying embarked.
In addition to the awesome rules from the formations, Yans had some terrible luck during the game. His Riptide managed to half kill itself in his first turn and his general rolling was pretty sub-par for most of the game. In contrast, my rolling was on fire in the game with some amazing saving throws and great luck with the maelstrom cards in the two turns.
I don't think the lack of objective secured hindered the army. It was one of my worries about the force, but I think the formation benefits could outweigh this disadvantage. I would be interested to try this out against another tournament list and see how it performs in objective or maelstrom missions.
I normally prefer a close game that could go either way up till the final turn rather than a one-sided stomping that is over by turn 2. This was definitely a game decided by who got first turn. It would have been interesting to see how the game would have went if I had gone second.
Thanks to Yans for the game and for allowing me to use my White Scars when I should have been using my Guard for the game. I will definitely be using the White Scars formations again in the future, but maybe not so much in friendly games.
Good timing! My experiment with them is going up on the blog tonight too!
ReplyDeleteI did notice your opponent tried to nova charge the riptide reactor twice in one turn, which I don't think he's allowed to do, as far as I know you can charge it once and have to decide which of the four bonuses to use.
As for the white scars formations, they do really give the bikes a huge boost, in particular around the combat side of things, and I think they actually make the white scars a pretty viable combat army (provided they are the ones doing the charging, don't get charged by a decent combat unit!).
I think the Riptide took a wound from Nova Charge, then another from gets hot
ReplyDeleteAh, that makes sense, albeit shocking dice!
DeleteAbout the only useful thing I managed to do was blow up the Devastator's rhino. Rolling was terrible for the whole game and yes, the 2nd riptide wound was from gets hot.
ReplyDeleteYans.
Yeah, that was some atrocious rolling in your game. Some of the worst I have ever seen, very unlucky.
DeleteWow that was a truly brutal two turns for Tau on the receiving end... Great showcase for the new formations.
ReplyDeleteYeah, I had no idea that they would be so powerful in game (it doesn't hurt having a tooled up grav command squad to benefit from them).
DeleteAwesome! Finally another White Scars batrep, and with the new formations no less! Great read! My friend and I just today decided on going to a team tourney end of May, and I'll bring a Hunting Force, too! Now I'm even more excited!
ReplyDeleteOh, and one question - did you feel the banner of the eagle was worth it? I just look at it and can't help thinking 'man, that thing is expensive!'
ReplyDeleteOK, I actually have two more qs if you don't mind.
Delete1 - you gave your whole command squad storm shields, but I seem to remember you trying that in a tourney with just one or two storm shields and getting the impression that it was not worth it. That's a lot of points. Do you feel they were worth it this time around?
2 - how do you feel that Landspeeder performed? On first glance I would say mixing a multi melter (short range) with a Typhoon ML (long range) seems counter intuitive. Also, did you keep it close to the Landspeeder Storm for the jink bonus?
And just a small nitpick if I may, the auxiliary formation was the Stormbringer Squadron, not the Speartip Strike :)
Hi Chris, glad you enjoyed the report. As for your questions:
Delete- I didn't really get much use out of the banner in this game as my command squad never got to charge. I think it is a useful addition as fleet should ensure that the unit gets into combat when they need to (and furious charge is a nice bonus too). In smaller points games, I probably wouldn't bother with it.
- I've done a complete 180 on my thoughts on Storm shields on the unit after a few games with them. The four grav guns and Hunter's Eye are a very powerful combination and you want them firing each turn if possible. I used to rely on Jinking to keep the command squad safe, but this seriously diminishes their firepower. Arming the squad with storm shields means they get the same save (or better as it cannot be removed by ignores cover weapons) and don't have to snap fire the next turn. For only 40 pts, I can take 4 storm shields and keep the unit firing to full effect. I would say it is well worth the cost.
- I like using the landspeeder as an anti-tank vehicle. It can move fast to get into short range with the multi-melta or to more vulnerable side and rear armour. For this reason, I take the multimelta and typhoon. The ranges don't match, but the purpose for the guns does. I use this combo in my Ravenwing army too and it seems to work quite well. I never put it close for the jink bonus, I wanted them to go after different targets, plus with all the other units in my army, I didn't think the Landspeeder storm would be a priority target.
I have no problem with nitpicking, helps to correct me and get it right!
Hey! Thank you for those very good replies, I'll make sure to stick some storm shields onto the command squad! Your explanation with the landspeeder males sense, too (I usually put just one weapon on them)
ReplyDeleteAfter reading this and some other articles I definetly want to start building a white scars army, but can you clear up the point breakdown of your army, when i try and recreate it I'm going well over 1850
ReplyDeleteWhite Scars are an awesome army Nate, look great on the table and have some of the best chapter tactics available.
DeleteYeah, I just put my army into army builder and I'm just over 2000 pts. Must have made a mistake when writing the army. Thanks for the catch, apologies to Yans!
I'm most likely going to style/fluff them as a second founding chapter, Im not a huge fan of mass white army color wise, and am even worse at painting it. What would you cut from this list though? Playing with the numbers the simplest thing to do seems to be drop the spear tip strike force and bolster a couple other pieces here and there.
DeleteIf you are wanting to run the scarblade for the formation bonuses, you would need to keep the Speartip. To take it below points, I would most likely drop one of the attack bikes from the hunting force and lower the bike squads to 5 man each. I will still need to reduce the tactical squads to 5 man or lose some of the grav cannons (I didn't realise how over points I was). If you are not worried about the scarblade, the spear tip strike force would be the easiest to drop.
DeleteI don't often use the formations as I normally run my White Scars with a CAD. The objective secured bikers are so good in most regular games.